• Skip to primary navigation
  • Skip to content
  • Skip to primary sidebar
  • Skip to footer

SkinTrack

  • Lightest Gear
    • Skis
    • Boots
    • Bindings
    • Skins
    • Packs
  • Skimo Training
    • Training Plans + Skimo Manual
    • Transitions Videos
  • Facebook
  • Instagram

Gear, Tech & Food

Suunto Ambit 2 Review: Multi-sport altimeter GPS watch with heart-rate functionality

October 1, 2013 By Stano Faban Leave a Comment

Suunto Ambit 2 quick overview:
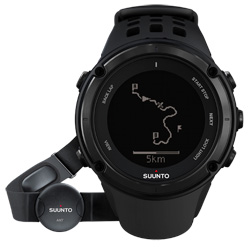
suunto-ambit-2-watch

  • Usual full price: $550.00 USD
  • Weight: 82-92 g depending on the model (mine is 89g for the watch + HR belt 60g)
  • Cost per gram: $3.69 / g (watch + belt)
  • Pros: Battery life, data analysis, TrackBack GPS function
  • Cons: Data transfer, size
  • Suitability: Complete sports watch for outdoor/mountain athletes who want the most comprehensive data to monitor their training with the ability to navigate GPS tracks.
  • How we go it: Bought through a pro-deal (disclosure notices)

Bottom line:

Expensive but it does everything. If you want the best of the best this is it.

Photos:

Product description and How we tested it:

Four months of summer testing, skiing and running the Sea-to-Sky. It is billed as the wrist-top computer for explorers. The Ambit2 is a fully equipped sport watch with an excellent heart-rate monitor and a GPS device. The Ambit2 has a large battery designed to lengthen its life in GPS mode (compared to a smaller version – the Ambit 2S – geared toward multi-sport athletes).
Suunto has stepped up where Garmin models failed to provide battery life sufficient for ultra-endurance and mountain athletes. The Ambit2 can be used over multiple days and for events lasting longer than 20 hours.
The watch casing itself is similarly sized to other GPS models and though slightly bulky, not overly. Screen size is adequate for reading data and simple navigation. Data fields can be customized to any combination of displays to suit your needs depending on activity. I like to see HR while training but am more concerned with elevation and time during hikes – easy to setup using the online interface.
User designed apps allow custom metrics that can be displayed. While I personally don’t find any of the available apps any better than what is packaged on the watch, this idea has potential for the future as users become better app programmers.
Distances during my runs are generally slightly lower than the devices that running partners use but not significantly. The large face is exposed to scratches, especially while using hands on rock but seems scratch resistant.
Moveslink software is intuitive to use but requires an Internet connection and data is stored online. Every variable can be plotted on graphs versus time and distance.
A track is superimposed over a Google Map. Tracks can be exported and saved within Moveslink to be shared with other users. This allows users to download a track in a new area and use the navigation feature to follow it from start to finish.
GPX files can be exported from Moveslink and uploaded to Strava.com and other training software.
Other features include a compass and accelerometer to enhance distance accuracy.

Pros:

  • Fastest GPS connection I have ever had. Always connects faster than the Garmin.
  • Best battery life (50hrs) of competitive GPS watches.
  • Top quality HR signal.
  • Moveslink software allows useful analysis of data after transfer from device.
  • Recently announced TrackBack feature allows user to retrace their route back to the starting point. Useful “breadcrumb” navigation tool. Could be crucial to ski mountaineers/mountain athletes who find themselves retreating in a snowstorm when navigation is difficult.

Cons / What can be improved about this product:

  • Computer connection uses USB cable (compared to wireless ANT connection).
  • Data transfer requires significant time (sometimes >15min).
  • Data transfers failed frequently using early software versions. This seems to have been fixed, though transfer times are still long.
  • Internet connection required to transfer data and utilize Moveslink.

Product Specs:

  • Weight: 89 grams (my model)
  • Cost per Gram: $3.69 / g (watch + belt)
  • Battery life: up to 50 hrs.
  • Water resistance: 100 m / 328 ft
  • Warranty: 2 years watch, 1 year included accessories
  • Critical accessories:
    • HR Strap (Included in HRM version)
    • Computer with Moveslink installed
  • Optional accessories:
    • Running Cadence Monitor (overrides distance data from GPS)
    • Cycling Speed/Cadence Monitor

Online stores that carry Suunto Ambit 2 watch:

suunto-ambit-2-watch

  • $450-600 at Amazon.com
  • $550 at Backcountry.com
  • $450 at GearX.com (Suunto Ambit2 S)
  • $550 at REI.com
  • $450 at CampSaver.com (Suunto Ambit2 S)
  • $550 at MooseJaw.com

Filed Under: Reviews Tagged With: altimeter watch, GPS, heart-rate monitor, Moveslink, Suunto, Suunto Ambit 2

Guide to Skimo Racing Nutrition and Hydration: From 2 days before to the finish line and beyond

February 19, 2013 By Stano Faban 5 Comments

It’s 7am, you feel rested and your legs are ready to go. You are packing all your race gear and just before leaving the motel room you are organizing your race food and drink: “Gels check, bottle check, banana check…”

You might look full but are you really fueled? 🙂
Now fast forward to eleven. Your vision is blurry and your legs are noodles, and you start asking yourself that very humbling human question: “What the fuck?”
All of us have different diets, eating habits and lifestyles. We also believe in different nutritional advice whether due to marketing or our principles (likely a combination of both).
So what I want to lay out here is not The race nutrition plan but rather through using specific examples from my diet provide you with overall guidelines to understand the bigger picture.

Your body is a fine machine

Race day nutrition is important but like with training it’s near impossible to get a quick last minute fix. You need to plan (and do) things ahead.
Think of it as a machine with a gas tank. You need to oil the machine properly and fill up the tank with the right fuel to perform at its very best. This takes longer than just couple of hours before and during the race.

Principle #1: Think of nutrition from health perspective first, performance later.
If you have an overall healthy diet (avoiding processed foods in favour of organic vegies, fruit and animal products) then, I believe, you are much better positioned for longer term athletic development than just trying to finish the next workout.
Energy gels during/after a race are OK but I stay clear of them otherwise. I am not as prudent with trail bars but I try to eat only the whole food ones (no added artificial stuff and preferably organic).
In an interview with Reiner Thoni last year he summed it up the best: “Mother Nature seems to work in harmony. Isolating things causes problems. The extra money on organic food is a much better option.”

Two days before

Let’s start getting ready early.
Principle #2: If your race is on Saturday then make sure not to go too hungry or dehydrated starting from Thursday morning.
This not to say you should over eat or over hydrate. Strike a balance but it’s OK to be more on the fuller side. As for hydration, drink to thirst, you don’t need to go crazy.
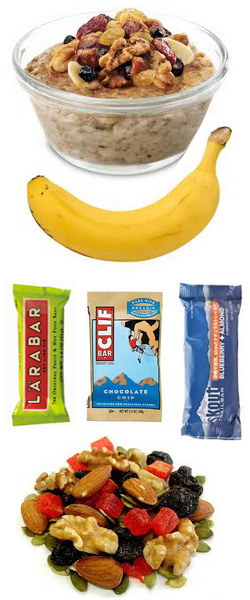
I tend to drink about 2.5-3 litres per day on average, so all I try to do on pre-race days is to avoid drinking, let’s say, less than 2 litres.

What to eat and drink?

See principle #1 above. Eat whole foods, avoid processed (packaged) foods.
Personally, I consider myself a 90% vegetarian, if there is such a thing. If I do eat meat in two days leading up to a race then last time I would do so is for Thursday dinner, same for cheese.
I would mostly eat potatoes, beans, eggs, rice, quinoa, buckwheat, some pasta, nuts, veggies, fruits, berries butter, and oats.
For drinks it would mostly be water, tea and a bit of sports drink during a workout or water mixed with apple juice. I don’t drink milk, coffee or sodas at all, just didn’t grow up with it.

Dinner the night before

Again, continuing on the principle #1 and #2 but somewhat overeating on rice or pasta combined with some fats and veggies. I am not too fussy about the look or taste of the meal at this stage, just get the right stuff in, but I do like to add salt and pepper.
Here are two ideas for a dinner for you. They are simple to cook or kind of simple to arrange for in a restaurant:

  1. Cook some pasta (or rice), and then mix it with crushed walnuts and honey. And let a slice of butter melt over it. Sometimes I add a pinch of salt.
  2. Cook rice, not an instant one. You can even cook it in half water and half coconut milk. Steam some leafy vegetables (kale, Swiss chard, spinach) for a side dish, beats are good too. Again, add some fat such as coconut oil, butter or sesame oil. Salt and pepper should do for taste.
    If I am craving some protein here then I eat about 2 spoons of peanut butter with this, tastes seem to combine well.

For drinks, plain water or water with some squeezed lemon is usually good enough for me.
Principle #3: The idea of starting fueling the night (or two days) before is to let you not need a big breakfast the day of the race, and not needing to consume too much during the race as sometimes this is close to imposible due to technical skimo courses.
» Also, you might want to check out this read on Wikipedia – definition of glycogen and its function for endurance exercise.

Pre-race breakfast

I find it tough to give a specific advice with this one because I believe you should rather eat for race breakfast what you like (even if not the most ideal) than fight a taste of something that experts say is the best fuel.
Simply, at this point, it comes to psychology more than fuel given that you had two good days before. If experience of eating a certain meal gives you too much of pre-race anxiety or uncomfort then eat something else BUT when you go back home maybe start practicing that other meal 😉
Here is what I eat for race breakfast, or pretty much for most of my breakfasts, usually all ingredients are organic:

  • Plain quick oats mixed with some nuts and maybe some raisins and coconut shreds. Poor boiling water on top of it, stir and let soak up for 10-15min. Before eating I add hand-picked blueberries from my winter stash. Lastly, I mix in some honey. Sometimes sprouted chia seeds as well.

From after breakfast until the start

Principle #4: With skimo racing it’s important to have pre-race snacks handy. Why? Because skimo race starts get easily delayed due to weather and avalanche conditions. You don’t want to hungry 10min before the gun goes off.
These snacks could be a sports/trail bar, banana, raisins, some nuts… more on the carbs side.
Same goes for your hydration – have more ready than you need just for the race. Sports drink is fine.

Nutrition during the race

Principle #5: As mentioned in 10 Quick Tips to Improve Your Skimo Racing article, if you think you won’t finish the race faster than in 2h do not skip on fueling. What that means is very individual but for me it usually is one or two gels with about 0.5L of sports drink throughout the race. Should the race be more than 3h I would eat a bar and drink more too.
For food, you can buy commercial energy gels or you can make your own. Mix some honey (agave, maple syrup) with warmer water (not hot) and squeeze in a bit of lemon and add a pinch of salt.
For race drink, mix your favourite sports drink powder with water, preferably it’s without artificial flavourings and colour agents.
One of the top North American skimo racers, Luke Nelson, likes to mix his gels right into his drinking bottle. Try it, it’s a personal preference.

What to eat after the race?

After-race nutrition is very important and not only so you can feel better few hours later. By giving your body the right fuels after the race you are giving it an opportunity to benefit from your just finished hard effort – it can start properly rebuilding to make you stronger for the future.
Food:
Within next 30 min or so the priority should be on carbs. Finish your race gel if you haven’t or have another one, eat a banana. Between 1-2h after the race consume some good proteins (meat, tofu, beans, eggs…) and veggies. Try not adding too much fat but some is OK.
By dinner time you are good to eat what you are craving but it’s better to keep it on the healthy side – not much of processed foods. Some organic protein (meat) is a great addition too. Fats are good to go as well, but again think healthy, not ice cream.
Drink:
Beer tastes great but hold on until about 2-3h after. Recovery sports drink is good but avoid those with too many artificial additives. Sometimes I even create my own recovery drink – tea with lots of honey and some salt.

It’s 7am… again

All fueled up now?
If you feel you have learned couple of new things from this article then what you can do for Skintrack in return is to tweet it or share it on Facebook.
And if you have some advice or want to share your experience with race nutrition you are welcome to do so in comments below.

Filed Under: Gear, Tech & Food, Skimo Racing

La Sportiva Stratos Cube – lightest skimo boot in the world!

November 2, 2012 By Stano Faban 1 Comment

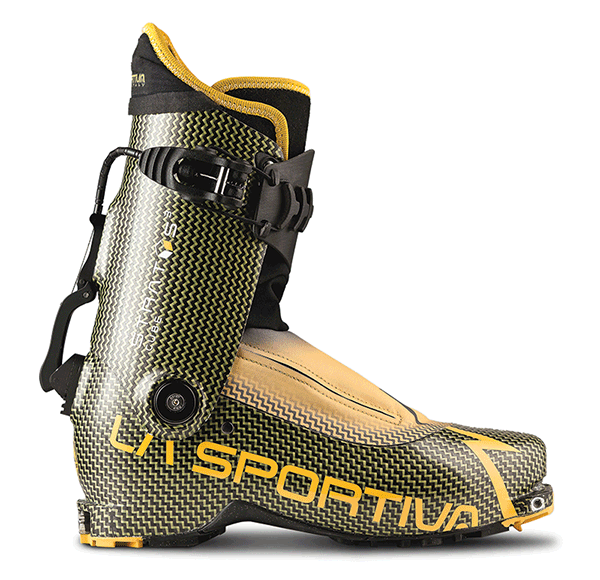
A post about new La Sportiva Stratos³ Cube appeared here on Skintrack couple of weeks ago but had to be taken down on request from La Sportiva due to patent filing process. However, the info is back and much more detailed!
la-sportiva-stratos-cube-2
La Sportiva’s carbon lab is almost ready to reveal the Stratos³ Cube and here are some specs that should leave any light gear freak impressed.

La Sportiva Stratos³ Cube details and specs:

  • Weight: 470g / boot  at size 27 (without liner)
  • There might be two liners available and the lighter one will weigh only 80g – Bikini Cube Liner
  • Shell and Cuff material: 100% Carbon Kevlar
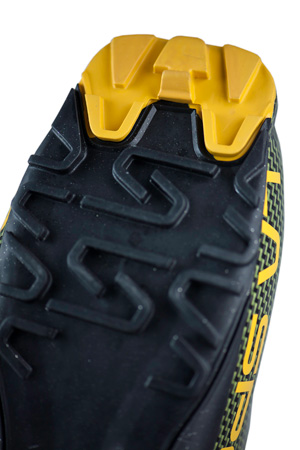
  • Outsole: Vibram
  • Range of motion: 76° (+53°, -23°)
  • Forward lean: 5 positions from 5° to 19°

Combined – boot and liner – the weight comes to 550g per boot! This likely makes the Stratos³ Cube the lightest ski mountaineering boot in the world, surpasing Pierre Gignoux XP444 by few grams.
This 3rd generation of the Stratos boot will be ready for retail for Winter 2013/14, but there should be some top skimo racers testing it this season already.
» See this page for a full comparison of the current lightest ski mountaineering boots.
» And here is a video when the first Stratos boot was announced – New carbon ski boot: La Sportiva Stratos

La Sportiva Strato Cube photos

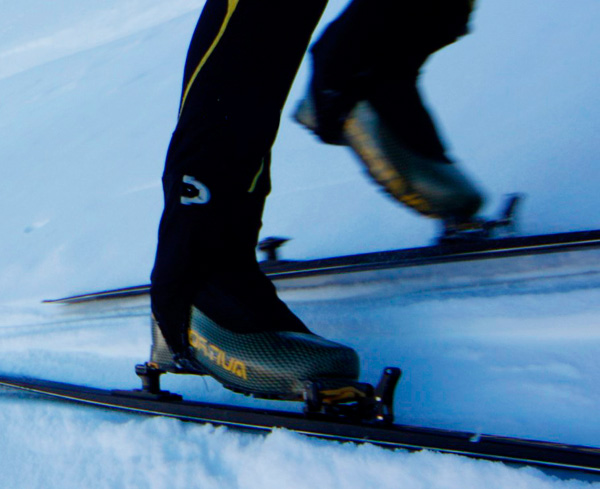
New Stratos Cube in action:
La Sportiva Stratos Cube photo
 
Stratos Cube Vibram sole:
La Sportiva Stratos Cube Vibram sole

Filed Under: Gear, Tech & Food, Skimo Racing Tagged With: La Sportiva Stratos, La Sportiva Stratos Cube

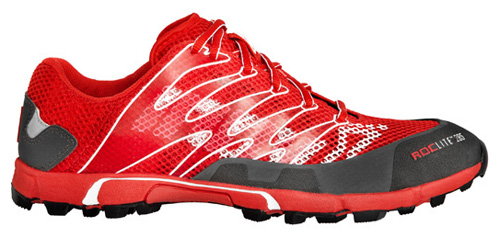
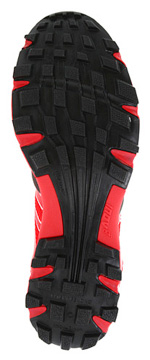
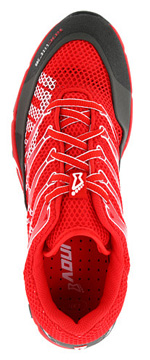
Review: Inov-8 Roclite 285 minimalist trail running shoes bring new experience

October 29, 2012 By Stano Faban 1 Comment

As snow starts to fall down discussing trail running shoes could seem off topic but to really test a pair of shoes it takes more than two laps around a local park.
In early September I was offered to try a pair of Inov-8 Roclite 285 trail running shoes. Firstly, I never heard of Inov-8, and secondly, the shoes looked like trail runners on a serious weight-loss diet.
I decided to give them a go since I never ran such a minimalist shoe, never mind in the woods.

Usual descriptions and claims

This is a review of my experience and of what I think based on that.
To read the usual official facts and claims you can do so here:

  • Inov-8 website
  • Zappos
  • Backcountry.com (click on “Inov 8” under brands filter to see other Inov-8 shoes as they don’t seem to carry the Roclite 285 at the moment)

Going half-size smaller

For the Roclite 285 shoes I chose them half-size smaller than I usually wear because I worried they would be little too big once they give in after some use.
Now, after running them for couple of weeks I am happy with that choice.

New running experience

In the past couple of years much has been made of fore-foot running or no support shoes that promote such technique. Even though that made me think about my technique and made me read some research on the new “silver bullet” I still consider the whole thing to be more of a marketing hype than a radical shift in running knowledge.
In short, I wasn’t looking for any specific benefits when I picked up the Roclites apart from gaining a personal experience.

Fit and shoelaces

These were the first ever shoes I took running without walking them for at least couple of times. The fit was great out of the box and remains so. (They probably won’t take a very wide foot.)
Shoelaces on the Inov-8 Roclite 285 are nicely thick, therefore, they were not cutting into my foot through the very minimal upper mesh (as some thin shoelaces do) and they kept my foot in place in all conditions.

First runs – getting use to things

Right away it was obvious I will have to adjust my technique since there is not much cushioning on these. I have never run a very long stride or never been much of a heel striker but the Roclites were making me run with even shorter stride and much more on my toes than I was used to.
You can look at this in two ways:
You either don’t like it because it steers you away from your habits, or you open yourself to a new experience and agree to judge later.
To not change things drastically (to avoid any unwanted aches or injury) my first 3 sessions with the Roclites were only between 45-60 minutes couple days apart. I did other sports and running in my other shoes in between.
By about the third session I started to appreciate the new feeling. Not only was it a higher frequency the shoes made me run but I could also feel different leg muscles getting used more than before.

Longer runs

Since I like to ease into things I didn’t take the Roclites for my 1.5h+ runs until I felt comfortable that I figured out the best style for such minimalistic shoes.
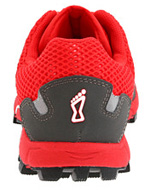
By now, I have run 3 sessions between 1.5 and 2 hours in them.  I did those on trails with lots of up-and-down, some for mountain biking. My feet and leg muscles felt good but I noticed my lower calf was sorer (more tired) the next day than compared to other times.
I guess pure fore-foot running engages that part quite a bit more and requires longer time to get used to.

Smooth vs Rocks and Dry vs Wet + Overall grip

I would recommend the Roclite 285s for smoother trails and in drier conditions. They handle rocks nicely too but if they are very sharp then I found it a bit painful over longer continuous rocky sections.
The shoes breathe very well thanks to their airy all-around mesh. In warmer months this is a great benefit, and during wet periods it means they will let water in much easier.
Overall grip is great in all conditions; even in those the upper mesh is not really built for (wet, mud, sharp rocks).

Blisters

No issues at all.

Bottom line: It’s good to vary your technique – Roclite helps with that

So what do I think about the Inov-8 Roclite 285 overall?
I am glad that I got the experience trying them. They convinced me that even if I don’t want to run a minimalistic shoe all the time there is a place for them in my shoe box. To have a different running experience even on the same trails I can just engage different muscles.

And I bet that thanks to their light weight and good grip these would be ideal for up to 1-1.5h trail races in all conditions, unless very rocky or very wet.
The Roclite shoes were built for a specific purpose and I think they are very good at that.
If you are looking for one-does-it-all shoe then you need to take a look at other Inov-8 shoes. Which actually the Roclites make me want to do.
 

Filed Under: Gear, Tech & Food

Review of Dynafit touring setup: Manaslu skis, TLT 5 Performance boots, TLT Radical ST bindings, Speed Skins

October 26, 2012 By Stano Faban 11 Comments

This is a review of my current touring setup.
I skied the gear described below from December last year until June 2012, and I will be skiing it this season too. Also, I used the Performance boots with other skis on some really hard-pack and corn snow.
When I chose this setup I was looking to balance couple of things. But mainly, the need was to find something that gets me from December to July and is reasonably light. Color didn’t really matter. 😉
I didn’t want very wide touring skis, as is now common, because I ski in different conditions, at different places, and at very different times of the year. Also, I somehow still think that a narrower ski edges easier than 105mm+ boards, and that anything under that can be still fun in deep powder. I was right and wrong, sort of.
Here are my impressions. All from backcountry skiing.

Dynafit Manaslu skis + Speed skins

I picked these in 187cm since I am 6′ 2″, and I was trying to buy float with length versus width. Their side-cut came at 124-95-109 and weight at under 1600g per ski.
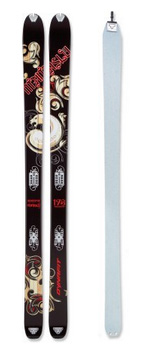
Dynafit Manaslu skis and skins.

Skins

What I really like about Dynafit’s ski-skin combo is the complete package. The skins fit exactly as they should and it’s very easy to rip them off without taking your skis off, and not from the back but from the front, like when rando racing.
Plus I have never had such a fast pair of skins out of the box, no matter what width! Usually, skins need to wear out a bit before they start gliding well. These grip uphill nicely too.

Skis

To be honest, these were my first skis over 90mm. Little late to the game…
I believe I chose the width, length and weight well for my needs. I am totally satisfied how they perform in all conditions and over various terrain.
Yes, there were some days when I thought: “Could use something wider right now”. However, those were “too deep to ski” days at couple of the best powder places in North America. Manaslu’s rockered tip definitely helps with the float.
On spring/summer snow or in chopped powder they were good, no complaints.
On hard-pack I can’t really say yet because I am still not used to forcing such a wide ski on its edge. And I can’t compare it to anything wider since I haven’t tried on a such surface.
Bottom line: Not impressive in anything specific but versatility, great all-around skis. Looking forward to take them to more places.
Manaslu skis online at:

  • CampSaver.com ($699.95)
  • Oregon Mountain Community ($594.94)
  • Backcountry.com ($699.95)
  • USOutdoor.com ($699.95) $559 for 178cm

Dynafit TLT 5 Performance boots (vs TLT 5 Mountain)

Simply, these are some damn good touring boots.

Up

Ease of walking is very comparable to any skimo racing boots. The no-resistance big cuff rotation plays the biggest role here, and the light weight helps as well – 1050g at size 27,5!
I tried walking them with the removable tongue in. It’s still good compared to other touring boots but definitely walk them with the tongue in your pack – it’s super easy to take out or to slide back in once on the top.

Down

Again, I tried skiing the TLT5s with and without the tongue. There is a definite difference – always put the tongues in. But even when I forgot them in the car they skied powder no problem, on hard-pack felt little soft.
Their stiffness comes not only from the tongue but actually from the carbon cuff, so let’s talk about that.

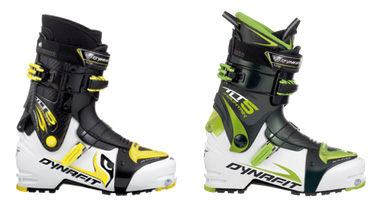
Dynafit TLT 5 Performance and TLT 5 Mountain boots
Dynafit TLT 5 Performance ski boots with carbon cuff, and the Mountain version with the bigger liner.

TLT 5 Performance vs TLT 5 Mountain

I was fortunate to try the TLT 5 Mountain few times before I got the Performance. The Performance version is quite stiffer thanks to its carbon cuff but the Mountain version skis well too, just feels softer under pressure.
I found both boots to walk exactly the same.
One warning, the beefier liner that came with the Mountain TLT5s was much more comfortable, and I don’t have a wide or big volume foot. For this year, I am sacrificing some grams – I am buying the bigger liner and sliding it into the Performance boots. Happy feet make powder deep J
Bottom line: Just to repeat – these are some damn good touring boots.
TLT5 Performance boots online at:

  • Backcountry.com ($999.95)

TLT5 Mountain boots online at:

  • Backcountry.com ($749.95)
  • CampSaver.com ($749.95)
  • USOutdoor.com ($749.95)
  • Oregon Mountain Community ($749.95)

Dynafit TLT Radical ST bindings

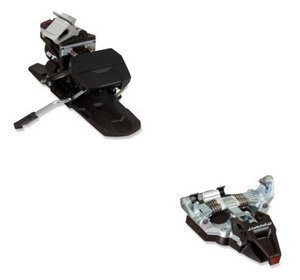
Dynafit TLT Radical bindingI’ve been using Dynafit style bindings for about 15 years now and I chose the Radical because I wanted to try a binding where I don’t have to bend down to twist the heel.
Stepping into these with the TLT5s could be done with closed eyes – it’s super easy thanks to a new Dynafit patent. Everything else works great as well, breaks too.
One thing that might happen sooner or later though might be that the heel lifter will snap. It’s not going to under normal use but from time-to-time when I need to stomp on the heel really hard (to set a steeper track in powder or kick off some snow) I wonder.
Crampons attach and work great too.
With Radicals, I like the fact that this binding is still lighter (at 531g), with all the ease-of-use perks, than its overbuilt competitors.
Bottom line: Great binding for anyone seeking more comfort and that is not overly rough with their gear (applies only to the heel lifter).
TLT Radical bindings online at:

  • Backcountry.com ($499.95)
  • CampSaver.com ($499.95)
  • USOutdoor.com ($499.95)
  • Oregon Mountain Community ($499.95)
  • GearX.com ($499.95)

Filed Under: Gear, Tech & Food

ISMF White List: List of approved equipment, clarification… and some confusion

October 18, 2012 By Stano Faban 5 Comments

As we were busy researching gear for comparison pages of the lightest equipment the last couple of weeks – skis, boots and bindings – the International Ski Mountaineering Federation (ISMF) was busy creating a list of gear that would be approved for racing. They labeled it the ISMF White List.

Show me the White List

Unfortunately, due to the way the ISMF website is built there is no unique link to any page on their site, same goes for White List.
Therefore, to browse the White List go to ISMF home page and in the middle column you will see a banner that will point you to the right page.
The navigation through the White List is somewhat confusing, so be patient and forward thinking 😉

Clarification

People that studied the latest version of the ISMF competition rules (for 2012/13 season) know that there are some grey areas that create confusion about whether a certain piece of equipment would be in fact legal at an ISMF sanctioned event.
On top of that, the White List doesn’t seem to include some big names at the moment, for example Dynastar and Pierre Gignoux are not there.
With curiosity I emailed ISMF directly my questions:

Thank you for the information on the newly created equipment white list. And hopefully you can clarify something for me.

I own and are planning to buy some equipment that is not currently on the “white list”, so I want to ask:

If equipment is not on the white list does that mean it is illegal for ISMF sanctioned competitions (such as World Cup)?

What about Dynastar skis or Pierre Gignoux boots (those brands and their equipment are not on the white list), will you allow me to compete with that equipment?

Does a company have to be part of the manufacturers’ pool in order to make their equipment legal, put on the white list?

I got an answer yesterday which is actually almost identical with what they just clarified on their website (home page banner). But they clarified even further which I thanked them for.
ISMF response (interesting in red):

“The ISMF White List is a list of products all relevant to competitive ski mountaineering – provided by various manufacturers which are member of the ISMF Manufacturers’ Pool. Each product is self-certified by the manufacturer to fit within ISMF Sporting Regulations. Therefore when a skier looks at the ISMF White List he/she knows that the products are suitable for use in ISMF races. Items which do not feature in the list are not necessarily outside of the guidelines, it’s just that the manufacturer has chosen not to participate in this initiative, therefore the validity of products not listed should be checked directly with information provided by the manufacturers. In any case the equipment used in ISMF competitions must comply with the ISMF Sporting Rules.”

They added this bit for me:

“You can buy the brand you would prefer: the only important aspect is that if you would like to compete in an ISMF race the equipment should comply with the ISMF Rules.

The advantage of the white list is the fact that you have already a list of certified products, so you don’t need to ask to the manufacturers if the material complies with ISMF rules.”

Confusion still exists

I applaud the effort to put the White List together, it was long due.
However, by always referring to the rules, should one be in doubt, one will do so. The crux is that the rules aren’t crystal clear about bindings, specifically the release functionality – no specs are provided/required – leaves room for self-interpretation.
And with essentially manufacturers self-submitting (certifying) their equipment into the White List they must have figured that as long as a binding has a release mode it’s good enough.
Does anyone actually know what is OK-ed by the rules?

Have an opinion on rules around bindings?

With the above I wanted to help you clarify some things, and at the same time provide my opinion that there is still some confusion existing. To me, based on the rules, it’s not clear what a “safety release system” means, thus it leads me to assume that as long as the binding releases it’s legal.
Quoting from ISMF rules, section about bindings (regarding toe is in red):

“which allow heel movement during ascents and are blocked for descents;

front and rear parts:

• The rear part of the bindings must have front and lateral release safety systems.

• If front bindings have limited or no release safety system or can be used locked without a safety

system, it must be clearly specified in the written information supplied with the equipment that these

bindings are designed for competition and don’t require a safety release system for the front part of

the bindings.

It is recommended to use a safety release system in the front part, which will be compulsory

from the season 2012-2013.

For the season 2012-2013, a minimal distance of 4mm will be imposed between the rear part

of the boot and the heel piece.

(NB : ski stoppers are no longer compulsory for the 2013-2014 season)”

What do you make of it?

Filed Under: Gear, Tech & Food, Skimo Racing Tagged With: ISMF, ISMF White List

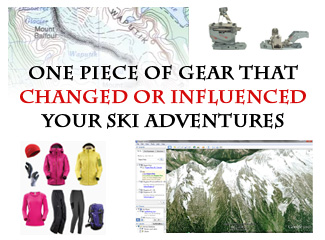
Game Changers 3-article series: Interesting ski tourers answer "What is the one piece of gear that changed or influenced your ski adventures?"

June 14, 2012 By Stano Faban 3 Comments

I like to learn from people and about people because we are all unique characters. With some we have lots in common, with others only few things. But there is always something to learn.
gear that changed your touringSo I had an idea – let’s ask couple of interesting people 3 simple questions and see what comes out of it.
Since answers came in longer and deeper than expected I decided to spread them over three articles than jam everything together.
» To read answers, from the same people, to the 2nd question of the Game Changers series see – The person that influenced or changed your ski adventures.

Who is answering?

I reached out to couple of people that would represent the ski touring pool in every aspect – from exploring, adventurous skiing, to rando ski mountaineering racing:
Greg Hill – the 2 Million Man trail breaking machine, Dynafit Stoke ski features his name
(http://www.greghill.ca)
Melanie Bernier – 5th at World Ski Mountaineering Champs 2011, triple Canadian Skimo Champ, also very successful MTB rider
(http://inthetrails.blogspot.ca)
John Baldwin – Canadian West Coast ski mountaineering explorer and author of “Exploring the Coast Mountains on Skis”
(http://www.johnbaldwin.ca)
Christina Lusti – 2006 alpine Olympic skier metamorphosed into a backcountry skier and ACMG Assistant Ski Guide
(http://christinalusti.wordpress.com)
Stano Faban – this is me. I wanted 5 people to answer these and since I couldn’t get hold of Andrew McLean I humbly decided to take his place. Hopefully, I can fill in his answers later.

1st question: What is the one piece of gear that changed or influenced your ski adventures (whether that be touring or racing)?

Before you dive in, I want ask you to share the piece of gear that changed YOUR ski adventures. You can do so via comments section at the end of this article. It is always interesting to see what influences others.
Greg Hill says:
Google Earth changed the way I approach adventures! It increased the amount of terrain I could explore from home, which expanded what I could do out in the mountains.
I remember the moment I started using Google Earth, in 2006, it was getting information for the Bugs Rogers traverse [Bugaboos to Rogers Pass]. We were planning on doing some variations from thee normal route and we spotted this 4500 foot avalanche path into the Duncan creek. Weeks later when we rolled into the line it looked exactly like on Google Earth, and we skied it top to bottom completely relaxed, knowing the line was cliff free to the valley bottom.
Up until that moment all our information came from maps – vague 100 foot contours hinting at the terrain that was out there. Huge cliffs could hide in the middle of lines, a line pondered and penciled in at home could turn out to be un-skiable.
It was harder to truly daydream a line, you could see the potential but there was always a huge amount of unknown. With Google Earth you can view lines from all angles, tilt them and look down them. Check out approach, spot hazards from home and then go out with so much more information.
You can spot a line from 100 km away, go home and view it close up, mark it “Cool Peak”. Dream about it for a few months and then go and ski it, feeling like you have already been there.  It’s unbelievable!
Melanie Bernier says:
Ski touring bindings.
Growing up, there was a cross-country trail just across the street from my parent’s house. Getting lost in the forest with our cross-country skis was what we would do after school.
At 8, I put the free heal equipment aside when I discovered a new passion for downhill skiing.  After learning the skills and racing moguls for years, I would have never thought this amazing sport could get any better until the day I moved to the West Coast and discovered touring bindings.
The purchase of my first pair changed my perspective forever. It totally made sense tying in the cross-country skiing roots, which were still present in my heart and the ever-growing passion of downhill skiing. It offered not only a way to fulfill my desire for exploring beyond the boundaries but also the love for carving turns in the white fluffy stuff.
It allows for freedom of the destination, the length of the journey and the type experience. In a rando ski mountaineering racing perspective, the type of binding and their evolving technology allows now not only to discover new terrain but also cover the distance with speed and confidence.
As simple as it sounds, the piece of equipment that charged my perspective in ski touring and racing is the piece that rests between my boots and my ski.
John Baldwin says:
Stano, that’s a tough question. I’ve been skiing for 40 years and have used a lot of different equipment over the years.
I don’t feel that old but I do remember leather downhill ski boots, jackets that had cotton in them before there was Gore-tex, clip on skins, and sat phones and GPS hadn’t been invented.  Most of the gear we use has generally gotten way better and we have some pretty amazing gear nowadays. As a package all of it has influenced my ski adventures.
To single out one piece of gear is hard! But if I had to pick one thing I think it would be maps.
I started backcountry skiing in the 1970s. Back then there was no Coquihalla Highway (BC, Canada), no winter access to Duffey Lake (BC, Canada), and far fewer logging roads. There were areas that didn’t have 1:50,000 scale maps. Many of the detailed maps of the Coast Mountains were not completed until the mid 1970s.
I remember going on a trip to the Manatee Range in 1979. Hardly anyone had ever gone in there skiing. Access was from logging roads that were still under construction. What really influenced my ski adventures was the map that we had. It was a new 1:50,000 scale map of the area.
Half of the map showed the Lillooet Icefield which is just north of the Manatee Range. I remember staring at the map. It showed huge glaciers and I was so curious to see what those large blue areas on the map looked like. In a way it was that map that got me started on going to all these wild incredible places in the Coast Mountains.
Christina Lusti says:
All of my amazing Arcteryx clothing!
I love spending as many days skiing as I can. . . So being suited with Arcteryx’s finest makes my days in the mountains comfortable.
Stano says:
As John pointed out, it is difficult to single out one piece of gear and I definitely agree with any of the choices above. But I wanted only one, so here is mine.
The game changers for me were a pair of Dynafit Classic bindings. I think it was in the winter of 1999/2000 when Peter Svatojansky (an upcoming top Euro skimo racer at the time) recommended that I switch from Silvretta to Dynafit even though I was not seriously racing skimo back then. To this day I am grateful my father spend the money to let me have a pair of quite light Dynastar skis mounted with the Classics.
These bindings have not only let me enjoy mountains more and feel less sore for next day’s triathlon workouts but they showed me that if you buy a quality product you never have to buy again. To this day I remount them from skis to skis. They are 12 seasons old and I never serviced them once!

Next question: Who is the one person that changed or influenced your ski adventures (whether that be touring or racing)?

To read answers to the 2nd question of the Game Changers series see – The person that influenced or changed your ski adventures.
» Signup for our newsletter (top right of this page) or follow us on Twitter and will let you know when any new article is up.

What piece of gear was your game changer?

Share what was The piece of gear that changed your ski adventures, be it backcountry or racing.
And thank you for enjoying the read!

Filed Under: Gear, Tech & Food, People (Interviews) Tagged With: Christina Lusti, Greg Hill, John Baldwin, Melanie Bernier, Stano Faban

Make your own dehydrated food for multi-day ski traverses and backcountry trips

April 16, 2012 By Stano Faban 9 Comments

For a long time, when it came to multi-day backcountry ski traverses, I thought I have to rely on dried or dry-freeze packaged foods from a store. I won’t mention brands but except one Norwegian and one German brand all the other ones so far tasted the same no matter what kind, and irritated everyone’s throats. Sounds familiar?
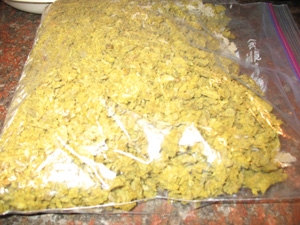
Make your own dried food for ski traversesThen while staying at mountain cabins I randomly met people that would pour dried food into boiling water from Ziplocs.
I asked and learnt that they cooked their dinner few days earlier then dehydrated it in a food dryer. “F…ing amazing”, I thought!

Your own food vs. from a store

Everyone likes good food. But most of times by “good food” people are referring only to taste. It is not necessarily healthy, natural and without preservatives or unpronounceable add-ons.
And since today’s food industry has means of making anything taste well or at least descent enough I think it is irrelevant to judge quality of our food only by taste.
On a ski traverse or a long backcountry trip you need quality fuel. You shouldn’t just be trying to get by for a few days. And you don’t need to because:

  • If you cook it you know what you put in it.
  • It’s cheaper.
  • You can have kinds/tastes of dishes you can’t buy in a store.
  • Your own tastes way better than artificial flavours can ever create.
  • The weight of your own dried dinner portion is the same as a one from the store.

Dehydrated rice dishes for dinners

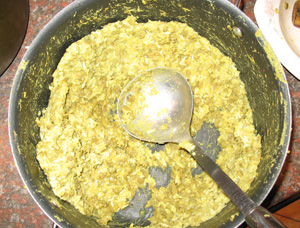
cooked rice before drying
Remember to measure your portions (using a bowl) before putting your in a dryer because once the food is dried it is hard to figure out.
From mine and my friends’ experience rice dishes work the best because:

  • They are high in calories.
  • They package easily once dried.
  • Save gas.
  • They absorb water fairly quickly once you want to eat them (about 10min).
  • No need to cook them on the trip, just add boiling water (or pour them into boiling water) and let them absorb it with only occasional stirring.

Exact recipe is not important and when it comes to rice Asian cuisine is the king. We usually end up cooking some kind of Indian curry and Tibet/Nepal style dishes – rice with lentils.
Rice is high in carbohydrates (and is even 7% protein) and lentils add protein (30% protein) and other valuable nutrients.

Preparing and drying the rice dishes:

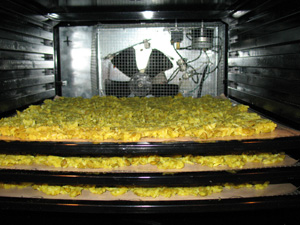
dehydrating riceTo prepare these rice dishes you will need only the usual kitchen tools and a food dehydrator.
Suitable temperature and time settings will be in the manual as this depends on type of the dryer.
3 important things to do at this stage:

  1. Cook the rice and lentils/peas as usual (with all your spices). Once you mix it all up try to get out of it as much water as you can by constantly stirring it while heating the pot on the stove. This way it will take less time to dry the food in a dryer.
  2. Measure your portions in a bowl before spreading it on the plates that go into the dryer. If you don’t do this then once all is dried you won’t be able to figure out how much of the dried stuff makes up a portion.
  3. Once dehydrated put it in Ziplocs. We usually put 2-3 portions in one bag since we all eat from the same pot.
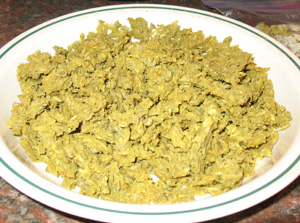
dehydrated rice
Dried rice dish is crumbly - easy to pack. But don't crush it too much cause you will eat "dust" later on.

On the trip:

I have found out that the food loses a bit of taste during drying but mainly only its saltiness.
Remember to bring some salt and garlic with you and when you add boiling water to your dish add some salt and garlic as well. They will bring all the flavour back.
We usually add some sausage or jerky too which definitely brings up the flavour.
Others like to add butter for taste and fat calories.

Dried bananas and apples

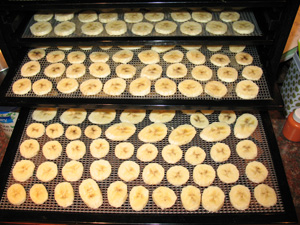
drying bananas
These dehydrated bananas tasted much fresher than dried ones from a store.
As an addition to trail bars I like to prepare some dehydrated bananas and apples.
These are great for snacks during long days and if added to morning oatmeal they will absorb water which makes them taste quite fresh.
Preparing and dehydrating:

  • Slice bananas into circles and apples into half-circles, about 4mm thick in both cases.
  • Dehydrate them separately or check every couple of hours since one fruit might dry faster. Or check the manual for instructions.

Ski traverse foods from John Baldwin

These are not dried food recipes per se but use some dried ingredients. But mainly I wanted to share this page – Expedition food list – with you because John is the guy to ask about winter expedition foods since he completed more than I can imagine anyone do.

Any questions? Or share your recipes and experience

3 portions of rice in a Ziploc bag
3 portions of Indian rice dish in a Ziploc bag.
Use the comments section below to ask any questions.
And you guys that already have experience with preparing your own dried food please share it with us.

Filed Under: Gear, Tech & Food Tagged With: dehydrated food

Greg Hill talks about his choice of boots, skis and other gear he takes on adventures

March 26, 2012 By Stano Faban Leave a Comment

This article was submitted by Greg Hill through which he responded to my questions and curiosity about what gear (and why) he uses the most these days. Thanks a lot Greg for sharing this info with us. Short paragraphs in italic are comments on my ski touring gear.
Gear constantly evolves and with it so does our ability to progress. I think back ten years to the gear I skied on and its limitations. Now as I skin up mountains and ski down them I can feel the difference.
I have been skiing for 34 years and one would think that I should plateau but I am not. Somehow this year I am skiing harder and better than ever. And a lot of that has to do with the gear I am using.

Touring boots – Dynafit Vulcan

The Dynafit Vulcan boot is the most futuristic boot I have ever skied  (not on the market yet). When in walk mode the boot is free and easy to walk in. My stride is natural and strong. One of the reasons is that the tongue comes out for the ascent.  My hips and knees thank me every time I take the tongue out, the freedom of movement is appreciated by a body that has walked too much.
Once on the top I put the tongue back in and the boot transforms – it changes from an easy walking show to a charging downhill boot. It’s amazing how laterally stiff and aggressive these boots are. I charge harder, and I am more in control than I have been in years.
I am using the Dynafit TLT5 Performance for touring days. They are the best boot to walk in I ever tried (besides some very light, specific skimo race boots) thanks to the range of movement they allow and their weight. The TLT5 also features a removable tongue which adds great stiffness, however, on most soft (or powder) snow days I go even without it. 

Greg Hill Dynafit Vulcan and Hauscaran
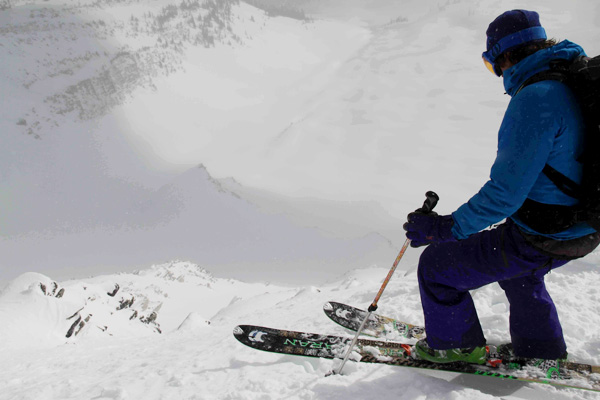
Greg Hill just about to drop off the Peak 8812 in Rogers Pass. This was his first time trying out the Dynafit Vulcan boots and Dynafit Hauscaran skis combo.

Dynafit Huascaran skis

I am also skiing on the Dynafit Huascaran skis a lot (not on the market yet), which is Dynafit’s new big mountain ski. It is 114mm in the waist and has a great early rise tip. The ski is stiff through the middle and tail and skis amazingly well.  I find it super easy to turn and when I am going reckless it is easy to dump speed and regain control.
The combination of the boots and skis connected by the Radical binding is allowing me to evolve into a better skier.
Since I own only one pair of touring skis and skiing very variable conditions during the year I decided to give a try to Dynafit Manaslu skis in 187cm this year. So far I like them. In the past I used to ski much stiffer skis, so I am still getting used to used to them on hard choppy snow. With these I use the Dynafit Speedskins which glide and attach very well, however, might not last as long as my old heavier BD skins.

Greg’s pack – Arcteryx Quintic

The backpack I am using is the Arcteryx Quintic pack (not on the market yet), it is 28 liters and great for backcountry day trips. This bag is super simple on the outside and very complex on the inside.
The outside has straps that are multi use, depending on your style of ski carrying or board carrying this bag transforms to accommodate you.  The inside is very compartmentalized, which means you have to have a system. Once you have a system then everything has its place and is separate from the others.
Now that I am dialed with it I always know where something is and where stuff should go. Although it is a little small for any big days it is a great little pack.
I am using my 9-year old trusted Dynastar touring backpack, so far not seeking an upgrade.

Ski helmet – Smith Vantage and Smith Maze

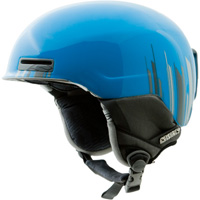
Smith Maze ski helmet.
Lately, I have begun wearing a helmet. This is something I haven’t done since I ski raced at 16 years old. But new helmets are light and comfortable.
I ski the resort with the Smith Vantage helmet and have been trying to tour with the Smith Maze that is lighter.
I think of all the crazy wild lines I have skied without protecting my head, a lot of false confidence that I have luckily gotten away with. But making my kids wear helmets has made me realize the importance of them.
I am not using a helmet for touring days but will consider it. For some steep spring skiing I use Salewa skimo racing helmet.

Greg’s jacket and pants – Arcteryx Sabre combo

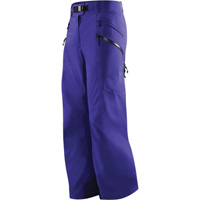
Greg Hill Arcteryx Sabre pants.
Greg's Arcteryx Sabre pants.
As for clothing I like skiing in soft-shell gore-tex products. These are burly but comfortable. They are quiet and supple, and have a cozy fleece inner.
The Arcteryx Sabre pants are long legged, with good side zips for ventilation and not too many pockets. Combined with the Arcteryx Sabre jacket in the same color and voila a ballistic beautiful set up.
I don’t really have a preferred brand or piece of clothing at the moment.

Equipment progress means our own as well

All this equipment is my favorite because it works really well, helps me maximize what I am doing and also looks great. The fact that its evolution progresses our own is as exciting as straight-lining a chute at Mach 5 😉

Buy GoPro HERO Camera at GoPro.com

Filed Under: Gear, Tech & Food Tagged With: Greg Hill

How to choose the right length (and kind) of skimo racing poles for you

March 14, 2012 By Stano Faban 10 Comments

Some time ago someone posted a question on Skintrack about ski poles for skimo/rando racing. It never got fully addressed.
Recently, @peteyknight asked about skimo racing ski poles length during our live Twitter interview with Reiner Thoni. And I bet you are asking the same, so I decided to share some personal experience and discuss the topic more.

ski mountaineering racing world championships
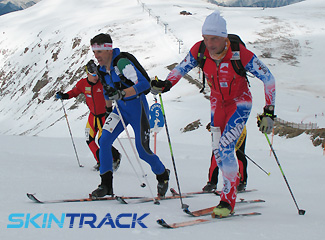
Top 3 from vertical race at 2010 World Champs: in blue Dennis Brunod (he seems about 170-175cm tall), Florent Perrier in red/blue (about 180cm tall), behind Kilian Jornet was about to pass them, more on him below.
Feel free to share your experience and thoughts in the comments below. It will open more opportunities to benefit yourself in finding the most suitable poles for you.

Previous personal experience with racing poles

As anyone I started skimo racing with normal ski poles with full baskets, don’t remember the exact length though. There is nothing wrong with that as during this time you should be evaluating other aspects of your experience more, such as: “Do you like this type of racing? What turns you on to come back?”
After getting inspired by super-fast Euros I decided to put more energy into skimo racing. I noticed that their poles were longer than usual backcountry ski poles and that they were actually cross-country ski poles (smaller baskets too).
To shorten the story, I ended up with 140cm cross-country poles. I am 186cm (6’ 1.2”) tall so it seemed appropriate until I noticed that my shoulders and arms were getting quite tired even mid-way through each race. But still stuck with them.
Few years later a friend from a Spanish skimo team gave me his 130cm Ski Trab poles, he was about 170cm (5’ 7”). Sure, 130cm felt a bit short but was more comfortable on the steeps, in the switchbacks and on the downhills. I stuck with these for few seasons (they were free, eh) until I lost one. Then the dilemma began again. What length?

My racing poles now

In the last three seasons I use 135cm cross-country ski poles and find that length the most suitable overall. As I mentioned above, I am 186cm. My arm span (Wikipedia on arm span) is 186cm too which gives me about an average height to arm span ratio (this ratio is different for women). I am providing this info since I believe it is important to consider also your arm span, not just your height, when choosing your poles.

Some thoughts and examples

Perhaps, a super ideal length for my skimo race poles lies somewhere between 135 and 140cm. However, it is very difficult to objectively select the right one, so by relying on my feelings I am leaning towards 135-138cm, and only maybe 140cm for a flat vertical race.
This leads me to believe that some of the most advanced skimo racers would use, and train to effectively use, two different lengths. In the same time I believe it is very individual.
What length other people use:
Reiner Thoni at cca 188cm (6′ 2″) – 140cm poles (NA and Canada’s skimo champ).  You can read our interview by following Skintrack on Twitter and diggind in our history. The transcript is coming here soon.
Peter Svatojansky at 186cm (6′ 1″) – 138cm poles (podiums at Pierra Menta, World and Euro Champs). Read an older interview with Peter where he provided his ski poles info.
Melanie Bernier at 175cm (5′ 9″) – 130cm poles (3 x Canadian champ and a 5th place from a sprint race at World Champs 2011).
Kilian Jornet at 171cm (5′ 7″) – (best of the best last 3 years) from photos Kilian seems to be using quite long poles for his height, I would guess around 135cm. I also guess that he would be the one to use two different lengths – for individual race and for a vertical.
This video does a good job of showing how long poles the best use (in proportion). Not the best quality but you will get the idea:

How to choose your skimo (randonnee) racing poles?

Since all competitive skimo racers use cross-country (xc) style poles I suggest you consider them as well. Just be careful to pick the ones where hand straps can be easily removed.
Length:
Consider that the poles length should be suitable for all aspects of skimo racing – skinning, bootpack, and downhill.
Since most of xc poles can be cut to adjust length I would  suggest this formula:

  • if you are 190cm+ tall (6’ 3” +) buy 145cm and you can either cut them or keep as is
  • if you are 180-190cm (5’ 11” to 6’ 3”) buy 140cm, cut or keep
  • 170-180cm (5’ 7” to 5’ 11”) buy 135cm, cut or keep
  • 160-170cm (5’ 3” to 5’ 7”) buy 130cm, cut or keep
  • 160cm and less (less than 5’ 3”) probably buy 130cm, then cut or keep

Material and weight:
You have couple of choices:

  • Carbon is very strong and very light but most expensive. Need to be careful not to fall on them because it breaks, does not bend.
  • Aluminum is less expensive, strong but heavier than carbon or composite. Makes for a good beginner or training poles. Usually bends when you fall on it – you can still finish the race. Cheap aluminum poles bend way too much when you put lots of your weight on it, they are too soft.
  • Composite poles are a mix of materials. Price, weight and performance varies quite a bit. Similar qualities as carbon.
  • Fiberglass probably comes only with composites these days. I find it a bit too “bendy” when loaded.

Baskets:
Some xc poles come with very small baskets. You don’t want those. You need something smaller than backcountry skiing pole baskets but still big enough to provide some support when the snow is deep.
Figuring out the length:
See the length formula above before buying. Then it will take some time (maybe even few seasons) to find your ideal.
How about figuring this out with a length-adjustable mountaineering pole?
This only works if you manage to restrict how much of the tip sinks into the snow. Usually, tips on mountaineering telescopic poles can go as deep as 5-6cm. You want to restrict your test poles that only up to 1cm punches in, and then you can use this length as a reference.

What poles do you use? Questions, thoughts?

Share what poles you use and how tall you are. Or if you have any questions use the comments below to ask.

Filed Under: Gear, Tech & Food, Racing 101 Tagged With: Kilian Jornet, Melanie Bernier, Peter Svatojansky, Reiner Thoni, skimo racing poles length, Stano Faban

  • « Previous Page
  • Page 1
  • …
  • Page 6
  • Page 7
  • Page 8
  • Page 9
  • Page 10
  • Next Page »

Primary Sidebar

  • Facebook
  • Instagram
  • YouTube
Our Facebook Page

skimo-manual-banner-300px
 

Recent Articles

  • Kilian Jornet Interview: About His New Foundation, His Own Environmental Impact, and How He Wants To Help Athletes and The Outdoor Industry To Protect Nature
  • How Fast Are Glaciers Really Melting? How Will This Affect Your Mountain Adventures? Interview with Pascal Egli
  • Book Review – Art of Freedom: The Life and Climbs of Voytek Kurtyka
  • Forest Skis: Innovative, Custom Build, For Backcountry Skiing and Freeride
  • Lighter and Completely Redesigned: New CAMP Ultralight Ski Mountaineering Ice Axes

Categories

  • Contests & Giveaways
  • Crazy Tracks
  • Events & Races
  • Gear, Tech & Food
  • General News & Articles
  • Industry Press Releases
  • Movies & Books
  • News Shorts
  • People (Interviews)
  • Racing 101
  • Reports & Results
  • Reviews
  • Skimo Racing
  • Training, Tricks & Tips
  • Trip Reports & Conditions

Footer

About SkinTrack

Travelling through snowy mountains on skis is like flying… and experiencing life at its core.

Gear reviews, interviews, adventures, contests, skills, skimo training, race reports – we connect you to all things related to self-propelled skiing.

SkinTrack.com, created by Stano Faban, was born out of passion for ski mountaineering and ski touring. Over the years, it has become one of the most popular ski mountaineering blogs in North America.

Recent Articles

  • Kilian Jornet Interview: About His New Foundation, His Own Environmental Impact, and How He Wants To Help Athletes and The Outdoor Industry To Protect Nature
  • How Fast Are Glaciers Really Melting? How Will This Affect Your Mountain Adventures? Interview with Pascal Egli
  • Book Review – Art of Freedom: The Life and Climbs of Voytek Kurtyka
  • Forest Skis: Innovative, Custom Build, For Backcountry Skiing and Freeride
  • Lighter and Completely Redesigned: New CAMP Ultralight Ski Mountaineering Ice Axes

Useful Links

Comparing the lightest: Skis | Boots | Bindings

Skimo Training: Training Plans | Videos

Stay in Touch

  • Facebook
  • Instagram
  • Twitter
  • YouTube

Copyright © 2025 SkinTrack.com. All rights reserved.