• Skip to primary navigation
  • Skip to content
  • Skip to primary sidebar
  • Skip to footer

SkinTrack

  • Lightest Gear
    • Skis
    • Boots
    • Bindings
    • Skins
    • Packs
  • Skimo Training
    • Training Plans + Skimo Manual
    • Transitions Videos
  • Facebook
  • Instagram

Gear, Tech & Food

Skout Trailbars review: We need more quality choices to replace some old fillers

March 8, 2012 By Stano Faban Leave a Comment

Bottom line: Highly recommend to try Skout Trailbars for various activities. Value them for what they really offer and let your priorities decide.
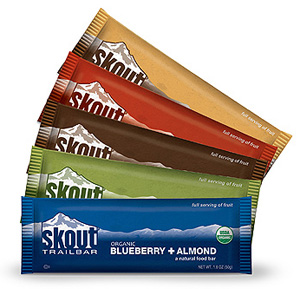
Skout Natural Traibars flavorsThere are plenty of trail, sport, energy and protein bars to choose from these days. In fact, there might be too many.
To me, there is no problem with the amount of choice but with the quality, and so it is nice to see a fresh player bring a natural product to a crowded market.
Surely, to each of us ‘quality’ means different things but to me it represents:

  • ingredient sources – how healthy it is
  • flavors, taste & texture – the variety a brand offers, and whether I like it enough
  • nutritional values – what it gives me (not only energy)
  • price & comparison – how they compare to other ones I like

What do I think about Skout Natural Trailbars

This is a summary from multiple experiences with Skout Natural Trailbars during various sporting and outdoor activities throughout couple of months.
First bars for this review were provided by Jason Pastega of Skout Natural, however, more were purchased on free will. And so you can consider this review as objective or as biased as you like.

Ingredients – nature’s simplicity

What I like about Skout Trailbars is about what they do not contain rather than what they do.
They do not contain any added sugars or fillers such as corn syrup. No artificial flavours or colour.
They are 100% organic, made only from basic natures ingredients. All five flavors of Skout Trailbars contain these two main ingredients – organic dates and whole grain organic oats. Four of them contain the two plus almonds.
Skout bars are made in Portland, Oregon and the ingredients are sourced from the Pacific Northwest region.

Flavors, taste & texture – too much simplicity gets in the way

Skout Trailbars come in these different flavors:
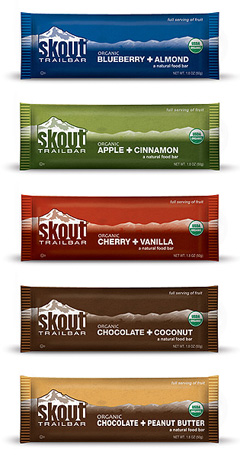
All of Skout Natural Trailbars.

  • Blueberry – Almond
  • Apple – Cinnamon
  • Cherry – Vanilla
  • Chocolate – Coconut
  • Chocolate – Peanut Butter (no almonds)

All of the bars taste great (Apple Cinnamon being my favorite), however, to be honest I have to say that they all taste similarly.
It could be my palate but maybe if you have two ingredients creating the bulk of each bar it shouldn’t be a surprise. This doesn’t really bother me since I am sold on the quality of all ingredients.
Texture left a good feeling but was a bit on a drier side, I prefer little juicier. But since most of us drink while/after eating a sports bar anyways this shouldn’t be a problem.

Nutritional values – comparable to other bars but a more natural mix

Again for me, nutritional values come second to the ingredient sources. If those are really natural (doesn’t have to be labeled organic) and chosen wisely then I believe nature does the rest – it provides the right mix of what we need.
Skout Trailbars are totally comparable to other trail bars (or sports, energy bars) in terms of their nutritional values – at 50g provide around 170-200 calories.
The added bonus with Skout is that the nutrients come in more natural combinations than in most other bars. Because once you start pumping a bar with fructose syrup or maltodextrin to raise its energy/carbs values such concentration (or ratios) do not occur naturally.

Skout blueberry bar nutrition facts.
Blueberry - Almond bar nutrition facts.
Skout apple bar nutrition facts.
Apple - Cinnamon bar nutrition facts.
Skout cherry bar nutrition facts.
Cherry - Vanilla bar nutrition facts.
Skout chocolate bar nutrition facts.
Chocolate - Coconut bar nutrition facts.
Skout peanut bar nutrition facts.
Chocolate - Peanut Butter bar nutrition facts.

Price & comparison – quality costs a bit more

Some people like to justify a price of a bar based on grams-to-cents ration. If a sports bar is 60g at $2.10 then you are paying 3.5 cents per gram. Basically, they reason the heavier and cheaper the better.
This thinking forgets to appreciate quality. If something is of higher nutrient quality (not just the amount of calories) it will give your body more than something that is a highly processed 20g heavier “filler”.
Skout Trailbars are more expensive than let’s say Cliff Bars (not 100% organic) but are the same as Hammer Bars and Larabars (both 100% organic) which too use lots of natural, organic and raw ingredients. I would not solely buy Skout bars as it can get pricey but to widen your range of tastes I definitely recommend them.
You can buy your supply online at SkoutNatural.com in boxes of 12 or choose individual bars, or a great sampler box. You can also get them online at REI.com (in person too).

Have you tasted these? Or want to know more?

Feel free to comment below if you had tasted these Skout’s bars. Or if you have more questions about them, ask below.

Filed Under: Gear, Tech & Food Tagged With: Skout Natural

Pierre Gignoux 444: Behind the scene of the lightest ski boot in the World

February 25, 2010 By Stano Faban 12 Comments

Sharing a look behind the scene of manufacturing the world’s lightest ski boot (Pierre Gignoux 444 model) through the eyes of Michael Silitch, an internationally certified mountain guide living his dream in Chamonix.

rando-girls
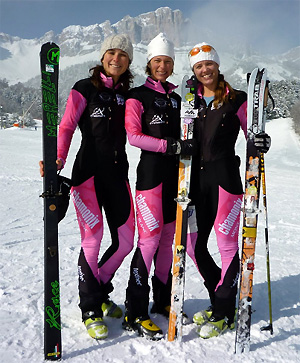
Nina with her team mates from the Chamonix Ski Alpinisme Club.
Michael is the founder and the main guide of High Alpine Mountain Guides, and a husband to one of America’s top female skimo racers Nina Silitch – NinaSilitch.com.
Both of them ski the PG boots on regular basis while Nina is also putting them through rigorous testing on the skimo World Cup circuit.
On behalf of all SkinTrack readers I want to thank Michael for sharing his experience from a visit to Pierre Gignoux’ workshop.
Michael supplied the text and photos, so please contact him via his website if you wish to reuse any of it.
Also, judging based on Pierre’s accomplishments as a ski mountaineer, and couple of reports like Micheal’s, Pierre is an absolute representation of someone extremely dedicated to deliver nothing less than the best to the sport he loves so much.
For a comparison of the lightest ski boots, currently available on the market, make sure to read also check these two articles and great discussions in the comments sections below them:

  • Introducing the lightest ski mountaineering boots
  • New carbon ski boot: LaSportiva Stratos

Look behind the scene – Michael Silitch words

Nina just loves her Pierre Gignoux all carbon fiber ski boots. She loves how light they feel climbing (less than 10% heavier than a Salomon World Cup nordic skate boot) and also how stiff they feel while descending, delivering precise edge to edge control.
Basically they are lighter and stiffer than almost all touring boots out there, from the big touring boots to the race specific light boots.

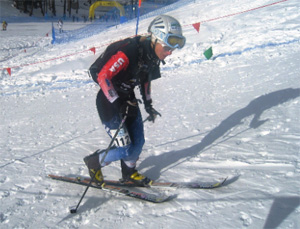
Nina Silitch in the Pila World Cup sprint race in Italy, December 2009 with her Pierre Gignoux boots.
Just after [the December 2009 Pila World Cup] race, I had the opportunity to visit Pierre Gignoux at his workshop outside of Grenoble, France.
It’s a small workshop in his basement where he and 5 other employees hand-mold and assemble the lightweight masterpieces.
Pierre raced for 12 years at the highest level and [besides other wins] he won the Pierra Menta stage race.
He also holds the ski record for Mont Blanc. With Stephan Brosse, he skied up and down Mont Blanc in 5 hours 15 minutes – the start and finish line was the church in downtown Chamonix!
Stano’s note: This is little more than 3800m of climbing, then skiing it down. Pierre and Stephan reached the summit in 4 hours. The record attempt also involved a small crevasse rescue.
After all Pierre’s racing at altitude and using his degree as a biomechanical engineer he started working to create the lightest and highest performing ski boot possible. Used in skis, sail boats and F1 technology, carbon fiber was the material of choice.
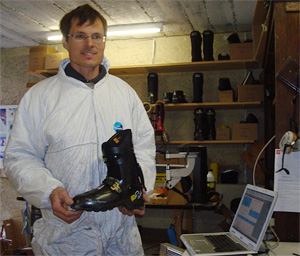
Pierre, in his workshop, proudly showing off his latest masterpiece, the XP 444.
After a few years of testing, the XP 500 was made available to the public in 2006.
At the time it weighed 650g per boot and was nearly half the weight of the Scarpa F1 (1200g).
My 2008 XP 500 were down to 520 g per boot without liner in size 27.5.
This year, the new XP 444 shell weighs a cool 444 grams in 27.5 and comes with many other improvements as well.
The shape, especially around the ankle, is lower profile and more streamlined resulting in an even more precise fit, and less ankle bumping which can rip your race suit to shreds.
The distinctive yellow fiberglass tongue has been replaced with a lighter more sturdy carbon fiber tongue. Besides the weight savings, the upper cuff is 30% stiffer and the locking lever more ergonomic.
The hardware assembly area of the workshop.
Speaking of the unique, one motion, locking lever (by just lifting the locking lever you go directly into touring mode without needing any further ankle buckle adjustments), Pierre told me he invented it and Scarpa copied it.
Poorly I might add, as the F1 Race locking lever is a real knuckle basher – Scarpa did fix that for the F1 Carbon.
Similarly, the new Dynafit and LaSportiva race boots have both developed one movement locking levers.
Pierre also makes a Mountain version with a protective rubber rand and a full Vibram sole – all that with just 56 extra grams.
The XP Mountain is a true lightweight touring boot. There is a rubber rand around the welt of the boot to protect the carbon fiber while scrambling around in the rocks.
And a full Vibram sole will give you the best grip and wear. All that for only an additional 56 grams still makes it an exceptionally light boot for extended tours.
One thing you may note of all these pictures is that there are not many boots in his workshop. That’s because they fly off the shelves.
Pierre and his crew produce about 300 pairs a year and currently there is a 6 month waiting list. So order now to get a pair for next season! They are well worth it.
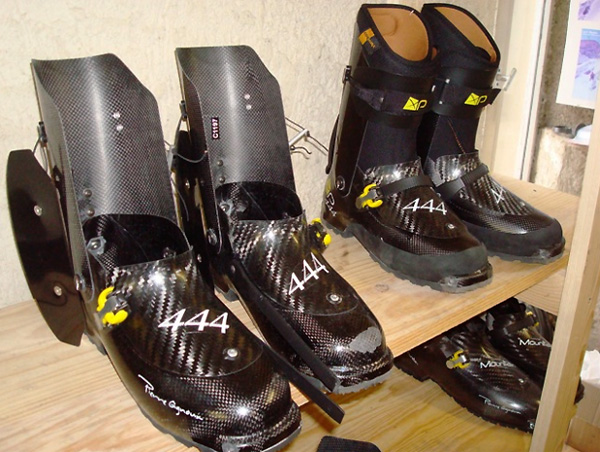
A Mountain version of Pierre's boots with a protective rubber rand and a full Vibram sole.

Questions? Experience?

Feel free to ask any questions about these boots in the comments section below.
If you have a personal PG boots experience you are welcome to answer these questions and share your experience.

Filed Under: Gear, Tech & Food, Skimo Racing

Are these the same skis? Dynafit DNA Race vs. Crazy Idea DNA Race

February 17, 2010 By Stano Faban 13 Comments

Update: After confirmations from various sources these two skis are in fact the same.
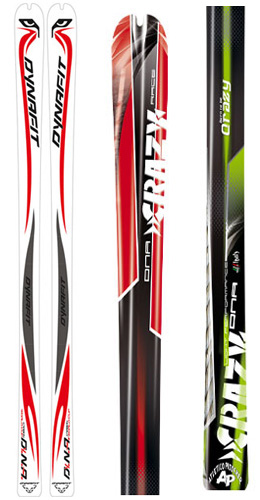
For a longer time now I have been suspecting a little “marketing scam” that might be being played with the ski mountaineering racing community. Two companies with well known names might be presenting the same ski but covered in two different top design sheets.
Dynafit is the Name in ski mountaineering (and ski touring) manufacturing industry, whereas, Crazy Idea is more known for its niche market approach in the sport of skimo racing. Both companies present skimo racing skis in their repertoire, however, I wonder how genuine these skis really are.

Some facts to compare

dynafit-vs-crazy-ideaWithout even comparing the model names (DNA Race and DNA Race) the similarities are pretty obvious.
Dynafit DNA Race:
Length: 161 cm
Side cut: 96-65-78
Radius: 24.5 m
Weight: 710 g
» See the ski here – Dynafit website
Crazy Idea DNA Race:
Length: 161 cm
Side cut: 95-64-78
Radius: 24.5 m
Weight: 710 g
» See the ski here – PDF doc
Except the side cut all other parameters match exactly. And even with the side cuts, I wouldn’t be surprised if they actually were identical.
But for “marketing purposes” companies (or one of them) decided to skew the numbers by a millimeter to create an impression that we are choosing between two different models. Who knows?
Also, after inspecting the specs (Dynafit website and the above PDF) the structure or the materials used in the built of both skis appear to be at least similar if not the same. But again, the specs can be written in so many ways and angles that “if you don’t really know you will never know”.

“Conspiracy theory” assumptions

Based on what I know, Crazy Idea had its skis out on the market first, now for about 2 or 3 years. And I don’t think they changed them significantly since then.
On their website, Crazy Idea, offers to customize the design of your skis for 30.00 Euros if you buy a pair. Therefore, they must be able to print out a different top sheet quite easily.
This leads me to quite a “serious discovery” because while inspecting my friend’s almost brand new Dynafit DNAs skis last Saturday he pointed out that the the top sheet is easily scratched on the top edges (rounded sides) of the skis.
After a closer look I could clearly see that the top sheet is only a vinyl-like layer that, with some patience, you would be able to peel off from the place where the ski was scratched. (I will ask for detailed photos of the scratches.)

Some questions to ask

Is Dynafit just printing a different design sheet over Crazy Idea skis? Or is it the other way around?
Has anyone been a little suspicious about these two skis like me?
What is your opinion on these striking similarities?
Most likely both companies will stand the ground that each ski was genuinely developed after years of testing, and I hope they are.
But if the ski industry is following the (outdoor) clothing industry example then I wouldn’t be surprised if there is even an absolutely different original manufacturer for these skis, and big companies are only slapping their designs over a pair of light sticks. Who knows?
The images and the PDF file were downloaded from the Dynafit and Crazy Idea websites.

Filed Under: Gear, Tech & Food, Skimo Racing

Future of avalanche beacons: old standards and new ideas – ARVA Link and Ortovox 3+

February 12, 2010 By Stano Faban 7 Comments

Every two or three years manufacturers release improved and more innovative features for their avalanche beacons. Some of these are revolutionary and some are just small enhancements, however, they are constantly moving forward.

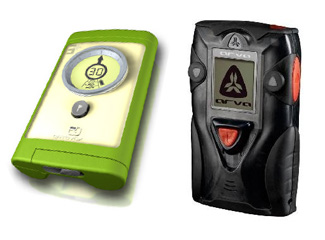
Ortovox 3+ (left) and ARVA Link will introduce new features to improve avalanche rescues.
In the past couple of weeks I had a chance to talk to two representatives about new products of their respective brands – ARVA and Ortovox.
Both discussions opened my eyes to some new thinking about avalanche rescue search but also somewhat confirmed my opinion that we might be stuck with some old standards.

Old standards

Technology and standards that are used for current avalanche beacons were established (agreed upon by manufacturers) about two decades ago.
Of course, there were some refinements since then but pretty much it appears that we are stuck with the antennas and the frequency they transmit (457 KHz). Therefore, being stuck also with the way we can search for avalanche victims.
I am no engineer, so during a meeting with ARVA representative from France I asked these questions:

  • Isn’t the current technology quite limiting for significant improvements for faster searching?
  • If it is then why something new isn’t being invented?
  • What about some other technologies (like GPS)?

The answers were both upsetting and encouraging:
On one hand, yes, we are a bit stuck with the very core technology beacons are using now. On the other hand, there are great plans underway to improve what we currently have.
Bad news
The current technology obviously affects the basic functionality of the avalanche beacon and the ways manufacturers can improve its performance.
Also, even with a technology like GPS it would be very tough, at least for now, since users (searcher and victim) would depend on one more piece of device (satellites) than just a transmitting and a receiving beacon. This would make the rescue activity quite vulnerable due to terrain obstacles (steep valley) and satellites available for precisely locating a victim.
Pretty much the bottom line is, according to ARVA representative, that avalanche safety is such a small market to invest big sums of money in to invent, or research, something completely new. Besides, manufacturers don’t have such budgets anyways as they are not selling to huge markets such as electronics consumers.
They could possibly work on this together but then there must be a significant will to share information. In a commercial world we live in, this seems too “utopia like” to consider that. However, there is already a small change on this front which is discussed later in this article.
Good news
The good news is that engineers found some new ways how to improve avalanche beacon search while using the same old standards. To me these are brilliant ideas and I am looking forward to see them work and hopefully to be implemented by more than just few brands.

New ideas: out of the box thinking

Two new avalanche beacons will (should) hit the stores next season – ARVA Link and Ortovox 3+, and they will represent new ideas and developments from inside their companies.

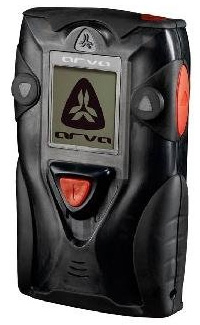
ARVA Link avalanche beacon

ARVA is a French avalanche safety equipment manufacturer that is quite popular in Europe, yet not known at all on the North American market.
w-link-logoRecently, ARVA purchased or is licensing W-Link broadcast technology from Mammut which uses a second frequency (W-Link frequency: 868 / 915 MHz) for additional data transfer between Mammut Pulse beacons.
Mammut uses this frequency to transmit victim’s life data and there is a bit of debate within the industry whether it is good or not to make such information available to those who search.
However, ARVA is not thinking to use this frequency to send such data but rather to use it for communication among all the beacons in a reachable range.
This is how it should work – rescue scenario:
arva-linkParty of five gets caught and three persons are buried under the snow, the other two starts searching. As searcher “A” flags (marks) a found victim searcher’s “B” beacon receives this info and flags it too. So now both searchers know there is only two more to be found.
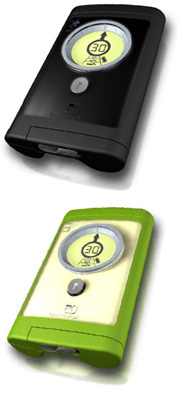
Or if the searchers run in different directions and searcher “A” picks up a signal that is too far for “B” to see, it will notify the “B” beacon that it already picked up a signal.
This signal separation would be possible because the other W-link frequency through which the buried beacon is sending its unique ID (maybe a serial number).
Therefore, there is no way a beacon could be flagged but really not located in case of signal overlap by the transmitting beacons which happens sometimes with currently available models.
Taking it a step further:
Lets say another party comes to help and is also equipped with ARVA Link (or other beacon that would support this technology in the future). As they start searching too their beacons will be notified of the already found victims by the searchers “A” and “B” beacons.
You can definitely see how this can be very helpful in multiple burial scenarios. However, as you also noticed, no one started digging yet. 🙂

Ortovox 3+ avalanche beacon

Ortovox is a well known leader in the avalanche safety industry and once again they are readying to release a beacon that will do something no other beacon did before.
ortovox-3+Apart from a very nice design and a use of only one AA battery, which makes the beacon very small and light, Ortovox 3+ will introduce a feature that helps others to search for itself!

This avalanche beacon will have the ability to automatically switch between two antennas through which the transmitting signal will be send when buried.
Ortovox 3+ will have three antennas in total but the third will be used only for enhancing it searching capability, not transmitting.
How this works – Ortovox 3+ vs today’s beacons:

When any currently available beacon is buried in a “wrong” way its main antenna will be transmitting mostly in vertical directions – to the sky and to the ground.
If an avalanche manages to bury you the “right” way then you have a better chance of being found as your antenna is transmitting more horizontally (or more leveled to the surface), therefore, providing the searching beacons with a bigger range to pick up your signal.
What Ortovox 3+ will bring to the table is its ability to figure out which one of its two main antennas is positioned more horizontally, then switch transmitting to it.
This means that no matter how this beacon is buried it will always be transmitting on the best plain for the searching beacons to pick up its signal from.
This feature seems quite revolutionary since the buried beacon will actively help the searching beacons to find it. Therefore, improving searching capability of any beacon, even those with a smaller search range.

More details about ARVA Link and Ortovox 3+

Currently, there are not all details available about these two units, thus not everything can be explained right now. However, based on what is known so far the features that will be used in these two beacons are a big step towards future improvements of avalanche beacon search functionality.
Both beacons will be available on the North American market once they are officially released and the purchase prices should be in a range of $350-$420, not too much for such cool features.

Filed Under: Gear, Tech & Food

Be strong and healthy: Chocolate moose recipe from Canada's skimo champ

January 12, 2010 By Stano Faban 8 Comments

The night before an opening race of the 2010 Canadian skimo racing season I ganged up with other two Canada’s skimo racers, Reiner Thoni and Ian Gale, to prepare dinner for us, plus Ian’s wife and their room-mate.

Chocolate moose fancied by lots of fruit. Preparation and photo by Reiner Thoni.
Chocolate moose fancied up by lots of fruit. Preparation and photo by Reiner Thoni.
Since there were three pairs of hands in the kitchen we knew that to serve this dinner without a desert would ruin the whole experience and wouldn’t go unnoticed.
So Reiner happily volunteered to get ready this portion of our little feast.
Once the dust after the main meal settled and we were talking racing once again, Reiner served us his chocolate moose with fresh fruit.
I have to say, it was one of the most delicious healthy deserts I ever had.
And I had to ask Reiner to share his recipe with us since I think it has a shot to become a refueling hit during evenings at Pierra Menta.

From Reiner:

Until the last couple years chocolate moose was on my no eat list, especially while training, however, this recipe has pushed it into a healthy choice.
Loaded with healthy fats, antioxidants and electrolytes it not only tastes good but it feels good to eat!

Guilt free Chocolate Moose

  • 4 ripe avocados
  • 1 cup coconut milk or almond/rice milk
  • 1 cup cocoa powder
  • add sweetener to taste of your choice (Agave nectar or real maple surip makes it smooth and healthy)
  • (Bannas or dates are also great but not as smooth)
  • 1-2 teaspoons vanilla extract or vanilla seeds
If you thought there was no way to put a moose in a fridge here is proof - two of them cooling down. (Reiner's photo)
Moose in a fridge? Actually, two of them cooling down. (Reiner's photo)

Method

Put all the ingredients into a food processor, or a blender, and blend until smooth.
If it is not sweet enough add more sweetener and if consistency needs adjustment add more avocados to make it thicker and water or milk to make it thinner.
Next, place in a bowl and put in the fridge for 1 hour. Keep in mind when mixing ingredients that it will firm up in the fridge.
Serve with fresh fruit to enjoy this guilt free treat!

Filed Under: Gear, Tech & Food Tagged With: Reiner Thoni

Which skis you want or would recommend to your friend, and why?

December 25, 2009 By Stano Faban Leave a Comment

The 2010 Gear Guide published by Backcountry Magazine obviously contains ski reviews among other gear. By now everyone that bought this gear guide issue knows what their testers think about the skis that were available to them.
However, there are more skis out there than can be contained in one test and more importantly there are many more different “tastes” than those represented by the testers. Therefore, I thought it would be great if we all get to say what would make our “Editor’s Choice” list.

How does this work? What do you do?

The way this works is based on your honest opinion or a desired choice.
In the comments section below, you can either state reasons why would you love to have (own) a certain ski or why would you recommend a specific pair to your best friend.
So the rules are simple – be honest, make sure to give good reasons (why?) and pick no more than two pairs of skis. And you can go as wild as you want with brands or types of skis you would recommend – wide, skinny, super light, hard, soft…

How did the Backcountry Magazine review work?

The magazine ski review was basically divided into two categories – freeride skis and all mountain skis.
The freeride skis were on the fatter side – about 110 to 140mm wide under foot. The all mountain skis were in the range of around 86 to 105mm wide. Then of course there were other properties but this seems to be trend these days in terms of widths and how we categories a ski based on this one single figure.
This is quite interesting because about 15 years ago an 85mm ski would be almost unheard of. And the magazine states in their own words that in 1994 they featured a story: “…about new ‘super wide’ skis that [were] 85mm at the waist.”
It is amazing how our perception changes with time and evolution. And also, I believe this perception is shaped a lot by the terrain and snow we ski the most often. Because on the West Coast you can “get away” with a narrower ski, even on a powder day, than you could in some bottomless interior regions.

My picks

My desired ski would be something that floats enough and behaves fairly well in most conditions. Therefore, it would be around 85-95mm at the waist and perhaps weigh no more than 1600gm per ski. So my choice might be…Ski Trab Stelvio Light XL…or Dynafit Mustagh Ata Superlight.
A ski that I would recommend to a friend, based on my own experience, would be a super light ski mountaineering ski for fast backcountry missions or skimo racing competitions.
The skis would be Dynastar Pierra Menta Pro or its carbon version. It is quite stiff for its weight (870gm per 164cm ski for the non-carbon version) and it is still 65mm wide under the foot.
Now go on share your own pics. This should be interesting 😉

Filed Under: Gear, Tech & Food

Questions and answers about G3 Onyx bindings with Melanie Bernier

December 21, 2009 By Stano Faban 19 Comments

Melanie Bernier is a G3 sponsored athlete for past couple of years and tests their equipment any time she is playing in the snow. She lives in Revelstoke, skis almost every day and is a member of the Canadian Ski Mountaineering National Team.
Melanie will be representing Canada at the 2010 Ski Mountaineering World Championships as well as at the famous Pierra Menta – a four day skimo stage race.
onyx-main-photo
I saw Melanie using the new G3 Onyx bindings at our Canada Team ski mountaineering training camp I asked her to answer a couple of questions for you regarding the product.
Obviously, this is not a review of the G3 Onyx bindings since Melanie is sponsored by the manufacturer, however, I don’t have any real use experience with the bindings myself, therefore I thought why not ask a friend couple of questions.
I am sharing my view of the product (even though it’s limited due to no real experience with it) below the questions/answers section.

Product intro

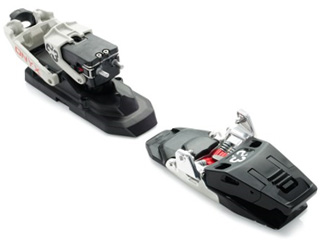
G3 Onyx bindings use the Tech technology that was developed by Dynafit about 15 years ago. Since the Dynafit’s patent expired few years ago some companies took on the challenge improving a system that revolutionized alpine touring bindings market. Here is how G3 made their mark.
» Click the following link to see a bigger photo of the G3 Onyx bindings.
» Click this link to see a PDF version of the operating manual for Onyx bindings.
G3 Onyx features as highlighted by the manufacturer:

  • Easy to switch between tour and ski mode on-the-fly
  • Easy step-in toe utilizing the Tech system
  • Dependable and intuitive pole-actuated heel lifts
  • Increased overall rigidity creating increased overall skiing performance
  • Adjustable base plate mounting system applied to the toe and heel for quick adjustments, maintenance of boot center mounting and 33mm of adjustment to fit a wide range of boot sizes
  • Ski brake and crampon compatible
  • Complete disassembly and re-assembly possible
  • Lightweight

Materials

  • Forged aerospace aluminum toe-jaws, chassis and heel-post
  • Fibre reinforced binding mounting base plates

DIN Settings

  • 5 – 10 (My)/12(Mz)

Weight

  • 1430g / 50oz with screws

What does Melanie have to say about the G3 Onyx?

Q: For how long have you been using the Onyx bindings? How many days have you toured or skied on them, backcountry and ski resort?

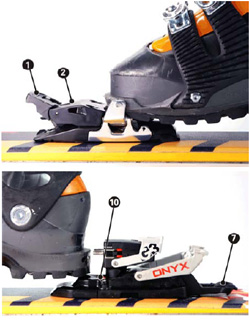
g3-onyx-walk-mode
Tour mode lever (1) is in the locked position and the heel mode lever (7) is in the down position. In tour mode, the RED tour mode indicator (10) is visible.
I received the bindings in April 2009. They were part of the “Beta Program” which consisted on giving the opportunity to G3 gear users to test the binding and give feedback after each day of skiing on them.
So the bindings version that I have been skiing on is slightly different than what is on the market right now. What you can buy at your favorite gear store is an enhanced version of the Beta Onyx bindings based on testers’ feedback.
I skied the Onyx bindings about 10 times in the backcountry exclusively last season, and I have skied them about 22 times already this season, which 7 of those days were on a ski hill.
Q: Did you have any problem with the binding during that time?
I did not have any problem per say. They are still in great working shape. No brake and no need to replace any parts.
I only had one emergency release while skiing with them and it was well needed and actually comforting to know that it works. I also only had one accidental switch from skiing to touring mode but it could have happened with any other binding in that situation.
Q: What features do you like the most about the G3 Onyx bindings?
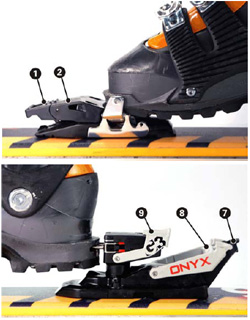
g3-onyx-ski-mode
Tour mode lever (1) is in the unlocked position and the heel mode lever (7) is in the up position. Low (8) and high (9) heel lifts must be in the stowed position.
How quick and easy they are to switch from walk mode to ski mode and vice versa. And activation of the heel-lifters is very fast too.
Then I like the fact that the bindings are so easy to adjust for different boot sizes. If you have different touring boots that have different sole lengths or if you want to let your friends use your skis, it’s a feature you will appreciate!
Also, the fact that you can adjust the positioning of the toe and the heel pieces of the binding on the skis is great. Therefore, whoever is using your skis can be positioned at the right place on them.
Another really nice feature of the Onyx bindings is that they are really easy to clip-in since the toe piece is designed to place the tip of your boot exactly where it should be in order to clamp onto the toe piece.
Q: What would you like to see improved in the future?
The toe piece activation mode since you have to push on it quite hard in order to get the boot in or out. It’s easy enough to get clipped-in properly as mentioned but sometimes when you are in knee-deep snow or if you are trying to put your skis on a steep icy ridge the current mechanism may cause some difficulties. I know G3 has been working on this.
Also, there are a lot of movable pieces with this binding but so far everything is pretty solid for me.
Q: What Skis are you using with the Onyx binding?
The new 2009/10 G3 ZenOxide. They are 105cm under foot – big boards. They have exactly the same side-cut as the G3 El Hombre but with a lighter core!
Q: You are a Dynafit binding user too. Pick one (feature or specification) to which the Onyx is better in your opinion and pick one thing that Dynafit has and Onyx not.
Onyx – Really quick and easy to switch from walk to tour mode.
Dynafit – Really light bindings, especially the Dynafit Low Tech model.
Q: What do you think is the best use for the Onyx bindings – backcountry skiing, slack country, extreme skiing, big vertical days? In other words, what type of user would mostly benefit from this product – regular backcountry skiers, occasional tourers…?
I think the Onyx would answer the needs of someone looking for a binding that does it all. It’s a great option for people getting more and more into backcountry skiing, people that do not want to carry the weight of heavy bindings like Fritschi or Naxos, and who want to have a closer contact with their skis.
The Onyx would be also for those who want a reliable setup which works on the hill, in the slack country and on day touring trips.
It will also meet the needs of people who are not wiling to spend a large amount of money for bindings since the Onyx are sold at a competitive price.
I think even the Dynafit die-hards should consider this binding since it is a great option. If you are all about the overall weight of your touring setup then it may not be your preferred choice but for a good days out in the backcountry it’s been proven to be a great choice!
Q: What is your overall impression?

I am so glad to see that there are companies, like G3, out there looking for alternative to touring bindings. It’s like the touring boots a few years back. Before Scarpa, Garmont and Dynafit were dominating the market, then others started to come out with alternatives which forced the previous mentioned companies to have a closer look at their products and improve them.
I think the same phenomenon will happen with the bindings. Since the Dynafit patent ran out, I am glad to see that more options are offered to backcountry skiers. I think the Onyx is a great alternative since it’s a competitive and reliable product.
And like any piece of equipment, the Onyx bindings have great pros to them and some room for improvement. But I still think that people have to try them in order to see what they have to offer.

My take on the Onyx bindings

As a loyal Dynafit bindings user since about 1998 it is tough to look at any other bindings without high expectations. But I fully credit G3 for sticking their head out and trying something new.
Whom the Onyx will benefit – in my opinion
I can clearly see that there are people that would desire the Onyx bindings and that they would really benefit from them as opposed to buying Dynafits or Fritschi or other models.
In my view, those people that would benefit from the new features that Onyx introduced (easier stepping in or more convenient ski-to-tour switch mode) are more of a leisure tourers or slack country skiers because all this comes at a weight cost compare to Dynafit bindings. In my opinion it would benefit more those that don’t log too many big days in the backcountry during a season or are likely to backcountry ski only seldom.
Whom the Onyx won’t make a difference for – in my opinion
In my view, the Onyx won’t make a difference over other existing bindings (meaning Dynafit bindings here) for people that are heavy backcountry users or performance oriented people. Because these groups use their equipment in such ways that they can live with small “inconveniences” if that means having a lighter and simpler product. Personally, I belong to that group.
My overall impression
My overall impression is that the Onyx appear very solid, therefore should be quite durable. The new features seem like a good improvement towards user friendliness, however, that caused an addition of many more parts over the very simplistic design of the Dynafits. With all those extra parts the Onyx design seems quite “exaggerated” to me, kind of overdone or unnecessary.
The price point (about $400) is very similar to Dynafits and other bindings, it only depends what models you are comparing it to. So there is no advantage or disadvantage when it comes to your wallet.
As you can see I am a Dynafit fan and that’s why I wanted someone else to make a case for the G3 Onyx. With that I hope to give you a more honest picture of a new product.
I believe, that in the next couple of years G3 will improve the Onyx more to my liking as well, thus I would finally have more choices on the alpine touring bindings market.

More about G3 Onyx bindings

There is a website dedicated by G3 to their new product with videos and all the specs – visit Onyx bindings at http://www.g3onyx.com.
Also, you can read more answers and reviews at  Backcountry.com.

Any questions? Share your experience

If you are thinking about buying the Onyx bindings or just simply have more questions you can ask in the comments below and Melanie, I or other people will try to answer them.
It would be valuable to hear from people that are using or have tested the Onyx bindings. You are welcome to share your experience in the comments below.

Filed Under: Gear, Tech & Food

New carbon ski boot: LaSportiva Stratos / Discussion about different carbon boots

December 14, 2009 By Stano Faban 42 Comments

With some plain luck, I found this YouTube video that introduces the new LaSportiva Stratos carbon ski boot.
Before, there were only some images available along with some technical information. Now the picture gets clearer. The ski boot seems quite sophisticated, therefore the expectations will be high.
Take a look at the video and some basic information about the LaSportiva Stratos that were posted on SkinTrack couple of weeks ago.
You are welcome to post your reactions in the comments below. Mine is – WOW.

Filed Under: Gear, Tech & Food

From tele to Team Canada: A telemark skier's switch to AT race gear

November 17, 2009 By Stano Faban 7 Comments

My first ski mountaineering race was completed on 184cm K2 telemark boards with non-free pivot bindings and Garmont Excursion boots. My skins were G3 Ascensions that required the removal of the ski from my foot in order to get each skin off.
This is a guest post from my friend and fellow skimo racer, James Minifie. James is sharing a great personal experience that is interesting as much for telemark skiers as for alpine gear users.

james-race-gear
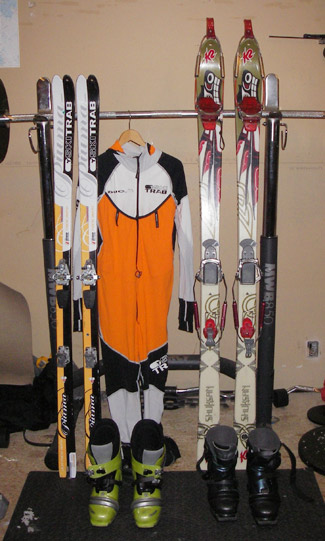
James' gear before (right) and after "The Switch". Now he is on Ski Trab Duo Race Aero World Cup skis, Dynafit bindings and Scarpa F1 boots.
I had never seen light randonnee race gear up until then and looking down at the competitors to my right and left and seeing 160cm skis 60mm at the waist mounted with impossibly small low-tech bindings and skins that could be ripped off in seconds left me awe-struck.
These guys were clad in Lycra suits with special skin pockets. They wore ultra light AT boots that converted from ski mode to tour at the flick of a lever. Their poles were composite Nordic jobs extra long and stiff for ultra efficient climbing.
These guys were F1 racers and I felt like a monster truck ready to lurch my way up a mountain. The good thing was, there were a lot more monster trucks in the field that day 🙂
I was lucky that day. Most of the really fast guys were in Europe competing in World Championships so I was able to Clydesdale my way to a 4th place finish on the tele boards. The other thing that happened that day was a beginning of my obsession with ski mountaineering racing.

The Switch

The winter of 2009 saw my return to skimo racing and this time I came armed with lighter skis and free pivot telemark bindings. I still used the Excursions (little more than a glorified cross-country ski boot) because they were light and nimble.
To paint a better picture, here are my 2009 before “The Switch” results. I always finished as the best telemark skier, yet I wasn’t reaching the top spots in the overall standings:

  • Whitefish Whiteout, MT – came 5th behind 4 AT speedsters
  • Sunshine 5000, AB – finished 9th
  • Nelson ROAM Randonnee rally, BC – finished 8th
  • Mountain Storm in Fernie, BC – finished 9th

See the pattern? It was then that I made my silent apology to the spirits of my telemark brethren and purchased all out AT race gear complete with carbon poles and a tight Spandex race suit.
The transition was surprisingly easy actually. The hardest part was learning to ski in alpine style again. Something I hadn’t done in almost a decade.
The difference in my results was profound. I raced in two final races in 2009 with my new AT set-up and took third in both. The biggest result “The Switch” brought was my second place from Canadian Ski Mountaineering Championships which secured me a spot on a National Team for this season.

Lessons learnt and shared

For those telemark die-hards pondering “The Switch” here is my humble advice:

  1. Just go to AT straight up! I transitioned through lighter telemark gear before I went AT Race. All this did was cost more money and delay the inevitable.
  2. Just give in and get a race suit. Not only does it allow you to show off your um…pecs, it’s an invaluable piece of race gear for comfort and skin storage.
  3. Plan the transition with plenty of time to practice the Alpine turn and get used to having your heel locked down. If you can, take a couple of lessons at a local resort it’ll fast-forward the “re-learning” process.
  4. Keep in mind that you don’t have to transform into Hermann Maier to race on this stuff. Look at the skiers in any rando race. We’re so tired and on such unsupportive gear that we all look like we’re just surviving on the descents anyway.
  5. And finally, if you’re already fast on your telemark rig, get ready for the podium because having AT race gear and learning to use it will put you in that lead pack before you can say “Spandex”!

Have fun shopping for that new gear. It won’t be cheap but neither are cigarettes, junk food, and cable TV!

Want to share or know more?

You are welcome to share your experience in the comments below as well as feel free to ask about any details of this article’s topic. James, I and other fellow readers will answer.

Filed Under: Gear, Tech & Food, Skimo Racing Tagged With: Mountain Storm, Scarpa F1, Ski Trab, Sunshine 5000

Buying altimeter watch that fits your needs and budget

November 13, 2009 By Stano Faban 9 Comments

Choosing which altimeter watch to buy is tough with the variety we are presented today, so let’s make it simpler with some basic advice that will help you decide.
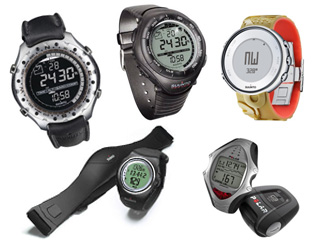
altimeter-watches-mainThis article is an extension of “Altimeter watch: Why it is important and beneficial to know your altitude?“. It is a recommended read for those that are unsure whether they need an altimeter watch or not.
Altimeter watches come in all shapes and sizes, and their features can vary greatly. Some don’t let you record your trips while others combine altimeter functionality with a heart rate monitor.

Making decisions – factors to consider

Two factors you need to really consider are your needs and your budget. The lower your needs and preferences are the less money you will need to spend and vice versa.
To beging the process make a list of your “watch needs”. What you want the watch to use for? What features should it have?
Here are some hints to get your needs list started:

  • need to know only my immediate altitude
  • want to record my trip/hike vertical profiles (logbook)
  • want to know how many laps I skied today
  • need to download data from the watch to computer
  • and so on…

I use and suggest these functions with an altimeter watch:

  • obvious – time, stopwatch, thermometer, alarm, immediate altitude
  • vertical speed – shows your actual vertical speed you are traveling at; once you start following it you will find many uses for it – here is more on vertical climbing speed topic
  • logbook – lets you record your trip/hike/workout including couple of parameters, mainly total vertical meters gained/lost
  • chronograph – almost the same as logbook but more useful for workouts with heart rate monitor

Once you know your needs you can start looking for the solutions – different altimeter watches.
Note: One thing here though is that you may not come up with a certain need in your list because you simply don’t even know a watch can have such features. Therefore, you might adjust (expand on) your needs as you are already browsing different models.

Define your budget – will save you time

Even though it is obvious you know your financial status it is good to predetermine your budget. Come up with a price range, it will help you narrow down your choices and save time comparing different models.
Again like with the needs list, this can be a little tricky if you are new to buying altimeter watch. You may simply not know what altimeter watches are going for.
Altimeter watch prices vary greatly due to different features, their brand name (recognition, prestige) and materials they are made of.
To get an idea, here two examples:

  1. Altimeter watch with titanium housing and leather straps are expensively priced mostly because they are very stylish for everyday wear and they are also very durable.
  2. Watch that has a heart rate monitor and shows only the immediate altitude but has no further altimeter functionality (i.e.: recording accumulated vertical gains) is going to be more affordable than its titanium brother.

Altimeter watches – various brands

As far as your brand preferences go you will have many options these days. But here we will take a look only at those brands that have proven over long time they are worth their price, whether low or high.
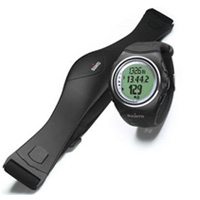
Suunto
Based on personal experience, Suunto is my favorite brand if the watch is primarily used as altimeter. Besides me, there are thousands of mountaineers swearing by Suunto.
Polar
Again based on personal experience, Polar is my favorite if heart rate monitor functionality is the most important. And again, millions of athletes swear by this brand too.
Timex
Everyone had a Timex watch at some point in their life. How was it? Mine was great. Unfortunately, I don’t know anyone who has a Timex watch with an altimeter but the brand is definitely strong.
Other popular and casual brands
Then there are other brands that offer altimeter functionality in their watches as well but don’t have as much history with it: Casio, Highgear, Nixon, Freestyle USA and more…

Altimeter watches – introducing 6 models

Now that you have considered your needs and defined your budget let’s look at some actual altimeter watch models:

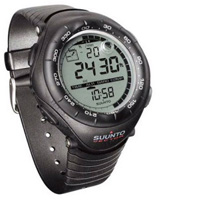
suunto-vector
Suunto Vector
» Essentials
Price: about $200
Various styles: yes
Available at: Backcountry.com, Altrec.com

The name “Suunto Vector” is a legend among altimeters and it was the first altimeter watch I ever saw. I believe, Suunto improved it since then yet they are still keeping it at a very affordable price. This watch has scored many awards and has been used by millions of people that go further than a stroll around a lake. Most recently, Suunto added a new model to the Vector family – Suunto Vector HR – that includes a heart rate monitor.

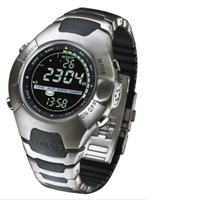
suunto-observer
Suunto Observer
» Skier specific
Price: $300-500
Various styles: yes
Available at: Backcountry.com, Altrec.com

I believe this was one of the first watches that was rated “for skiers” because the logbook was recording your day/trip and at the end you could see how many laps you skied. There are about four different styling options for it, however, not many stores carry more than two. Backcountry.com does.

suunto-x6-hr
Suunto X6HR
» With heart rate
Price: about $450
Various styles: yes
Available at: Backcountry.com, Altrec.com

I am using this is a watch past two years. (Before it was Polar.) I like everything about it except that heart rate monitoring is not as flawless as with Polar. Vertical speed, logbook functions and stopwatch recording are great. It connects to PC but the software is not as user friendly as Polar’s.

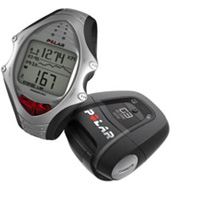
polar-RS800G3
Polar RS800G3
» Heart rate & GPS enabled
Price: about $470
Various styles: no
Available at: Backcountry.com

Polar is mostly know for their high quality heart rate monitors. My personal experiences support that 100%. This watch has basic altimeter functionality but great heart rate monitor features. It also shows your speed and tracks your distance via GPS. Polar comes from Finland, same as Suunto. And it connects to your computer.

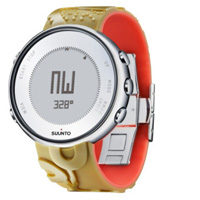
suunto-lumi
Suunto Lumi
» Women’s casual
Price: $300-350
Various styles: yes
Available at: Backcountry.com, REI.com

This is as interesting watch because the styling doesn’t say anything about what’s inside. The Lumi looks to look cool at any situation and it must be. It has an altimeter, barometer and compass. Also, it speaks four languages: English, Spanish, German and French.

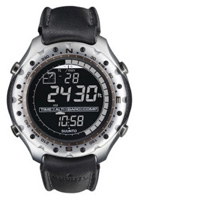
suunto-x-lander
Suunto X-Lander
» Casual & stylish
Price: $300-350
Various styles: yes
Available at: Backcountry.com

Suunto X-Lander is a great watch for anyone who is active outdoors but some times needs to head to a meeting right from the mountains. It has all essential altimeter functionality but with leather straps and aluminum body styling looks very “official”.

At different stores you will find different types/options/colors for different models, therefore you should check out more than one store:

  • At Backcountry.com you have the biggest selection of altimeter watches online (brand, models and options) and you can easily compare 2, 3, even 4 watches side by side.
  • At Altrec.com you will find less selection and different pricing than Backcountry.com.
  • REI.com doesn’t offer too many choices for altimeter watches, but does for other multi-functional watches.
  • MEC.ca offers about 10 different models.

Any questions re: altimeter watches?

If you have any questions or just want to leave a comment about this article or altimeter watches you can do so in the comments below.

Filed Under: Gear, Tech & Food, Training, Tricks & Tips Tagged With: altimeter watch, Polar, Suunto, vertical speed

  • « Previous Page
  • Page 1
  • …
  • Page 7
  • Page 8
  • Page 9
  • Page 10
  • Next Page »

Primary Sidebar

  • Facebook
  • Instagram
  • YouTube
Our Facebook Page

skimo-manual-banner-300px
 

Recent Articles

  • Kilian Jornet Interview: About His New Foundation, His Own Environmental Impact, and How He Wants To Help Athletes and The Outdoor Industry To Protect Nature
  • How Fast Are Glaciers Really Melting? How Will This Affect Your Mountain Adventures? Interview with Pascal Egli
  • Book Review – Art of Freedom: The Life and Climbs of Voytek Kurtyka
  • Forest Skis: Innovative, Custom Build, For Backcountry Skiing and Freeride
  • Lighter and Completely Redesigned: New CAMP Ultralight Ski Mountaineering Ice Axes

Categories

  • Contests & Giveaways
  • Crazy Tracks
  • Events & Races
  • Gear, Tech & Food
  • General News & Articles
  • Industry Press Releases
  • Movies & Books
  • News Shorts
  • People (Interviews)
  • Racing 101
  • Reports & Results
  • Reviews
  • Skimo Racing
  • Training, Tricks & Tips
  • Trip Reports & Conditions

Footer

About SkinTrack

Travelling through snowy mountains on skis is like flying… and experiencing life at its core.

Gear reviews, interviews, adventures, contests, skills, skimo training, race reports – we connect you to all things related to self-propelled skiing.

SkinTrack.com, created by Stano Faban, was born out of passion for ski mountaineering and ski touring. Over the years, it has become one of the most popular ski mountaineering blogs in North America.

Recent Articles

  • Kilian Jornet Interview: About His New Foundation, His Own Environmental Impact, and How He Wants To Help Athletes and The Outdoor Industry To Protect Nature
  • How Fast Are Glaciers Really Melting? How Will This Affect Your Mountain Adventures? Interview with Pascal Egli
  • Book Review – Art of Freedom: The Life and Climbs of Voytek Kurtyka
  • Forest Skis: Innovative, Custom Build, For Backcountry Skiing and Freeride
  • Lighter and Completely Redesigned: New CAMP Ultralight Ski Mountaineering Ice Axes

Useful Links

Comparing the lightest: Skis | Boots | Bindings

Skimo Training: Training Plans | Videos

Stay in Touch

  • Facebook
  • Instagram
  • Twitter
  • YouTube

Copyright © 2025 SkinTrack.com. All rights reserved.