• Skip to primary navigation
  • Skip to content
  • Skip to primary sidebar
  • Skip to footer

SkinTrack

  • Lightest Gear
    • Skis
    • Boots
    • Bindings
    • Skins
    • Packs
  • Skimo Training
    • Training Plans + Skimo Manual
    • Transitions Videos
  • Facebook
  • Instagram

Training, Tricks & Tips

Best Terrain for Skimo Intensity Interval Training: Groomed Ski Runs or Skin Tracks?

December 11, 2019 By Stano Faban Leave a Comment

Regularly including various technical aspects of skimo racing in your workouts is crucial to your improvement. ISMF photo.

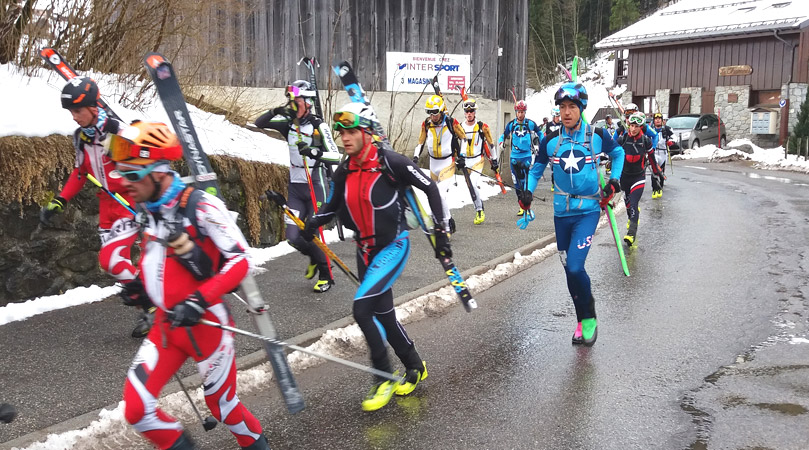
In any competitive sport, once you want to improve your speed beyond a certain plateau, you will have to incorporate regular high intensity sessions into your training (Zone 3 to Zone 5).

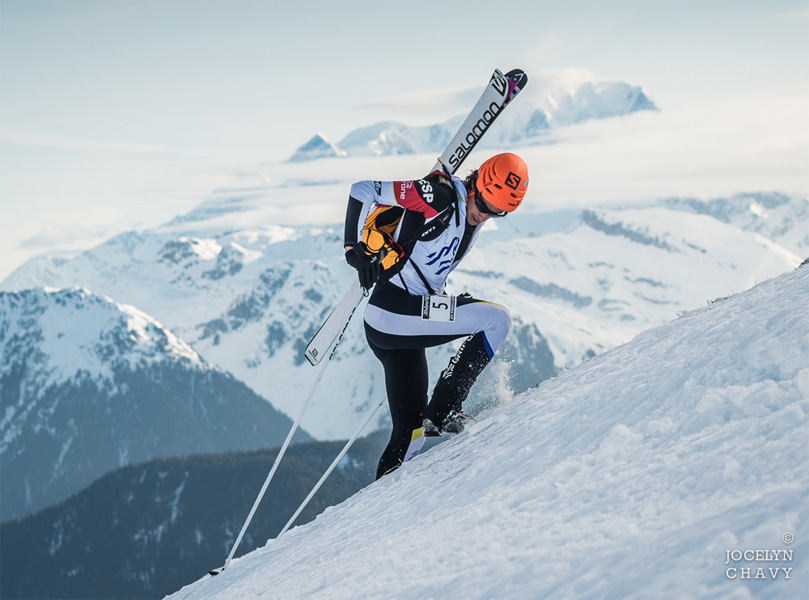
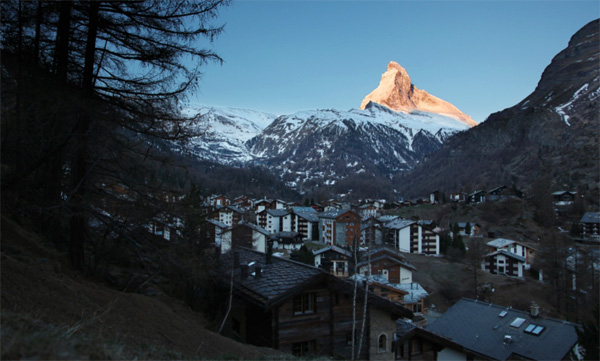
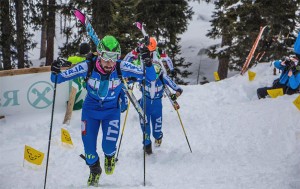
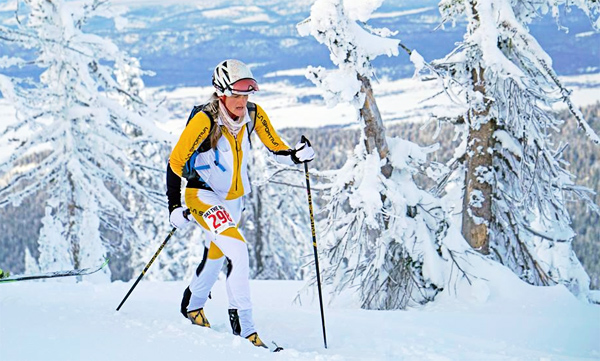
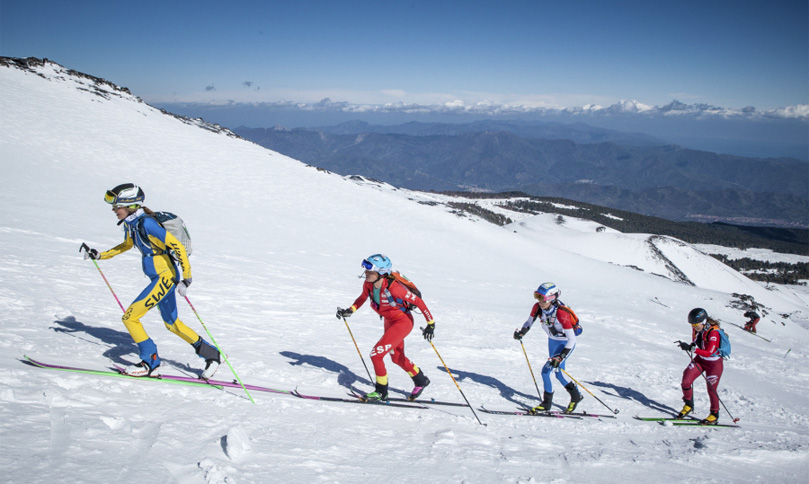
Skimo is no different and its various technical aspects introduce even more complexity compared to running or cycling. Skimo race courses travel across a variety of terrain, with most including technical climbing than just going straight up groomed runs.

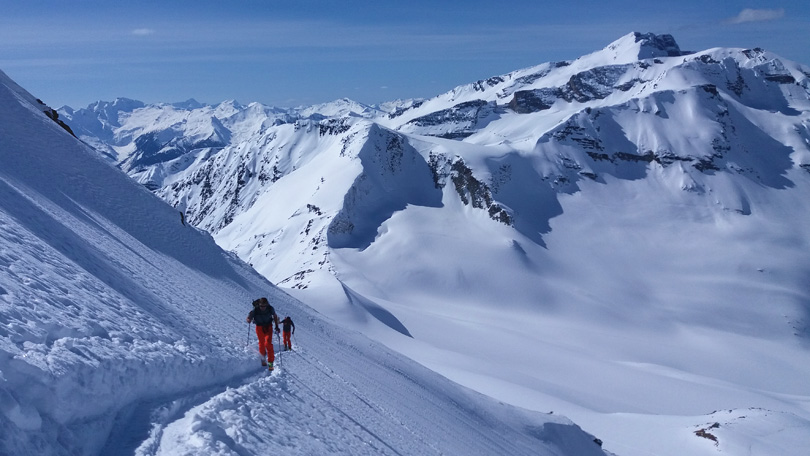
With that, you might be wondering whether you should do your intensity interval workouts on nicely groomed runs or in a skin track?

Comparing Terrain: Groomed Ski Runs vs Skin Tracks

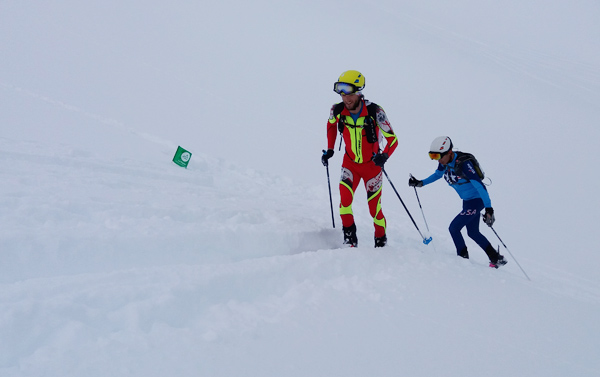
Comparing the two, by looking only at the terrain, the difference is obvious. Groomed ski runs are easy to climb up even for a skimo novice while skinning in a skin track requires more skill, especially, if your are trying to go fast.

Here are a couple of less obvious points how skinning between these two “terrain types” differs:

  • It’s easy to set into a steady rhythm for long periods of time on a groomed run. Skin tracks with switchbacks break your rhythm often, whether that be your breathing or your stride.
  • Having a consistent skin traction and grip on a groomed run is much easier than in a skin track because keeping good balance is less challenging.
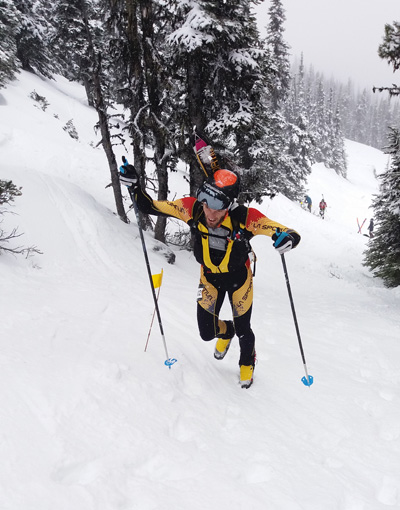
  • Skin tracks usually have switchbacks, thus, your proficiency in kick-turns is crucial to maintaining your speed throughout the climb or high intensity interval.

We can point out more differences but the bottom line is that skin tracks require you to be a much more proficient and technically skilled athlete than groomed ski runs.

Click above to check out our Skimo Manual for proven skimo training tips and advice.

How To Choose The Best Terrain For Your Interval Training?

Now that we are clear on the difference of the terrain types, let’s take a look at how you should decide which workouts to do on groomed ski runs and which ones in skin tracks with kick-turns.

Consider Your Goals and Upcoming Races

The two most important factors when “designing” your intensity workout should be:

  • The goals you have for that workout as part of your overall training goals.
  • What type of terrain you expect in your upcoming important races?

It should be obvious that if you are training for vertical races primarily then performing intervals in skin tracks is not critical to your improvement. In fact, in this case, it might be even be detrimental.

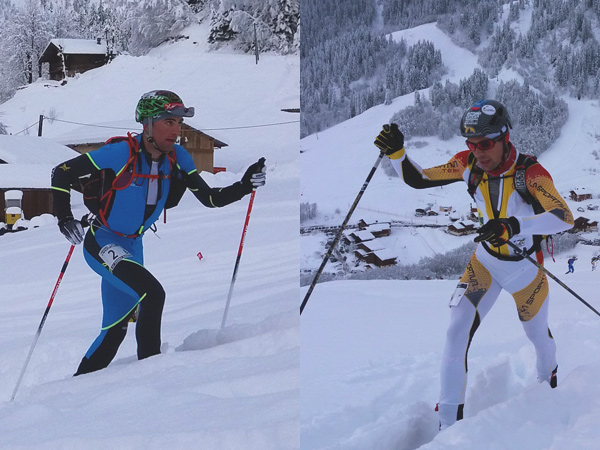
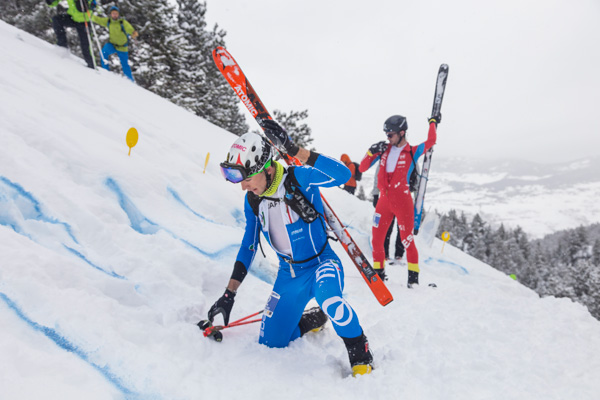
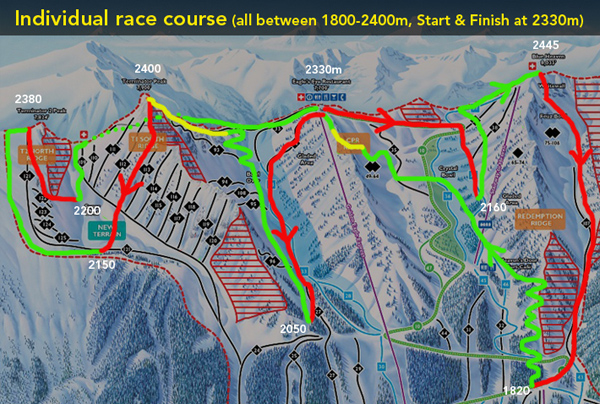
The opposite is true if you are training for technical race or a classic European skimo race like the Pierra Menta. PM’s courses take place almost exclusively in skin tracks and the race includes many technical aspects overall.

Interval Workouts Suitable for Groomed Ski Runs

Early season interval workouts, at least the first few of the season, are best done on less technical terrain, otherwise, you might simply not be able to hold the required intensity for long enough (which is crucial for further progress).

VO2max, or Zone 4 high intensity intervals (5x 5min), are also better performed on ski runs because holding the high intensity for the entire length of the interval is very important in developing your VO2max.

Another example would be maximum speed sprint-style intervals (30x 30sec full-out efforts), it would be counter productive to perform them in a skin track. After all, the goal with these is to generate as much power as possible so it’s best when the snow surface is very supportive and consistent.

Interval Workouts Suitable for Skin Tracks

As already discussed above, depending on your goals and upcoming races, there are times when you can enhance your improvement by performing certain interval intensity sessions inside skin tracks with kick-turns.

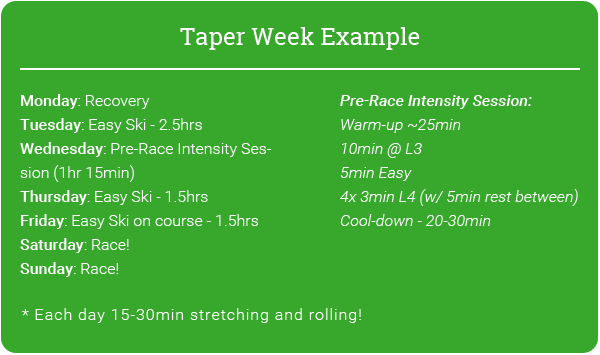
If your goal race is a couple of weeks away and you know it will have plenty of skin track skinning, then completing your long intervals (3x 10min of Zone 3) and your high intensity intervals (5x 5min of Zone 4) using the same terrain as the race course, will make you feel strong and confident when the race day comes.

Once you achieve a certain level of technical proficiency, occasionally moving your interval workouts into technical terrain will continue to enhance your skimo progress. As long as you are able to hold the prescribed intensity, in any terrain, you will greatly benefit by matching the race environment as close as possible.

Click above to learn more about our various skimo training resources and training plans. From interval workouts to technique, they provide you with proven tips and advice to help you improve your skimo racing quickly.

Early Season vs Race Season

Early in the season, the priority of your interval workouts should be on building your engine. Work on your technique during the long, easy Zone 1 sessions. Create the best possible conditions (including terrain choice) for a given workout to gain the maximum benefits for the time you spend. Just like you wouldn’t do Zone 4 intervals using your powder ski gear, you don’t want to choose terrain that prevents you from keeping the required intensity or speed.

As your season progresses and your goal races are approaching, design your workouts around the demands of those races. Unless you want to be a pure vertical race specialist, you will need to develop your technical skills while you are breathing heavily and your balance is compromised. Besides, the technical aspects are what makes skimo so appealing and interesting.

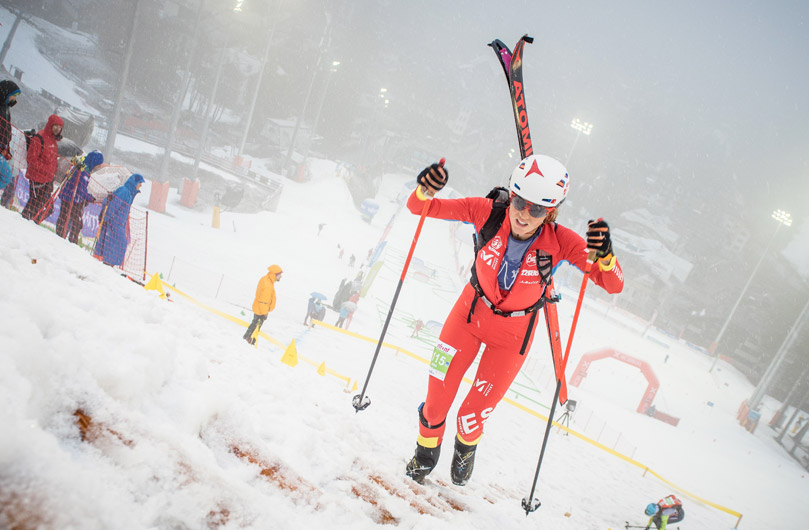
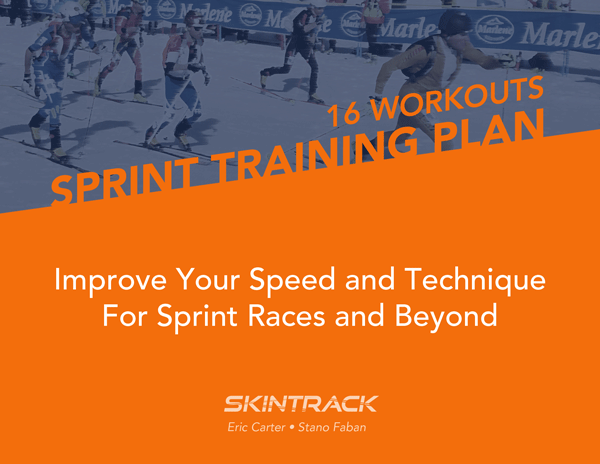
Sprint Race Training

Skimo sprints are a special kind of races that require great technique at high speed in quickly changing terrain.

They seem simple at the first glance because they take only 3-5min, however, even without considering the many transitions, a sprint race is arguably the most challenging event to perform successfully on consistent basis.

With that, performing high intensity intervals on sprint-like courses is one of the best ways to improve your skimo skills quickly. Anything done well at high speed will be much easier to repeat when your heart rate is lower. So even if you don’t participate in sprint races, you can greatly benefit by incorporating aspects of sprint races into your training, it is a very efficient use of time.

In few days, we will be releasing a unique sprint and speed development training plan that will give your interval workouts an extra boost and maximize your time. Stay tuned!

Filed Under: Skimo Racing, Training, Tricks & Tips Tagged With: interval training, skimo training

How To Effectively Train Boot-packing and Running Technique for Skimo Racing

November 8, 2019 By Stano Faban Leave a Comment

Kilian Jornet on a way to winning his fourth Pierra Menta. Photo by Jocelyn Chavy.

Technique for boot-packing and running seems fairly straightforward since walking and running are the most natural movements to humans. However, several critical details do make a difference in efficiency.

The weight of the ski boots, loss of ankle agility, snow and handling of the ski poles all add to the complexity of simple movements we are born to easily master.

Training for effective and efficient boot-packing for longer (slower) races should be somewhat different from training for fast sprint races and running so we are discussing each on its own.

This article is an excerpt from our Manual For Ski Mountaineering Racing ebook.

Boot-packing for longer races

Usually, in longer races, boot-packing is up a steep slope with skis attached to your backpack. The important thing is that you use double-poling technique for this – planting both of your ski poles at the same time.

How to train:

Find a safe, steep slope (30+ degree) where you can set up 30-100 m (100-330 ft) vertical boot-pack. The right snow density for setting up a boot-pack track should allow for at least half of your boot’s sole to form a step.

Perform 3-6 climbs during which you double-pole on every third or fourth step.

Throughout the first half of the arms motion, you are using your arms for pulling, while in the second half (once ski poles’ handles are below your shoulders) you are using them for pushing, finishing with a full extension.

Intensity will be dictated by terrain but you can easily incorporate such a boot-pack section into your tempo intervals (zone 3).

It’s less suitable to incorporate these into your VO2 max intervals (zone 4) because of the time required to transition unless you are planning on performing the whole interval by boot-packing.

What elite racers do:

All elite racers use the double-poling technique during a boot-pack. They plant their poles, hunch themselves with their heads tilted down, then pull and push with force while their feet are doing three to five steps in one cycle. Their cadence (step frequency) varies greatly depending on the slope angle and depth of the track.

Boot-packing for sprint races

During boot-pack sections in sprint races or short (or lower angle) boot-pack sections in longer ones, the technique is the same as described above but since it’s performed on much shorter climbs, the cadence is higher as well as the force that is used for double-poling.

ISMF photo.

How to train:

Find a safe, 30-40 degree slope that will accommodate a 15-30 m (50-90 ft) vertical boot-pack. The snow should be fairly hard as the ideal foot penetration depth for good steps shouldn’t be more than just above your boot soles.

Perform 6-10 climbs with the double-poling technique described in the “boot-packing for longer races” above, but with your arms maximum force pulling and pushing on your poles while running (not walking) up the track.

These should be maximal speed efforts, so heart-rate intensity is not important, with about 1-2 minutes of recovery between the climbs.

What elite racers do:

All top sprint racers are very fast going up short boot-packs, covering four to six strides per every powerful double-poling cycle with a cadence of around 90-100 steps per leg per minute.

In the video below, around 30sec and 1min 30sec, you can watch elite racers running up during a sprint race at the 2019 World Championships.

Running in skimo races

Some races have flat or almost flat sections that are covered on foot (with skis on the pack) that could be on snow or on dry ground (gravel, pavement, grass). These sections are covered by running.

How to train:

To train for running on the snow, complete 6-10 maximal efforts of 10-15 seconds with 1-2 minutes of active rest between.

Use double-poling technique and lean into the stride, just like you would running in shoes, planting your poles far ahead of you and doing about 6-8 strides per double-poling cycle.

Best is to practice on groomed or hard-packed snow with minimal or no foot-penetration.

To train for running on dry land, complete 5-8 efforts at speed of zone 2-3 intensity and 10-20 seconds in length with minimal or no recovery. For these, you can carry poles in your hands without using them for half of the efforts while double-poling during the rest. Avoid doing these at your maximal speed as running on dry, hard ground in ski boots is quite taxing on all your leg joints. The ideal surface is grass or soft-packed dirt.

What elite racers do:

On-snow running sections are regularly featured at the top of boot-packs at various levels of competition, while dry-land sections are almost exclusive to long races that are in the spring months such as Pierra Menta, Patrouille des Glaciers, etc.

Top racers perform double-poling during the on-snow sections and usually carry their poles on dry land to prevent from breaking their pole tips.

Filed Under: Skimo Racing, Training, Tricks & Tips Tagged With: boot-packing, skimo technique, skimo training

Planning Your Training for Your Next Skimo Season

October 5, 2019 By Stano Faban Leave a Comment

Are you ready to ski yet? We bet a lot of you are. After all, the snow has been flying already.

We are proponents of planning your next season as early as May or June, however, unless you are shooting for the stars, you will most likely delay this until some version of the season’s racing calendar is out.

This is not a complete flop by any means as long as you are staying active throughout the summer. If you happened to mix in some racing then even better.

You might have heard Kilian Jornet say that he doesn't follow a structured training plan and trains more by feel. However, he still plans around his goals and does this after many years of high level experience.
You might have heard Kilian Jornet say that he doesn’t follow a structured training plan and trains more by feel. However, he does this after many years of experience and still plans around his goals meticulously.

Establishing Facts: Things to Consider

To come up with a reasonable plan for your next race season, it is wise to evaluate a couple of important things:

  • What are my goals? (races and adventures)
  • How long do I have to get ready for them?
  • Where is my fitness right now?
  • What do I need to do to be at my best at the right time?
  • Do I have all the gear in place?

While the above should be figured out as soon as possible, the below still have some time:

  • Where are my goal races located?
  • Are they at altitude?
  • Will they require significant travel to attend?
  • How will this impact my training and life?
  • Can I share race trips with friends?
  • How much will these trips cost?

Planning Your Training Around Your Goals

Now that you have realized some truths and set some goals, you can start planning how to incorporate the necessary training. Having a full time job doesn’t make it easy but most of us have that responsibility so you are in no disadvantage.

With a well thought out plan you can make big performance gains without having to commit to 3-4h of training every day.
training-plans-banner-600x260
Drafting your training plan should start from the end and working backwards from your goal race (or race month) to the present. Analyze what demands (physical, technical…) your goal race will require of you. Is it a sprint, two hour individual, or a long teams race?

Beyond that, you also need to keep in mind that effective training should have continuity, progress, and variety to gradually make you improve to the desired level.

With all that in mind, here’s a simple example of how you can come up with a reasonable plan:

  • Goal event: January 27, 2018
  • Taper 1-2 weeks out
  • Focus on intensity 2-8 weeks out
  • Focus on strength and endurance 9-16 weeks out

From there, you can start planning your individual weeks and even workouts.

First, identify 1-3 goals for each period or week and then choose two primary workouts per week that help move you towards the goals. These are your “bread and butter” workouts and should be the priority. Once these are identified, fill in the rest of the week with the secondary goals and overall endurance work.

Secondary Considerations: Recovery and Nutrition

If you have been training for few seasons or following SkinTrack, you know that actual training is only one part of the whole puzzle. Recovery is equally important, especially if you have a demanding job or family commitments to consider.

The only way to improve is to adapt to higher (more demanding) training loads. To adapt you will need to strategically schedule recovery days and weeks into your plan. While this can be highly individual, there are some conservative general principles such as building your training load for three weeks followed by recovery period of one week, as well as having at least one full day-off each week.

Another factor affecting your rate of adaptation and improvement will be your nutrition. You do not need to obsess but eating mostly unprocessed foods and avoiding most junk food will be highly beneficial. You can also boost your caloric and protein intake during the most demanding weeks. Basically, if your body asks for more then eat more. We don’t mean ice cream though 🙂

Help with Planning

If you would like to follow a specialized skimo training plan and can commit 6-9h of training per week then we have designed such a plan last year – 12-Week Skimo Training Plan.

Besides that, you can get a deal on a package by combining the training plan with our Manual For Ski Mountaineering Racing e-book from which you can learn about all aspects of our sport, plus improve your transitions skills by learning from our videos.

Filed Under: Skimo Racing, Training, Tricks & Tips Tagged With: skimo training, Training

Roller-ski Training For Skimo: Video, Drills and How-to tips

August 15, 2018 By Stano Faban 1 Comment

Should I be including roller skiing in my summer and fall skimo training? And what should I even be doing?
If you have been wondering about the benefits of roller-skiing as part of your fall skimo training then we have some how-to tips. Eric provided most of the advice while Stano added some details as well. And we even shot a video to show you some drills 😉
For full descriptions of drills in this video, read the lower part of the article.

Who should consider roller skiing for skimo?

Before we get into specifics, let’s find out who will benefit the most and who can get by without it.
For most recreational competitive skimo racers, the best summer and fall training option is your favourite summer sport. Trail running, mountain biking, cycling, paddling and others provide excellent training stimulus that translates pretty well over to winter skimo fitness, especially when combined with a bit of skimo-specific training early in the season. Generally, for these athletes, we don’t recommend roller-skiing as a must.
Highly competitive athletes, for whom skimo racing is their primary sport and specific training occurs year round, might consider using roller skis in specific workouts to supplement their summer training. This group will reap the most benefits, especially if they need to perform at high levels from the very beginning of the skimo season.
callaghan-roller-skiing-2

How to choose and setup your roller skis for skimo training?

First, choose a pair of roller skis that is designed for classic skiing and not skate skiing. This means that the rear wheel has a racket that allows it to only roll forward. This will allow you to mimic a skimo stride as if you were on snow using skins (gliding only forward).
Some athletes mount the roller skis with a tech binding toe pieces, thus, allowing them to use their skimo race boots. This seems like a good idea, as it is more sport specific, but in practice it’s not the best option for everyone. The primary issue is that skimo boots are much longer than cross country ski boots, therefore, especially for guys with big feet, the toe piece must be mounted further forward to fit on the roller ski. That affects balance of the ski, impacting both technique and downhill ability. Without space to mount a heel piece, having only a toe piece to hold you into the ski, means that descending is extremely dangerous. Skimo boots are also much warmer than a cross country ski boot and with increased sweating your feet will be more prone to blisters.
oneway-roller-skis
Since we don’t see significant upsides to using a skimo boot, we recommend athletes use a classic cross-country (xc) ski boot and binding. These can be found pretty cheap at ski swaps and if you are buying a used roller-ski, it likely already has a binding. A slightly less supportive xc boot will also exercise your ankle stabilizing muscles and strengthening them in the process.

Terrain for skimo roller-skiing

The challenge with roller-ski training for skimo is finding the right terrain. Cross country ski terrain is rolling and fast, yet skimo is all about the long and comparably steep ascents.
While rolling country roads are ideal for simulating long cross country skiing stride, very few paved roads are built steep enough to replicate the grade of ski mountaineering racing tracks. If you are lucky to have a hill that is long and steep enough to properly mimic skimo technique, it might be quite the challenge to descend. Alternate methods of descent may be necessary such as hiking down, pre-placed bike, hitch hiking, etc.
Quality of the paved surface is important as well. Just like for roller-blading, the best surface is smooth paved road without much debris on it. However, these days you can also buy “off-road” roller skis with bigger wheels that perform quite well on gravel roads or less smooth pavements.

Maximizing the training benefit and Specific workouts

After the rant above, we recognize that roller skiing is not completely worthless so let’s discuss some specific details if you want to incorporate into your training.
training-plans-banner-600x260
Zone 4 intervals:
Even a short steep hill can provide a good place to do short, hard intervals (something like 6 x 3 min in Zone 4). These intervals can be used in the intensity phase of your training and will serve to help sharpen both your anaerobic threshold as well as your ski-specific upper-body strength.
Technique and strength drills:
Roller skis are also useful for ski-specific core and upper body training. By double poling instead of striding, it becomes a much more core-intensive workout. One of my favorite sessions is a ski-specific strength workout on a flat or slight uphill that includes 10 x 30sec of “single-stick” alternate poling (a striding motion using the arms but not the legs), followed by 10 x 30sec of core-only double poling, and finishing with 10 x 30sec of full body double poling (a crunch motion that cross country skiers use on flats).

Final advice

Our advice for most athletes is that it is not worth the time and expense to include roller-skiing in your summer training. Most will see more gains by sticking to their primary sports and adding a skimo-specific strength routine in their gym strength sessions – see our Manual For Ski Mountaineering Racing and 12-week training plan for skimo strength routine and more detailed winter training.
For some athletes, however, especially former cross country skiers who already have the equipment, roller skiing can be a useful but still somewhat small component of their overall training for skimo.
And be careful on those descents! 🙂
 

Filed Under: Skimo Racing, Training, Tricks & Tips Tagged With: roller-skiing, skimo training

Essential Tips for Preparing to Race Patrouille des Glaciers in Switzerland

March 2, 2018 By Stano Faban 5 Comments

It’s that time of year when days are getting longer so we can start thinking of big days in the mountains instead of just storm skiing and occasional resort laps. For skimo racers, this means thinking about the classic races, the Grande Course events.
One of the biggest and oldest is the Patrouille des Glaciers (PDG) that goes from Zermatt to Verbier in Switzerland. The 75 year old race covers 53 km and accumulates 4000m+ of climbing along the classic Haute Route, with approximately 3000 participating each year!
This year, we will be watching closely as several North American teams are attending the 2018 edition and we have put together some tips to help teams prepare for this big event in the future!

Athletes arriving in Verbier. Photo by PDG.

Getting There

Getting there is the first hurdle that athletes must tackle. Once a team has been selected for the race, they don’t have to worry about accommodation the night before. However, it is wise to head to altitude prior to the race (more on this later) to acclimatize.
Geneva, Switzerland is the closest major airport. Rent a car from the “French Sector” of the airport where rentals are MUCH cheaper, but be aware that driving on the autobahn (freeway) in Switzerland requires your car to have a vignette sticker which costs around 40 Euros. If you rent from the French side, your car likely will not have a vignette. You may get away driving from the airport to Zermatt without one, but you may get stopped at the border and forced to buy one. Pleading ignorance will hopefully prevent a fine.

Legendary village of Zermatt with the arguably the most iconic mountain in the world in the background. Photo by PDG.
The town of Zermatt, where the race starts, is actually off limits to cars. Additionally, the start and finish are in two totally different areas. For a team with no support crew and traveling by car, it can be difficult. We suggest parking a vehicle in the medium-sized town of Martigny, from here it is a short train ride to both Zermatt, for the start, and from Verbier at the finish.
There are festivities all along the course. Photo by PDG.

Staying Healthy

Another important component of preparing for such a big race, especially in combination with traveling from North America to Europe, is staying healthy.

  • Don’t try to make up training in the last two weeks for the race, you should be doing that now.
  • Use care on public transit – wash your hands often while flying and taking the train.
  • Schedule your flights to help with your jet-lag by flying overnight.
  • Spend as much time at high altitude (above 2000 m) as possible, focus on training easy, and to practice your downhills.
  • Eat healthy and sufficient calories. Don’t try to loose weight!
  • Sleep enough and well!

Tips on Dealing with Jet Lag

Because of the length of the race, the start takes place VERY early in the morning. Don’t expect to get great or a long enough sleep so do your best to rest well in the days leading up to the race:

  • Arrive in Europe with plenty of time to overcome jet lag and optimize your sleep schedule (early to bed, early wake-up).
  • Sleep lots in the nights preceding the race.
  • Use an eye shade and ear plugs if needed.

How Long Will it Take?

Finishing times in such a long race vary wildly so your best bet is to simulate about 1/2 to 2/3 of the distance and elevation gain in your training to figure out how long your team might take to finish. With that, you will be able to figure out how much food and water you will need to bring as well.
Current men’s course record was set in 2010 by a very strong Swiss team with a finishing time of 5h 52min. Women’s record stands at 7h 27min and was set also, by historical standards, by a very strong team in 2014.
We expect that most male North American teams can finish in around 8-12 hours and female teams in around 10-14h.

Swiss army is involved every step of the way with approximately 3000 members preparing and marshaling the course. Photo by PDG.

PDG Race Logistics

Bring only what you need for the night before the race and the race itself to Zermatt. The organizers will only transport a small bag to the finish for you. It’s best to leave your big suitcase in the car if possible.
The race often starts on foot in town. Depending on the length of the dry segment, you may wish to bring or buy a pair of cheap sneakers to run the first section in. When you switch to ski boots, you can leave the shoes with the race staff who then donate them.
Checking in is a long process. Arriving in Zermatt by train the day before the race, you will feel as though you walked into the skimo centre of the universe. Walking down the main street, crowded with other athletes, army members working for the race organization, and tourists will be very unique. The crowds are funneled towards the town’s rec centre where check-in takes place. Be prepared to show each piece of your equipment to have it individually approved – the Swiss military is very thorough. If you are missing anything, vendors are available on site to purchase equipment from but be warned, the prices are in Swiss francs and are raised for the race. Avoid buying in Zermatt, try to buy gear elsewhere prior to arriving.

Most big races in Europe begin either with marching band or in with a mass in a church. Photo by PDG.

PDG Route and Roping Up

Because it is the Patrouille des Glaciers, you will be traveling on glaciers with crevasse danger. This necessitates that racers rope up for much of the itinerary.
The race organization will indicate where you must rope up and when you can take it off. You must have at least 30m, 8.5mm half rope. If you have a 29.5m rope, you will not be allowed to use it when you check in!
The PDG does allow teams to use bungee devices to make skiing with the rope easier. This makes a huge difference as it prevents the rope getting tangled in your skis:

  • Purchase 3 or 4mm bungee cord from a sport shop. Two 10m sections should be plenty. Also purchase a big bag of zip-ties.
  • The idea is to stretch the bungee out completely tight alongside the rope and then zip-tie them together in about 10-15cm segments.
  • When the bungee relaxes, it creates small loops in the rope. This keeps the rope from going completely slack and then getting tangled in your skis.
  • You don’t want the ENTIRE rope attached to the bungee. Leave ~2m at each end and in the middle normal so you are able to tie in.
  • Practice tying into the middle of the rope without using a carabiner (and with gloves on).
  • Practice skiing with the rope/bungee prior to the race with your teammates . It takes a LOT of time getting used to it!
  • You will have to remove the bungees from your rope to check in with the military and then reattach it afterwards.

Once you’ve checked in and been given your bib and hotel assignment, grab some Rosti (a Swiss specialty) in a nearby cafe and then check into your hotel.
The race briefing takes place in the evening. It’s a busy affair with a band and many speeches in multiple languages. It might be wise to have only the most responsible teammate attend the meeting while the others prepare for the race. A French speaker will come home with the most information but critical details are given in English as well.
For a feel of history, check out this silent 18min movie from the 1945 race after you finish this article:

Altitude Acclimatization

Altitude at the PDG is a serious issue (with much of the route above 2500 m), unless you live in Colorado. It is advisable to spend time at altitude to acclimatize before arriving for the race. We don’t however suggest you do this in Zermatt because of the cost. Just on the other side of the Matterhorn lies the Italian resort town of Cervinia which is much cheaper and still allows access to high mountains and the race course. Similar altitudes can be found in the Avoriaz and other areas in France.
A full acclimatization schedule of arriving two weeks prior to the race will allow sufficient time to get used to the altitude, overcome jet lag, and prepare equipment and team tactics. If you cannot do that then plan to arrive at least 5-6 days prior to deal with jet lag, but make sure to spend time at altitude at home.
» For detailed tips on altitude acclimatization read our older post  – How to minimize effects of altitude on skimo racing performance

Fueling Before and During the Race

Finally, fueling is a critical component for such a long race. While getting outside assistance at specific points is possible there are no feed zones, so you must arrange your own support group or do as follows:

  • Eat as much as is possible the days before.
  • Wake up early enough to eat a large breakfast and digest it before the start.
  • You will be issued one Army Milk Chocolate bar at check in but don’t count on that during the race.
  • Make sure you have both liquid and solid calories to last you through the duration of what you expect the event to take.
  • You don’t want to, at most likely you won’t be able to, do the whole race on gels only – pack in some bars, chocolate, and even smoked sausage for a change of taste 🙂

Train and Practice

There are many fine details of preparing for a big race such as Patrouille des Glaciers but arriving in Zermatt in your top form and fully proficient with your gear will set you up for success. We want to recommend our own Manual For Ski Mountaineering Racing e-book and our skimo training plans as  we truly believe they are the the best English resources on the subject of skimo racing.
Commit, train hard, and have a blast!

Filed Under: Skimo Racing, Training, Tricks & Tips Tagged With: Patrouille des Glaciers

New Training Plan Release: 8-Week Sprint and Speed Development Training Plan

January 11, 2018 By Stano Faban Leave a Comment

While our social media accounts were dormant over the Christmas, we were working hard on finishing our newest 8-week skimo training plan!
Eric and I did lots of thinking in the fall and we decided to create a different kind of a training plan.
Unlike our 12-week Novice and Intermediate plans, that prescribe specific training for each day, with our Sprint and Speed Development Plan you will be able to “plug-and-play” 16 specialized interval and technique workouts into your already existing training. Alternatively, you can design your own weekly schedules around them.
This new plan also features 14 detailed skimo specific strength training workouts to further maximize your speed gains.
SPRINT-plan-cover-600x464
 

Is this plan only for sprint races?
Why there are no daily workouts?

Originally, we set out to design a training plan specifically for sprint races and follow the traditional format of prescribing daily sessions over a period of weeks.

Regularly including various technical aspects of skimo racing in your workouts is crucial to your improvement.
But we changed our mind half way through the creation process for three reasons as we realized this plan can have much more application than for the pure sprinters.
Reason #1:
20% of workouts create 80% of improvement:

While it’s not enough to train only 2 days a week to keep improving over long period of time, there really are only 2-3 key sessions each week that will deliver you the majority of results.
With that experience in mind, we decided to provide you with two highly detailed key workouts per week, and give you guidelines on how to design the rest of the week around your personal schedule.
You can complete the 16 on-skis workouts in this plan over an 8-week period, and you can keep using them into the future as you will have a “library” of very specific skimo sessions at your disposal.
Reason #2:
Specific and focused training is the most efficient way to improve overall:

Sprint events are the shortest of all skimo disciplines but they are the most difficult to prepare for in order to deliver a consistent performance.
Highly focused workouts, including both intervals and technique, are required as the sprint event packs all aspects of skimo in only a 3-4 min race.
This type of training transfers well into longer races too.
Reason #3:
High-intensity sessions greatly benefit even long distance athletes:

While interval workouts designed around Zone L3 (your anaerobic threshold) are essential to improve performance for longer races – such as individual, vertical and teams race – there is lots of sport science research that proofs mixing them with even higher intensity sessions will be more efficient use of your time.
Your body needs a variety of stress to keep improving if you don’t want to get stuck at a plateau, or when you have limited time to train but still want to progress.

Sample workout from the plan

Intervals: 2x 8min of 30/30sec
Goal & Focus: Leg Speed Turnover and Technique
Terrain: Mostly flat or slight uphill, on-piste
Overall Time: 65 min
Description: Do a 20min warm-up on uphill or flat. This is a fast “30sec on and 30sec off” workout to focus on kick and glide, and high frequency leg turnover. Priority is to maintain good technique and stride through the entire workout. Rest 8-10min between the two sets…

Learn more

To learn more about this newest plan visit 8-Week Skimo Sprint and Speed Development Training Plan.
If you are interested in our Manual For Ski Mountaineering e-book as well as this plan then check out this package page to get a special price.

Our 12-week training plans

Since the release of our 12-week Novice and Intermediate Level skimo training plans, we have been receiving a positive feedback from those that are following them.
If you want daily guidance or want to follow a plan for a longer period of time then learn more about these plans at our skimo training resources page.
NOVICE-plan-cover-600x464
 
INTERMEDIATE-plan-cover-600x464
 

Filed Under: Skimo Racing, Training, Tricks & Tips Tagged With: interval training, skimo training

Short and Long-term Skimo Training: Training to Train vs. Training to Compete?

November 28, 2017 By Stano Faban Leave a Comment

It’s appealing to follow the top athletes in our sport as many post all of their training on social media like Strava. It can be also incredibly tempting to try to mimic what Kilian Jornet or  other skimo stars are doing but it would be at a very high risk of failure, injury, or burnout.
While a few select athletes might be able to match the training of the pros, the vast majority of us have jobs, families, and other activities that occupy the portion of our life that pros dedicate to training and more importantly to recovery.
Aside from having the time and resources available to train and recover, it’s important to remember the training base that a professional athlete has to support their current training load. Training is cumulative, especially if volume is maintained consistently.

dfg
Damiano Lenzi (left), age 30, is the current World Champion in both individual and team races, consistently challenging the legendary Kilian Jornet, age 30. Both have accumulated lots training volume over the years. William Bon Mardion (right), age 34, has been known to focus more on quality over quantity and has also reached an impressive collection of victories – but remember he still accumulated a lot of volume in the process.
A 30-year-old professional endurance athlete has probably been training between 700 and 1200 a year for 15 years! The average recreational competitive athlete may have less than half that number of hours in their “training bank”. The accumulated hours provide a support system for the training currently being completed – imagine a pyramid with all the training hours building the base, and the current training load as the very top.
The training bank needs to be maintained both on a long-term scale (many years of training) and on a smaller scale within the training year (maintaining consistency and using sound periodization throughout the year).

Long-term Progression

I’ve found a concept developed by the Canadian Cross Country Ski Federation for their long-term athlete development program to be very useful. During their development, athletes go through stages, one of which is “training-to-train”. This is the process of building a large training bank and is followed several years later by the stage “training-to-compete” where the athlete is focused primarily on training to be as fast as possible.
Ultra-running athletes often find that the volume and intensity of training required to merely complete their first ultra-marathon is considerably more than that needed to complete successive races and also find the recovery period post-race to gradually decrease. This is a good example of transitioning from training-to-train to training-to-compete on a multi-season scale.

Janelle Smiley, racing to first place, spends lots of time moving in the mountains thus by default accumulating big training volume. Photo by Eric Hoff.
Janelle Smiley, racing to first place here, spends lots of time moving in the mountains thus by default accumulating big training volume. Photo by Eric Hoff.
I find it is also important to keep this concept of progression in mind within a single season. For athletes focused on skimo as their primary sport, the summer is primarily base building. At the end of the summer and beginning of the fall, it’s time to build up the intensity training (training-to-train) that will allow you to complete the workouts done when winter begins, that will actually build your race fitness (training-to-compete). Once the race season begins, you enter a new phase where fitness is maintained and racing itself becomes the main priority!

Early Season and How to “train to train”?

Hopefully you’ve been building your training volume through the summer so that by the time fall comes around, you are at a good amount that you don’t need to build too much the rest of the year. It can however be a good time to put in a few final big volume building periods to get up to the level you’re expecting. It’s also a good time to start to focus on skimo specific type training – prioritize uphill training and consider adding roller skiing!
Finally, this is the time to add the interval sessions that will enable you to do even harder intervals in the training to compete period. Focus on longer tempo efforts in the 10-30 minute range with a few short threshold sessions.

Winter Season and How to “train to compete”?

This period is no longer about building volume. Instead focus on adding longer intensity workouts at threshold pace and above. Training should be 100% sport specific and carried out on skis as much as possible. Strength training should be focused on max strength tolerance for downhill skiing.

Training Smarter

Train smarter, not harder. Plan your training progression and give yourself time to train-to-train and then train-to-compete. You will not only be better prepared but also be less likely to experience an injury or setback.
Remember that the pros have also had a lifetime of training-to-train and that matching their training plans is not advisable.

Filed Under: Skimo Racing, Training, Tricks & Tips Tagged With: Damiano Lenzi, Janelle Smiley, Kilian Jornet, skimo training, William Bon

Important Differences Between Training Volume and Training Load in Skimo Training

November 12, 2017 By Stano Faban 2 Comments

How can two training plans be the same overall volume but be designed for two completely different athletes? How can we quantify training in a sport where the track is always changing?
skimo-training-volume-and-load
You may recognize a few (or all) of the below terms from various training resources. They all refer to the same concept, that of training load or how much work was done during a training session:

  • Intensity Factor
  • TRainingIMPulse (TRIMP)
  • Recovery Time
  • Suffer Score
  • Training Effect

In skimo, we can measure training time, distance of an activity, or vertical ascent. We can also measure training intensity by looking at pace, heart rate, and other measures. Individually, these measures are not particularly useful in telling us the value of our training but combined as training load, we get great insights about what benefits we will see.
Knowing only the distance completed per week is interesting but it doesn’t tell the whole story. If all you know about two athletes is that they each run approximately 40 miles per week, you might assume that they were similar fitness or had similar goals. In reality, a sprinter might run 40 miles per week but primarily on a track at a high intensity while a novice training for their first marathon might run the same amount over a much longer period of time at a very low intensity.
By combining volume (in this case distance) and intensity (in this case pace) we get an idea of training load – how much work is being completed as well as the physiological demands being placed on the athletes and the anticipated effects.

Measuring and Calculating Training Load in Ski Mountaineering

In ski mountaineering racing, pace can be a difficult factor to work with. The variable nature of the snow surface means that pace and intensity are not very well correlated (compared to a sport like road running where pace is highly correlated with intensity):
Deep, fresh snow means an athlete may be working at a high intensity but traveling very slowly and covering little distance. A well groomed low angle piste allows for very quick but fairly easy travel. Also, distance is relative, especially if descents are included in the calculation! For this reason, heart rate becomes the best measure of training intensity that can be easily quantified for skimo.
training-plans-banner-600x260
To measure training volume in skimo, distance is not useful for the reason described above. Vertical ascent is much more appropriate but still significantly influenced by changing snow conditions. Time is the best volume variable to work with.
The rise of modern GPS and heart rate enabled training watches have enabled us to collect a big amount of data on every session as most watches and their accompanying analysis software allow athletes to define their heart rate training zones. Then workouts can be broken down by intensity level: 30 minutes spent in Zone 1, 25 minutes in Zone 2, 18 minutes in Zone 3, or similar.
Each of the training load terms at the beginning of the article take the time spent in a Zone and assign it an intensity value, and then add up the time in each Zone to get a total training load number. The simplest way is to give Zone 1 a value of 1, Zone 2 a value of 2, and so on. From our example before the calculation would be as follows:

  • 30 min of Zone 1 = 30
  • 25 min of Zone 2 = 50
  • 18 min of Zone 3 = 54

The total training load value for the workout is then = 134. For a simple comparison, a two hour workout entirely in Zone 1 would have a training load value of 120, thus, considered physiologically less taxing.
Most estimates of training load use more complicated intensity values that give each successive zone a smaller value so the low intensity zones are not undervalued, but that’s a topic for another post.

Training Plan Progression: Training Volume vs Training Load

Just like the training load of a workout can be calculated, the training load of a week, month, or entire training year can be determined. When developing a training program, it is important to look beyond just the total volume.
Is there a very little intensity (Zone 3-4) training or do you see a lot?
Who is this program designed for?
A novice training program may include a small amount of high intensity training. As the program increases in difficulty and a base volume is reached, volume might remain constant while total high intensity training time increases. In this case, overall volume (measured in time) stays the same but the training load increases, and new fitness levels are achieved!

Filed Under: Skimo Racing, Training, Tricks & Tips Tagged With: skimo training, Training

Mental Skills for Racing: Visualization

February 22, 2017 By Stano Faban Leave a Comment

Mental training is a commonly overlooked aspect of preparation for athletic competition. At best, most of us use only a few mental skills to cope with the difficulty of training and racing. In this article, we will take you through a few skills that will come in handy during a skimo season.

What is Visualization

Visualization is a method for practicing skills without actually physically performing them. It’s possible to use to practice technique (including transitions), overcome distractions, and prepare for more general race situations. Visualization training requires nothing more than a quiet space and some free time. Many strategies exist for visualization and the following are some that work best for us.

Lenzi leaving for a boot-pack in front of Jornet. ISMF photo.
Perfecting transitions through visualization is very effective. ISMF photo.

Preparation

Start by identifying visualization scenarios in three categories: Techniques, Distractions, and Racing Situations. I like to write things down so I start by dividing things I want to practice into three columns with the above categories as the title.
Technique visualization is used to develop a specific skill. In skimo, transitions are a good example of a technique that many of us need to improve and in which visualization can be employed.
Distractions are any type of adverse event in a race from which you must recover. A crash, a failed skin, or a frozen water bottle are all possible examples of distractions.
Racing Situations are more general, such as a start of a race, passing a competitor, skiing a difficult descent and so on.
In each column, on your piece of paper, write down as many scenarios of possible visualizations that you can think of. They can be specific to a single race or general to the racing environment. Once you’ve identified a handful of each, choose one at a time to visualize. I try to only do one or two scenarios per visualization session so they can remain clear in my mind rather than confused with many. You can do your visualization entirely in your head or write down some prompts (action steps). Notecards can be useful, writing the scenario on one side and then written prompts taking you through the visualization on the other – this way you are building yourself a library of scenarios and actions for future reference.

Visualization

There are several important things to include in the visualization process but most important is that it is as polysensory and positive as possible:
Polysensory refers to including as many senses as possible. While visualizing, you should not only see the scenario but also feel it. In a racing situation, this might include a cold, biting wind, fatigued legs, and the taste of blood from exertion! Include as many physical sensations and environmental conditions as possible.
Positive means that all visualizations should be resulting in a positive outcome. If you visualize yourself failing, you are setting yourself up for failure. Instead, always visualize yourself at your best! In the case of visualizing distractions, while you are initially experiencing something negative, through the course of the visualization, you should be realigning with it in the best possible manner and reversing it into something positive. A good way to think about it is to consider the problem or distraction and then think, if my coach was standing next to me right now, what would they say? You will picture the best version of yourself in that scenario.
Visualization can include a combination of 1st and 3rd person perspective. Some athletes like to see things through their own eyes while others like looking from above and seeing their body move through the action. I believe a bit of both is best – 1st person allows you to best feel the physical and emotional sensations while 3rd person allows you to see your body acting perfectly.
Finally, visualization should include all the emotions associated with that particular scenario. If you are visualizing a distraction, try to internally feel the frustration and panic initially but then regain composure and experience the confidence as you quickly act to correct the problem and finish stronger than before.

Putting it all together

Here is a particular situation (starting a race) and my visualization process:
I’ve got all my gear prepared perfectly – skis are waxed, skins are glued, and everything else is dialled and fits like a glove. I’m just finishing my warmup and even though the weather is a bit cold, I’m quite warm. I ski up to the start corral and feel my heart-rate settling as the race official checks my beacon. After I drop my jacket and pull up to the start line, I feel a bit of a chill but also the excitement of the race about to start. Standing still, my heart rate increases as I tense up. With a few deep breaths, my heart rate stabilizes. I relax my grip on my poles and get positioned for the start. The gun fires and I take off running, keep breathing, smooth stride, poling fast…
Do you use visualization to improve your skiing? What other mental skills do you use to prepare for training or events?

Filed Under: General News & Articles, Training, Tricks & Tips Tagged With: Mental Training, skimo technique, Training, Transition, Visualization

How to Taper and Peak for Your Goal Skimo Race: Volume, Intensity, Recovery…

January 29, 2017 By Stano Faban 1 Comment

After months of training, it can be daunting when the time finally comes for your big race. While it’s not possible to ‘make’ your race by training in the last week or two leading up to it, it’s definitely possible to ‘break’ it if you over do it!
By focusing on your taper, you give yourself the best chance for a successful performance.
taper-post-podium

Adjusting Your Training – Volume and Intensity

Tapering, to most athletes, means a reduction in volume so we’ll start there. It’s important to adjust your training properly, not just hang up the skis and hit the couch.
Your overall volume (time or vertical – depending on what you measure) should decrease approximately 50% during your taper week. Remember, the training is done, you aren’t going to make any amazing breakthroughs by putting in time the week before the big event.
As important is maintaining the frequency of training and intensity of your sessions. This means if you usually train five days per week, then continue to do so, just make each session shorter. Don’t drop interval workouts from your schedule but adjust them to be less taxing by reducing the number of reps and overall intensity while increasing rest between reps. One of my favourite intensity workouts the week before a race is shown in green below.
Use your reduced training volume wisely, such as to inspect the race course. Depending on the venue, a half-day lift ticket can give you a big advantage for scoping the course. Focus on descents and technical sections. You don’t want to be surprised by a sharp corner when you are racing at your maximum speed!
taper-week-example

Maximize Your Recovery

While adjusting volume is the most obvious part of a taper, there is much more to making it effective. Maximizing your recovery routine is a critical component.
Have a look at your schedule and figure out what time you are going to need to wake up the morning of the event, and what time you will need to go to bed the night before for a great night’s sleep. Use the week leading up to the race to adjust your bedtime routine so you get in the habit of getting to sleep on time!
The reduction in training time should also free up extra time to focus on recovery routines like rolling and release, massage, improved nutrition (take the time to prepare healthy meals), and preparing for the race.

Plan Your Race

Previewing a race course, as already mentioned, is critical. It might not always be possible to ski the entire course before race day but do your best to get a copy of the race map and check it out on Google Earth. Are you skiing on piste, open slopes, or in tight trees? Do you have dramatic turns or groomed runs to be aware of?

Some organizer provide a pretty good map from which you can figure out the locations of the climbs/descents and their vertical.
Best case scenario: Over the course of the preceding week, you’ve previewed every section of the course and taken notes about important sections on a copy of the race map. An advanced athlete can then use this information to visualize each section of the course and how they might react to situations at each point.
This becomes part of the overall race strategy. Being aware of the demands of individual climbs will help determine the equipment you use (mostly talking about skins here), how hard you will push in each section, and your nutritional demands.

Practice Your Transitions

While any time is good time to work on your transitions, the taper period is especially great. Going through the correct sequences of various skimo racing transitions will keep your mind sharp towards the race day and sometimes you can discover a bad habit that started to creep in during weeks of pure training.
Once you know the race details, you can specifically focus only on those transitions but pretty much at all times you need to be very efficient in these:

  • skins-on
  • skins-off
  • skinning to boot-packing
  • boot-packing to skinning/skiing

If you are unsure about the movement sequences in your transitions watch our playlist of videos below:

Equipment Preparation

Finally, and something easily overlooked, is equipment preparation.
Make sure, several days before, that everything is in proper working order. If your boot cables are frayed or your pole straps disintegrating, don’t wait until the day before the race to repair them. Give yourself a few days just in case the local shop is out of stock or whatever else could go wrong.
We always do a quick check of our boots (cracks/holes)bindings (cracks in the plate or loose screws), skis (waxed/scraped), skins (any glue touchups), and poles (mostly the straps).
Finally, check the weather and wax your skis for the expected conditions. Give yourself plenty of time and do a good job scraping and brushing. Do it when you have access to a bench and vice rather than behind your car at the venue!

12 Week Skimo Training Plan

In addition to our Manual For Ski Mountaineering Racing e-book, we released a very detailed skimo training plan that will help you to reach your best at your goal race – 12 Weeks to Your Best Skimo Race.
skimo-training-plan-cover-600x464

Filed Under: Skimo Racing, Training, Tricks & Tips Tagged With: Recovery, skimo training, tapering, Training

  • Page 1
  • Page 2
  • Page 3
  • …
  • Page 5
  • Next Page »

Primary Sidebar

  • Facebook
  • Instagram
  • YouTube
Our Facebook Page

skimo-manual-banner-300px
 

Recent Articles

  • Kilian Jornet Interview: About His New Foundation, His Own Environmental Impact, and How He Wants To Help Athletes and The Outdoor Industry To Protect Nature
  • How Fast Are Glaciers Really Melting? How Will This Affect Your Mountain Adventures? Interview with Pascal Egli
  • Book Review – Art of Freedom: The Life and Climbs of Voytek Kurtyka
  • Forest Skis: Innovative, Custom Build, For Backcountry Skiing and Freeride
  • Lighter and Completely Redesigned: New CAMP Ultralight Ski Mountaineering Ice Axes

Categories

  • Contests & Giveaways
  • Crazy Tracks
  • Events & Races
  • Gear, Tech & Food
  • General News & Articles
  • Industry Press Releases
  • Movies & Books
  • News Shorts
  • People (Interviews)
  • Racing 101
  • Reports & Results
  • Reviews
  • Skimo Racing
  • Training, Tricks & Tips
  • Trip Reports & Conditions

Footer

About SkinTrack

Travelling through snowy mountains on skis is like flying… and experiencing life at its core.

Gear reviews, interviews, adventures, contests, skills, skimo training, race reports – we connect you to all things related to self-propelled skiing.

SkinTrack.com, created by Stano Faban, was born out of passion for ski mountaineering and ski touring. Over the years, it has become one of the most popular ski mountaineering blogs in North America.

Recent Articles

  • Kilian Jornet Interview: About His New Foundation, His Own Environmental Impact, and How He Wants To Help Athletes and The Outdoor Industry To Protect Nature
  • How Fast Are Glaciers Really Melting? How Will This Affect Your Mountain Adventures? Interview with Pascal Egli
  • Book Review – Art of Freedom: The Life and Climbs of Voytek Kurtyka
  • Forest Skis: Innovative, Custom Build, For Backcountry Skiing and Freeride
  • Lighter and Completely Redesigned: New CAMP Ultralight Ski Mountaineering Ice Axes

Useful Links

Comparing the lightest: Skis | Boots | Bindings

Skimo Training: Training Plans | Videos

Stay in Touch

  • Facebook
  • Instagram
  • Twitter
  • YouTube

Copyright © 2023 SkinTrack.com. All rights reserved.