• Skip to primary navigation
  • Skip to content
  • Skip to primary sidebar
  • Skip to footer

SkinTrack

  • Lightest Gear
    • Skis
    • Boots
    • Bindings
    • Skins
    • Packs
  • Skimo Training
    • Training Plans + Skimo Manual
    • Transitions Videos
  • Facebook
  • Instagram

Trip Reports & Conditions

Skiing Gran Zebrù (Königspitze): 3851m Tall Pyramid in Ortler Cevedale Group – Alps, Italy

May 27, 2020 By Stano Faban Leave a Comment

Gran Zebru to my left with with its famous north-west ridge, Suldengrat. You can’t see here our ski route (on the right and behind) but this is one of the most spectacular views of this mountain.

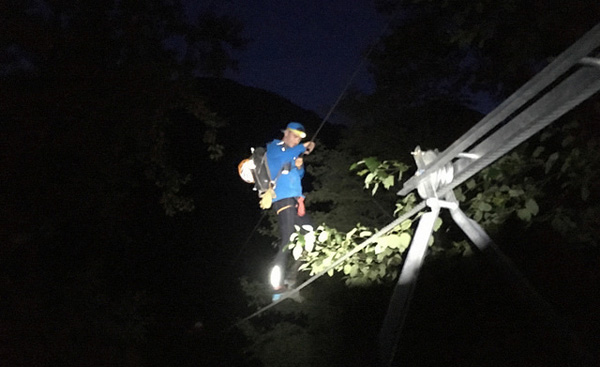
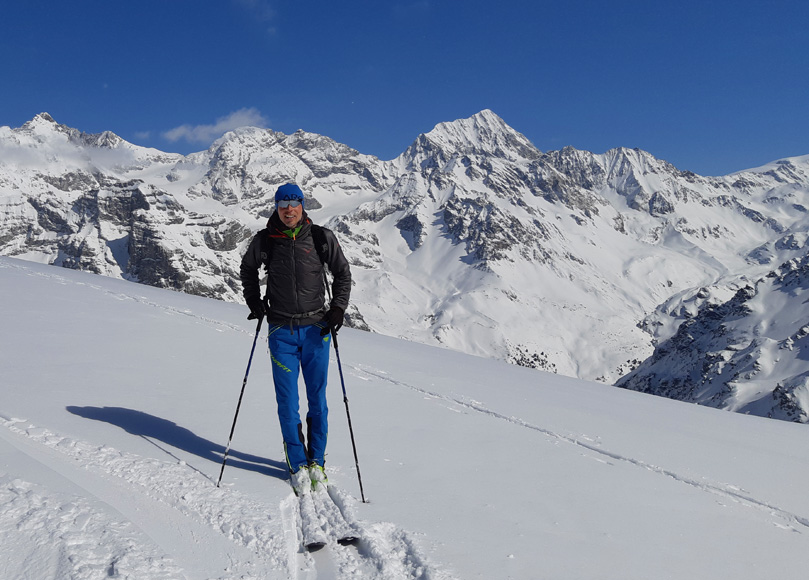
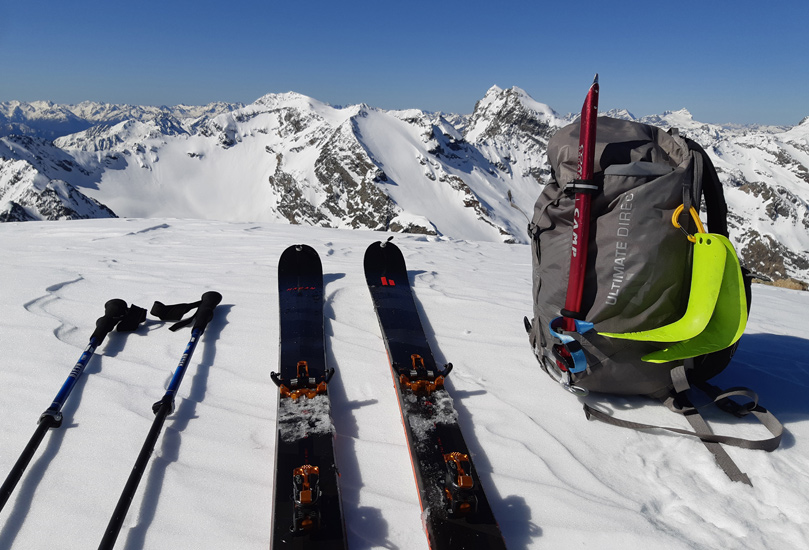
Since the country-wide coronavirus lockdown ended here in Italy the conditions have be great for spring ski mountaineering… and so another alluring peak was ticked off my never ending wish list.

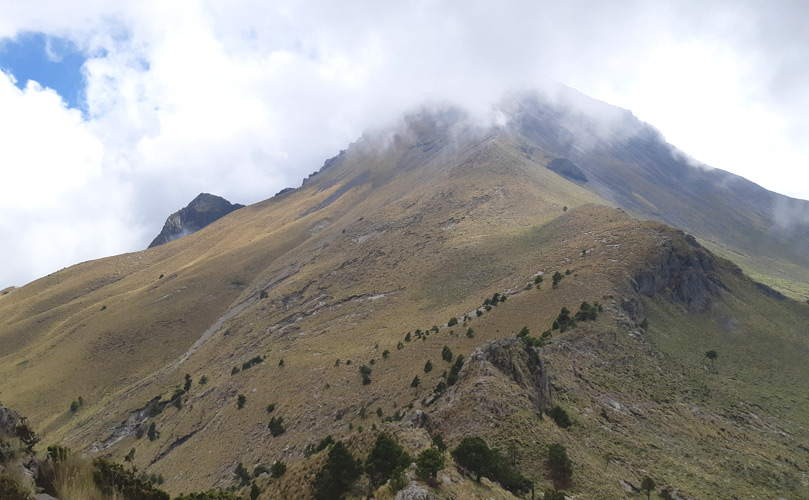
Proudly towering above its surrounding valleys, Gran Zebrù creates an instant feeling of respect and admiration. It truly is a grand mountain that moves you.

With a beautiful summit ridge, big east face and a couloir at the bottom, Gran Zebrù offers an amazing ski mountaineering experience on its south-east route.

Location and Access

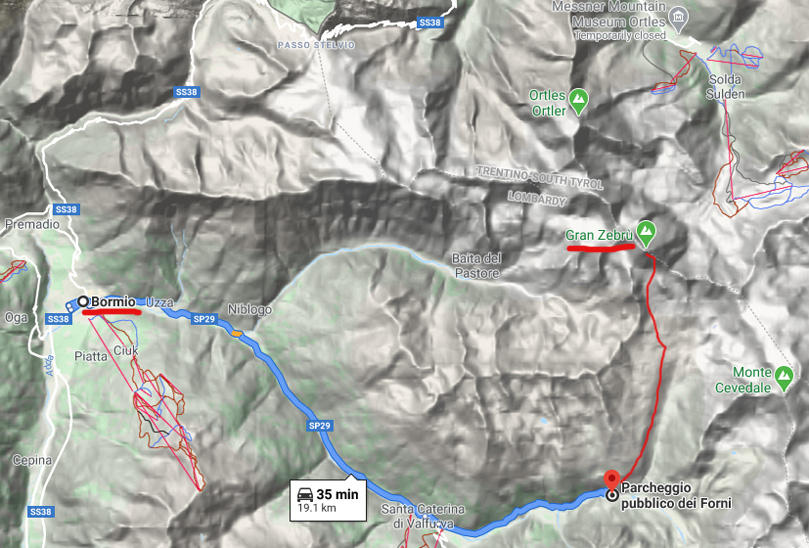
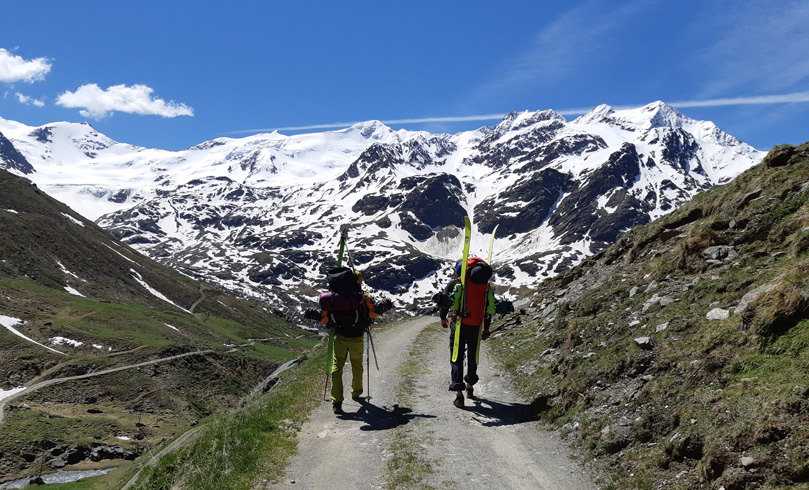
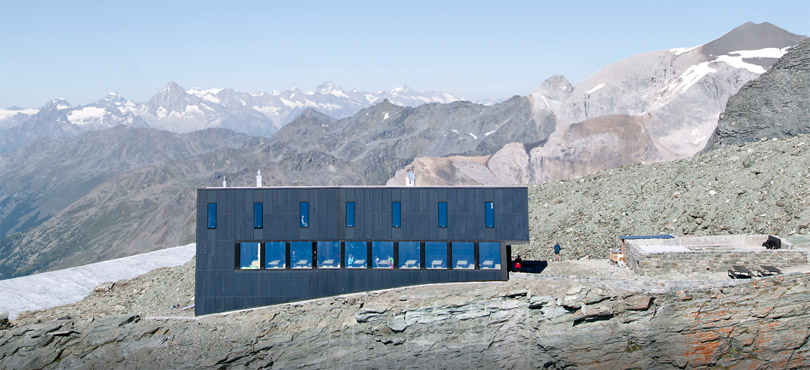
To start your day, drive about 20min east of Bormio (Valtellina, Italy) to Santa Caterina di Valfurva and take a left fork to reach parking at Rifugio Forni (2100m) about 15min further. This area for ski touring is generally known as “Forni” and this parking lot is a starting point for many tours in the area.

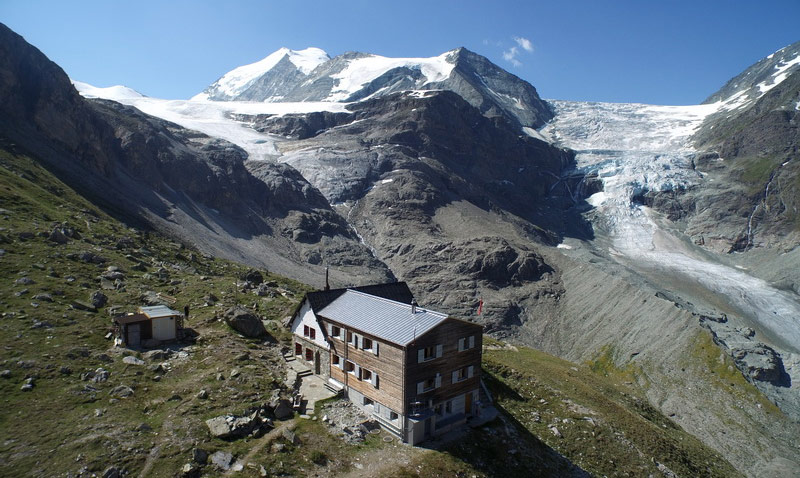
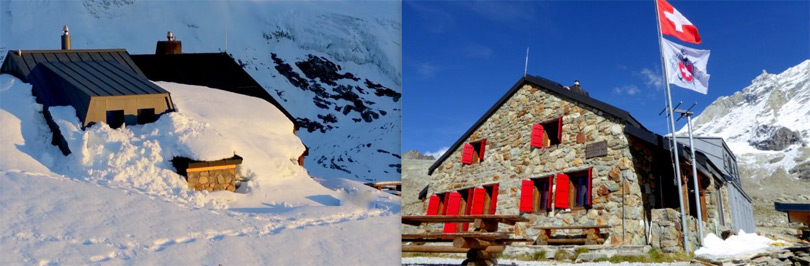
Then follow trail signs to Rifugio Pizzini (2706m) either on skis or hiking – this can take 1,5-2h depending on conditions. This valley is south facing so you will likely need to hike majority of the trail/road by late May but usually it’s possible to skin up from the bottom until late April.

Don’t plan to drive over famous Passo Stelvio (top of map) between November and late May as the road is closed.

The whole ascent from parking lot to the top of the mountain is just under 1700m, so doable in a day, but given the east exposure of Gran Zebru’s upper big face and south exposure for the bottom couloir you should strive to summit by around 9-10am.

Also, consider that in spring conditions you will be climbing up with crampons and an ice axe for about 700m so the progress will be slower. With that, I recommend to stay at the Rifugio Pizzini at still start around 5-6am to cover the 1100m to the top.

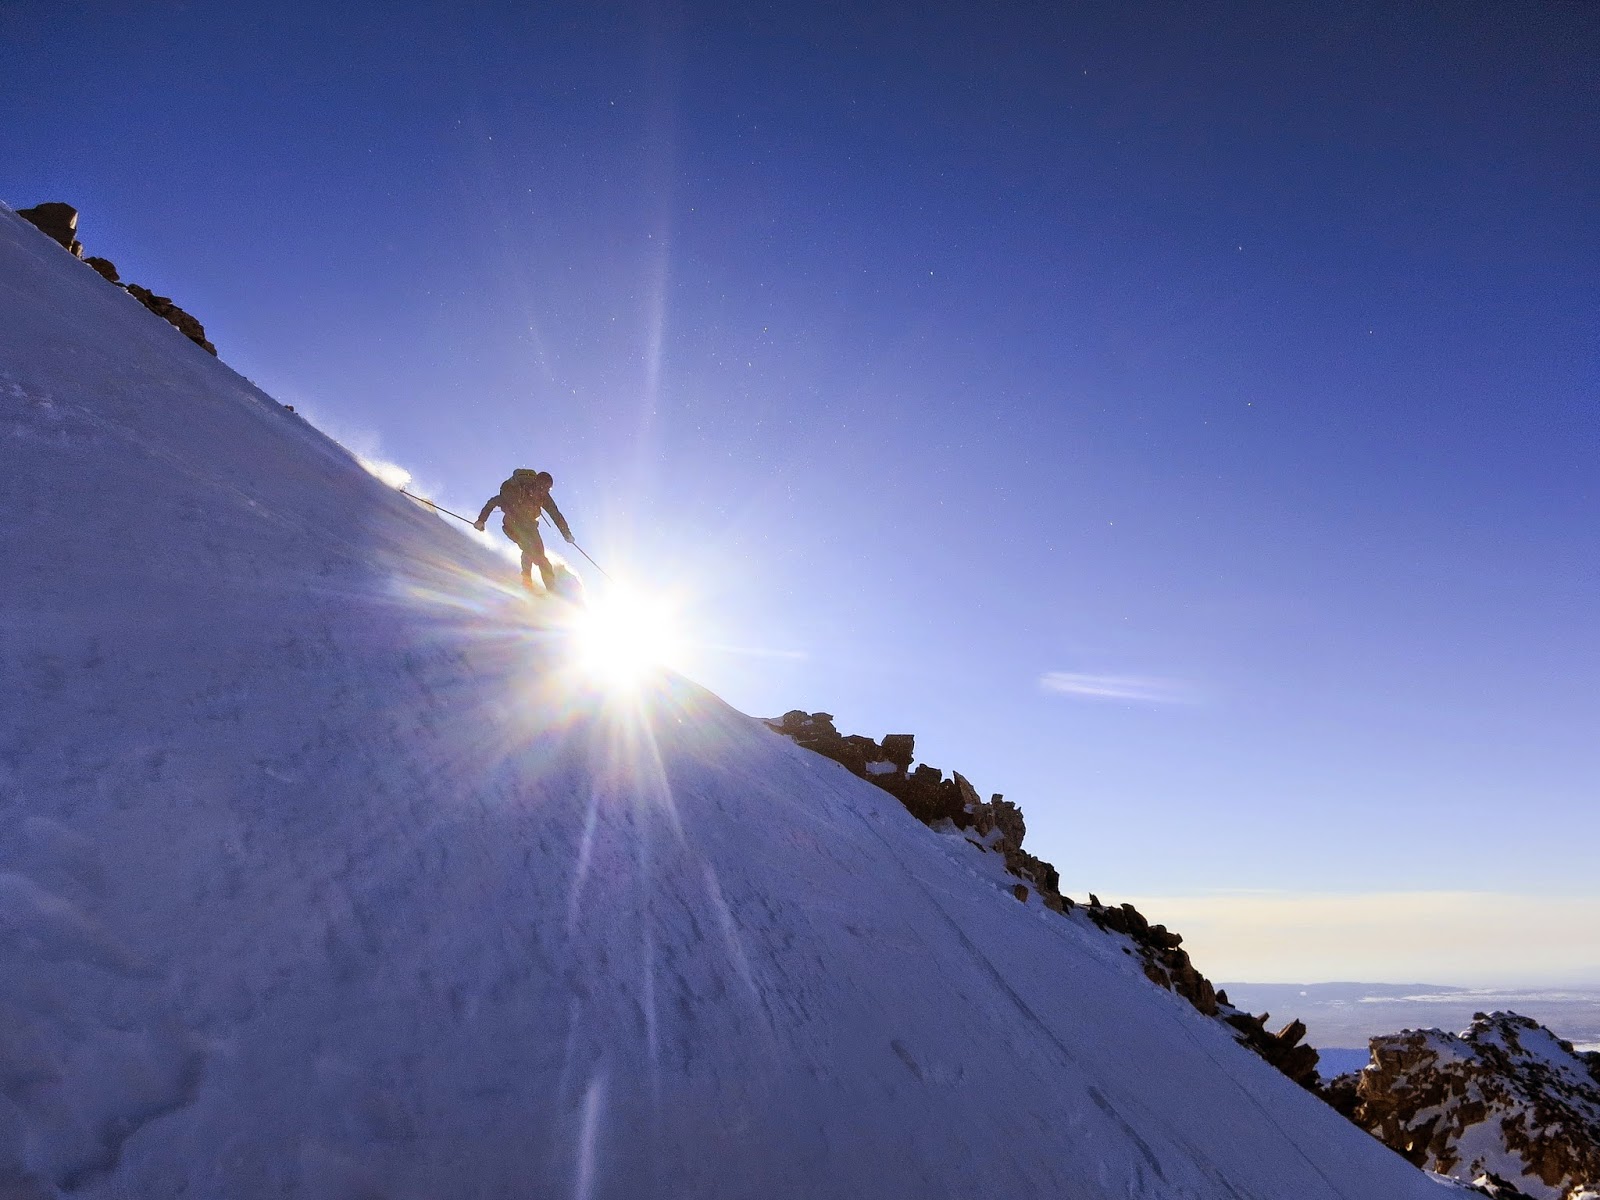
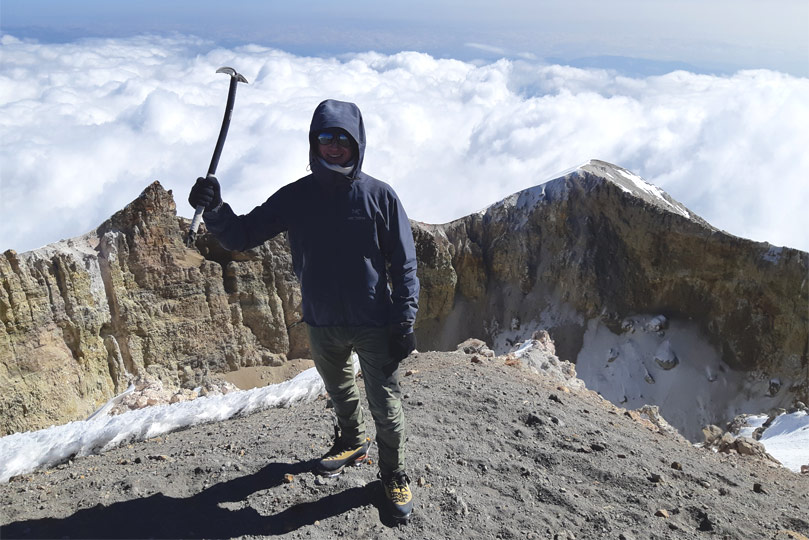
The ascent and skiing on Gran Zebrù (Königspitze)

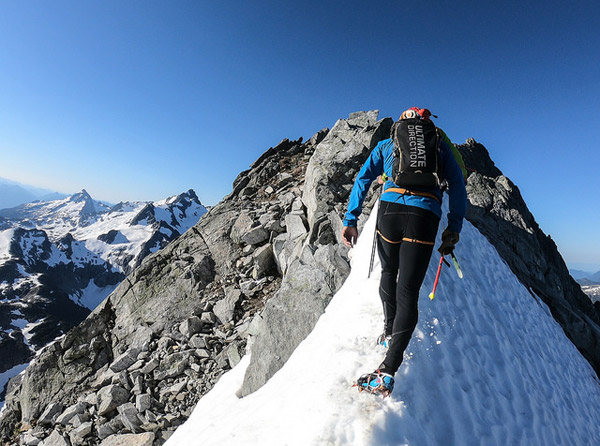
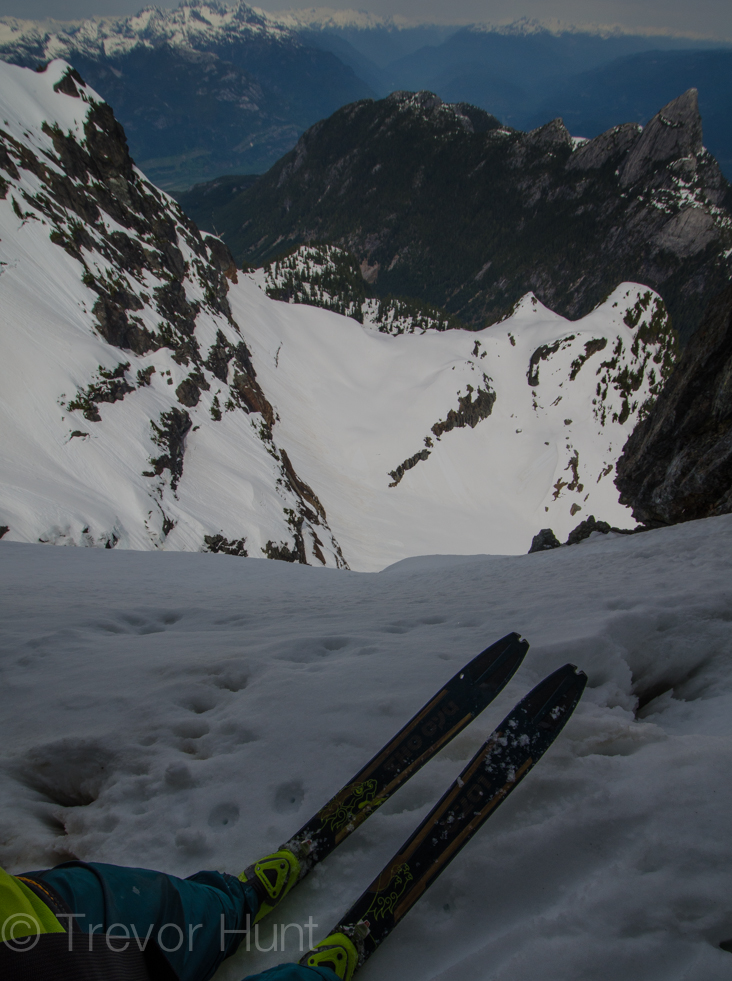
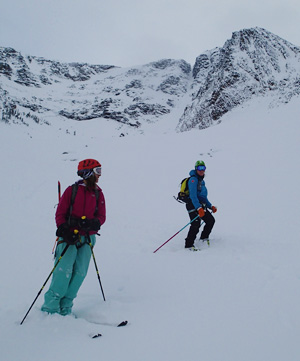
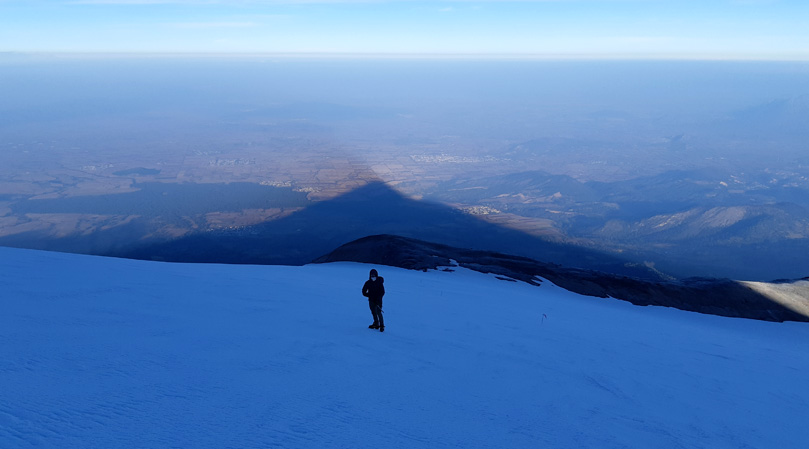
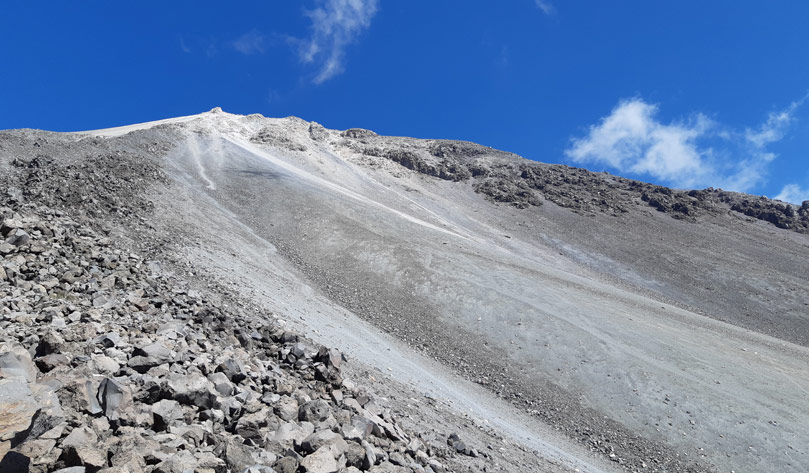
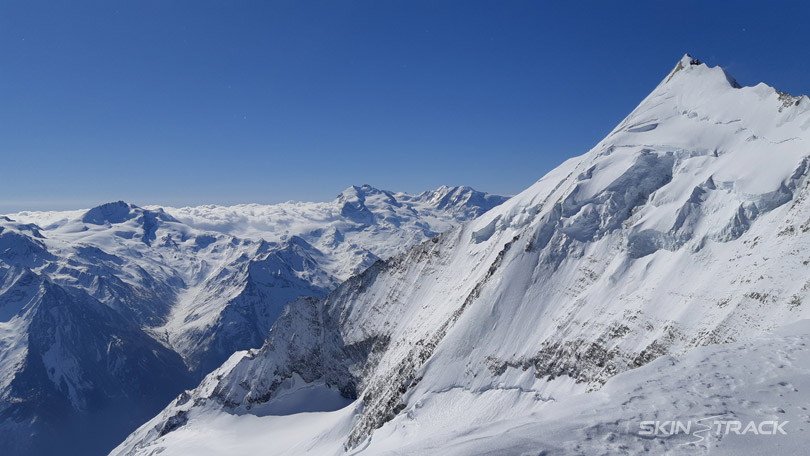
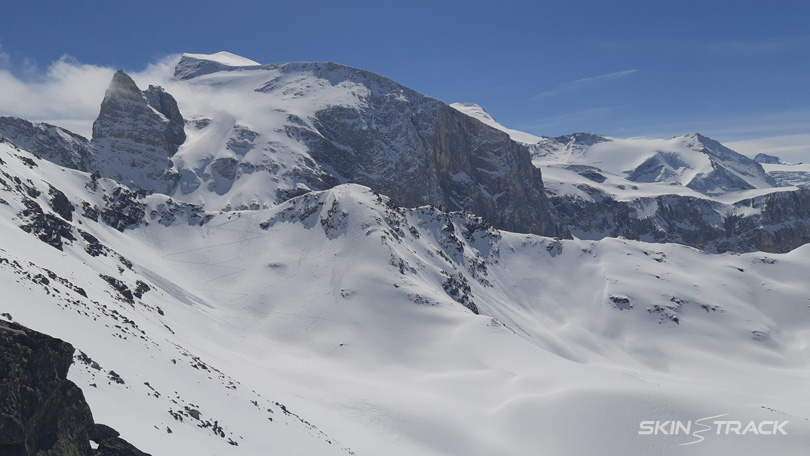
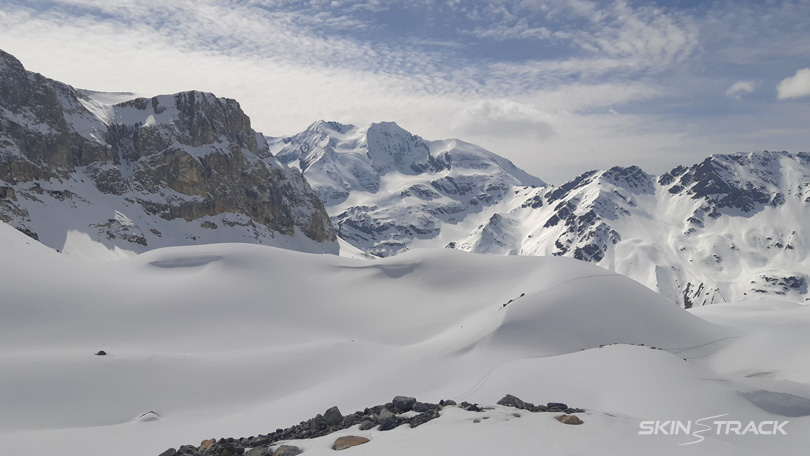
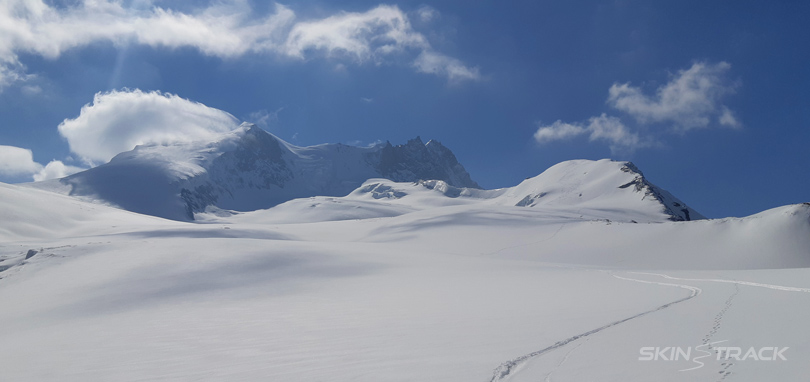
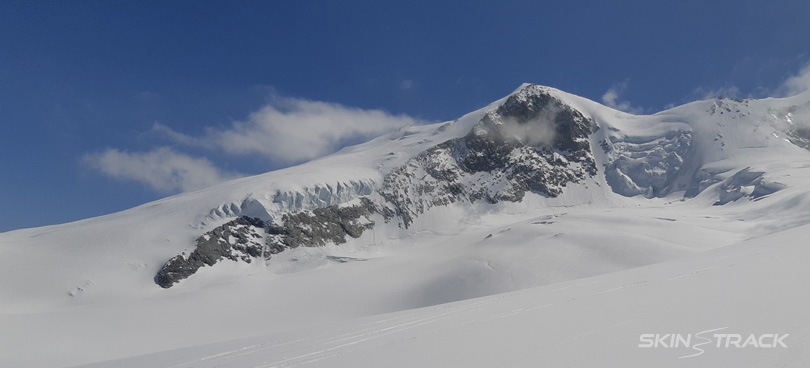
There are multiple routes you can choose from to ascend this mountain but for skiing the traditional south-east route is most appropriate as it is without much technical climbing or skiing. Still, majority of skiing will be on slopes around 40 degrees, with 45 only at the very top.

Skinning just passed the Pizzi hut with a view of the route: From the summit, follow the lit up slopes of the east glacier and then drop down the slim couloir. On the way up, we went left of the big rocky bulge and we skied to the right of it on the way down.

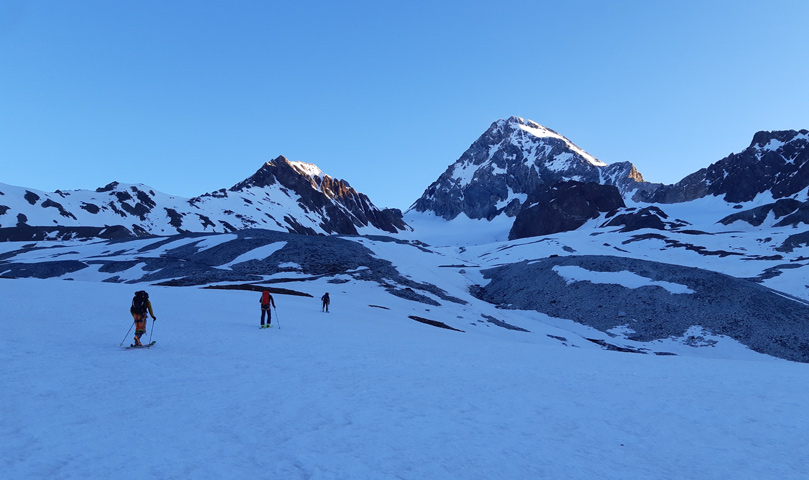
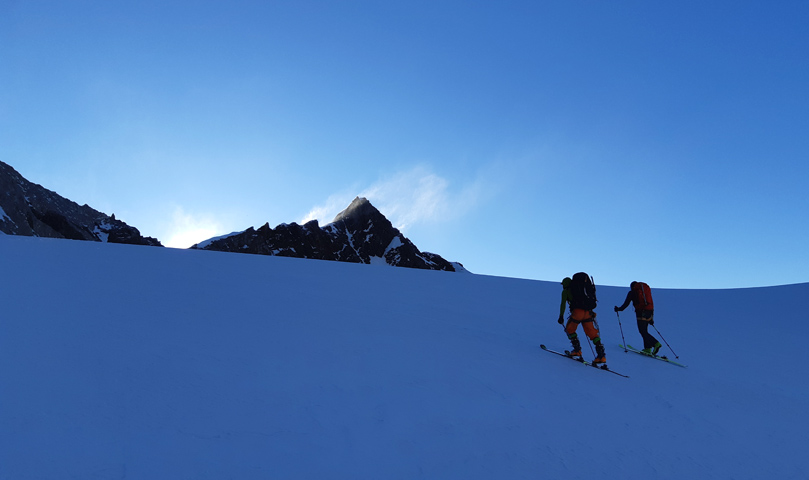
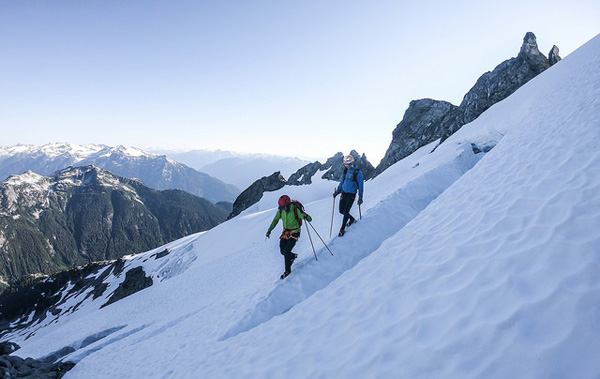
You will be skinning up gentle slopes the first hour (about 400m) beyond the hut, only steepening as you approach the bottom of the couloir. From there we put on boot crampons and kept them all the way to the summit, however, it’s possible that conditions might allow you to skin up some of the big east face, perhaps February to April.

Looking south-east towards the big glacier on Mount Cevedale. We were at about 3700m at this point.

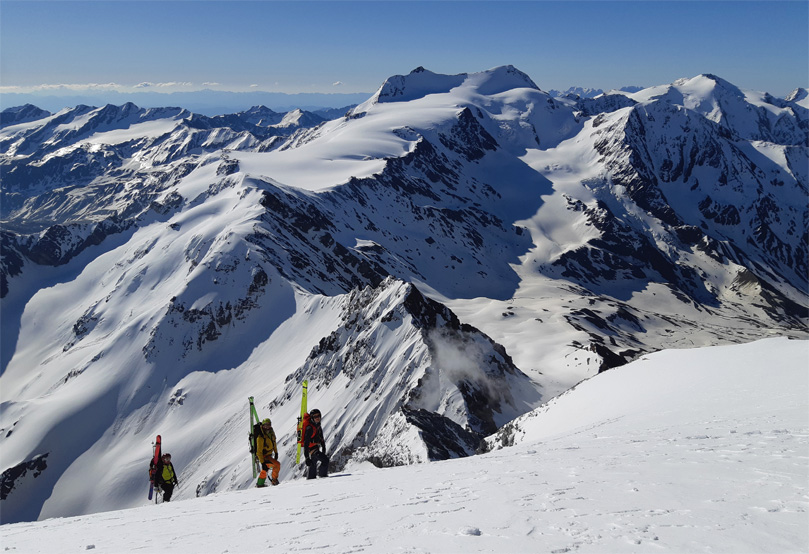
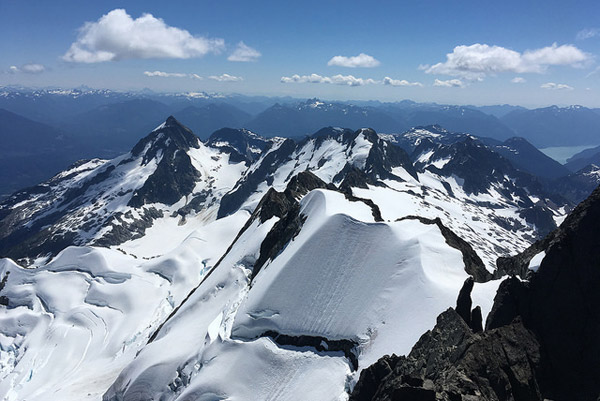
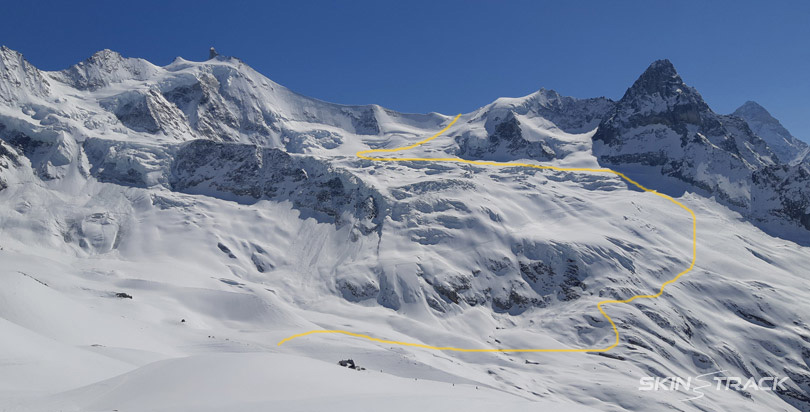
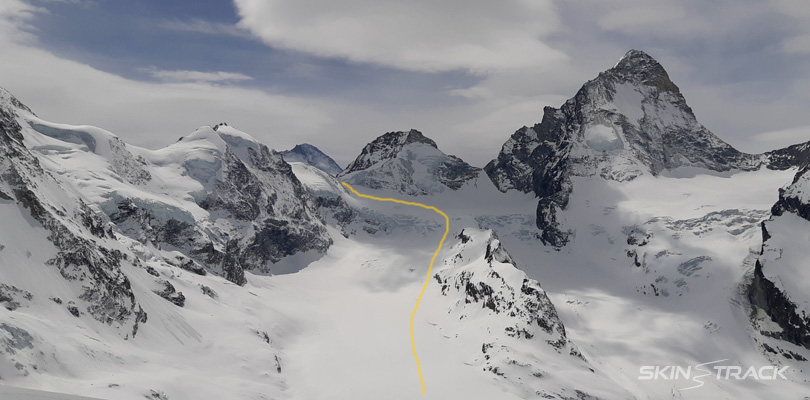
As you can see on the photo above, there is a big wide convexity on the big slopes of the east glacier so observe the snow conditions carefully as it is an easy spot for the wind to load.

Half way down from the hut and looking south towards Punta San Mateo in the centre and Tresero on the very right.

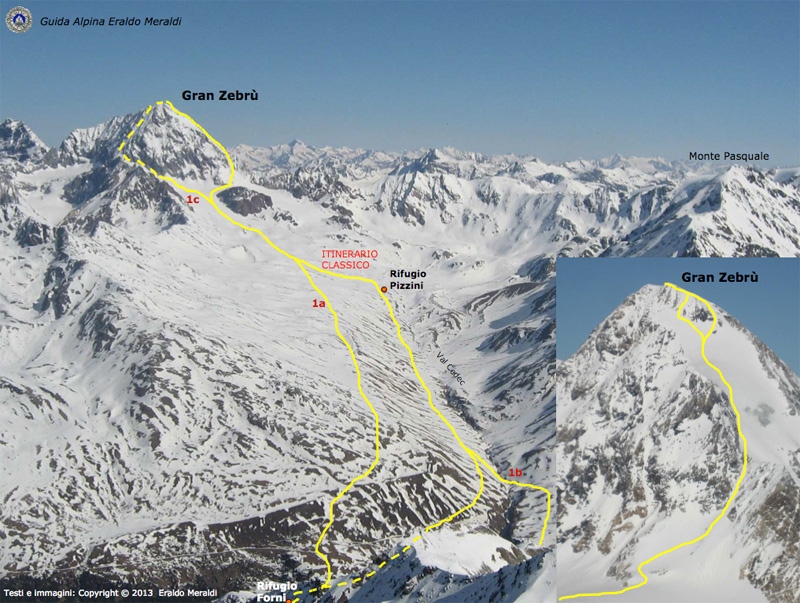
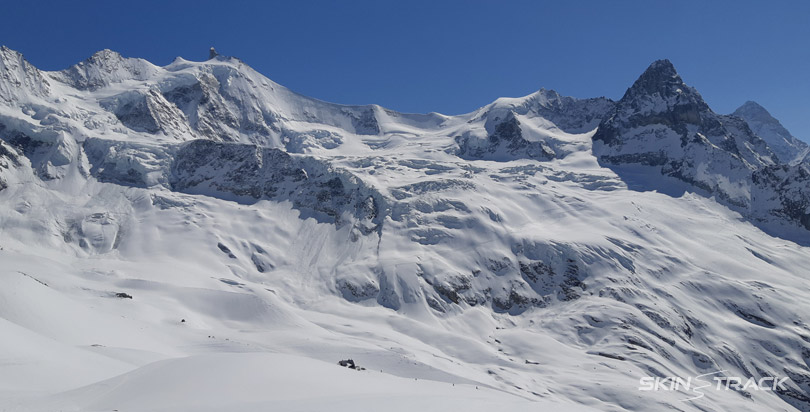
The next photo is from a mountain guide, Eraldo Meraldi, and the dashed line shows an ascent via west couloir (around 450m and 50 degrees) if you want to do a loop. The solid line shows our way. The small photo shows two variations at the top – we went up the left way and skied down the right on that follows the ridge longer. On the big glacier we went up and skied more in the centre than his line shows.

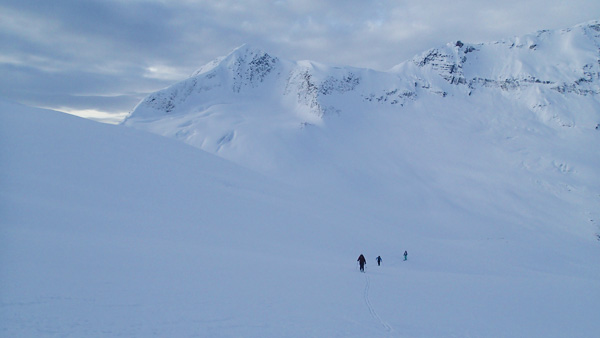
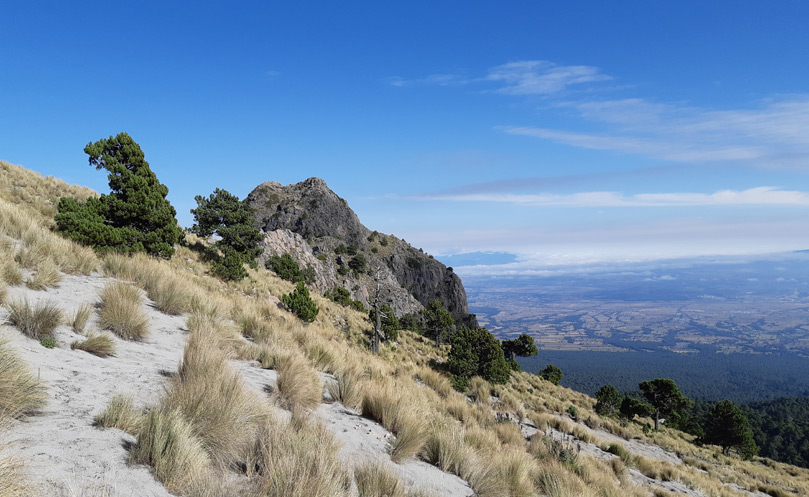
When you are in the area in the spring then definitely consider Gran Zebrù as on of your more challenging objectives. For less mountaineering and more ski touring you can go up Punta San Mateo or Tresero, starting at the same parking lot.

Filed Under: Trip Reports & Conditions Tagged With: Forni, Gran Zebru, Ortler, Valtellina

Ski Touring Paradise: Four Alluring Peaks in One Valley – Val Cantone di Dosde, Valtellina, Italy

May 24, 2020 By Stano Faban Leave a Comment

There are many excellent ski touring places in Italy but to find four such beautiful peaks, each with 1000m descent, in one small valley makes Val Cantone di Dosde literally a ski mountaineer’s paradise… I found it this May!

The four peaks a skier should be interested in are Pizzo Dosde, Cima Lago Spalmo, Cima Viola, Cima Saoseo – all just around 3300m in altitude. The valley floor is at about 2100m.

Location and Access

To start your day, drive about 25min west of Bormio, on the road to Livigno, and park at Arnoga at 1850m – see map below.

Approach to Val Cantone di Dosde leads through a more famous Val Viola valley that offers hikers, bikers and skiers a variety of options and amazing views in every season.

Val Viola is your access point and easiest to reach from Bormio or Livigno.

There are seasonal restrictions when you can drive in Val Viola and in the winter the approach on skis will be quite long. However, by May the restrictions are lifted and so your can drive further with a permit or you can hike or bike the first 7-8km before you turn south (or left) to Val Cantone di Dosde. Elevation gain for this approach is only about 250m.

An interesting point is that a hut in this valley – Rifugio Federico Dosde – is operated by Adriano Greco, the famous ski mountaineering racing legend. I had the pleasure to me him during on of my days. However, as all other huts it is closed usually from October to March.

Notice on the left that Val Viola crosses over to Switzerland. The skiing is all in Italy in Val Cantone di Dosde.

Pizzo Dosde, 3280m – South Slopes

This peak offers excellent panoramic views as it stands alone. The upper south slopes ski well in spring snow and most likely also mid-winter.

The ascent is not difficult or steep, and possible to do all on skis, however, you will need to pay attention to slopes above and also read the terrain well to find the safest and an efficient route.

I went up and down the same way but I didn’t ski all the way to the valley as I continued onto another excellent peak, Cima Lago Spalmo.

I did the very left red route to ascent Pizzo Dosde then ski down behind the big bulging rock, left of center, and ascended a short couloir to continue up the north glacier of Spalmo. If you are going just to Spalmo you can follow the middle red ascent route or my green descent.
Excellent views of the other 3 peaks in this valley from top of Dosde! You can see the short couloir I went up and onto the north glacier of Cima Lago Spalmo, with my descent in green.
View of my ascent route on Pizzo Dosde as seen from Cima Lago Spalmo.

Cima Lago Spalmo, 3291m – Skiing North Glacier

While this peak also offers great views skiing its north slopes and glacier are its biggest attraction! The true peak is hidden further behind a small pyramid that you will see from the valley as you approach.

Repeating the photos from above for reference…

As you can see, the ascent is up fairly steep and on big slopes on a glacier, however, I was able to skin up most of the way. Crevasses were well covered even in this low snow year (north aspect and high elevation).

There are a variety of high quality descent options, just choose appropriately for the current conditions and time of day.

Cima Saoseo, 3264m – East and North Slopes

Once atop, you will be standing on the Italian-Swiss border. Thankfully, there are no customs officers, just amazing views to the west!

Looking to the west and into Switzerland from Cima Saoseo (3264m), with 4050m high Pizzo Bernina in the background – the most eastern 4000m peak in the Alps. Below is Val da Camp valley.

To ascent this peak you will make a sharp right below the slopes of Cima Lago Spalmo and continue up a long flat valley before you begin the true ascent. There is no glacier on this peak.

My skin track in red and a variation on the descent in green. The summit is still quite far behind the horizon. To the left and not in the photo is Cima Viola.
I boot-packed a short section to gain the shoulder but it’s likely duable on skins mid-winter. For my descent, I chose a steeper line.
Looking south over the summit cross of Saoseo.

Cima Viola, 3374m – North-West Glacier and Slopes

The highest peak of the four and also the one with most descent options, non of them easy and some fairly extreme.

Cima Viola is also the most complex of the four mountains due to route finding and overall hazards. My photos of the peak from Saoseo helped me choose the best option couple of days later.

My ascent route going up mostly on the west side of Cima Viola and then down the north ridge off the summit before reconnecting with my ascent track. Notice the beautiful ramp traversing from right to left which has an exit to the valley via a steep 200m couloir that is hidden on the very left.
Switching from skinning with ski crampons to boot crampons and back is probably a usual exercise on Cima Viola. You can see that it is possible to ascend or ski the more direct lines from the summit, however, there are many more hazards.
Looking north and marveling over the long traversing ramp on Cima Viola.

When to Ski Here

While I skied in this valley only in May I believe the snow must be excellent all winter!

The terrain is complex but also open enough, and with many options, that an intermediate experienced ski tourer should be able to find great turns and stay safe at any time of the year.

If you have questions, send me a message via SkinTrack’s Facebook page.

Filed Under: Trip Reports & Conditions Tagged With: Cima Lago Spalmo, Cima Saoseo, Cima Viola, Pizzo Dosde, Valtellina

Freedom Skiing In Valtellina: 5 Peaks In 3 Days As Italian Coronavirus Lockdown Eased

May 12, 2020 By Stano Faban Leave a Comment

Following a spectacular ridge on Pizzo Canciano (3103m) with Martina Pini. The three-peaks of Cima Papa (3197m) in the middle were next on our menu. We skipped the familiar Pizzo Scalino on the right (3323m).

Fresh air of an early morning, with blue skies above us, after a couple of strides on skis everything felt very natural yet somehow odd.

Still feeling like partisans, as more strides passed and one hundred became one thousand, the anxiousness transformed into joy that we were freely out, that we are skiing again!

Pizzo Canciano, or Piz Cancian in Swiss, as seen from Passo di Campagneda (2626m). This peak can be climbed from the Swiss side or as we did from the beautiful Valmalenco valley in Italy.

After two months of the lockdown under the beautiful peaks of Valtellina in northern Italy – just south of Sankt Moritz, Switzerland – there was a lots of anticipation mixed with uncertainty.

Now, the ski conditions here are quite good and the valleys are fairly empty as most already transitioned into summer sports. With new snow in the forecast, there are more ski adventures to be had this winter… trip reports are coming 😉

From the top of Pizzo Dosde (3280m) looking towards the next peak that day and its beautiful 800m north glacier of Cima Lago Spalmo (3291m).
Looking into Switzerland from Cima Saoseo (3264m), with the 4050m high Pizzo Bernina in the background – the most eastern 4000m peak in the Alps. Below is Val da Camp valley.
Pupazzo di neve, or a snowman in English, guarding gorgeous flowers in Val Viola.

Filed Under: Trip Reports & Conditions Tagged With: Valtellina

Traverse of Pico de Orizaba Volcano in Mexico: North America’s Third Highest Mountain

March 5, 2020 By Stano Faban Leave a Comment

The main part of the traverse, from Refugio Piedra Grande on the north side to Refugio Fausto Gonzalez on the south.

I like to mix mountain adventures with cultural experiences and so without too much planning and speaking only few Spanish words was enough to inspire me for a trip to Mexico in early November last year.

The highlight was going to be the whole trip but I needed a specific excuse… Pico de Orizaba (Citlaltépetl), a 5636m volcano, seemed good enough.

With flights booked only ten days apart, I was slightly nervous if my wish list wasn’t too ambitious – visit Mexico City and Puebla, climb two volcanoes, and hopefully manage it all by normal bus transportation.

That’s me, Stano Faban, at the Orizaba’s crater, one of the most spectacular summit features I have ever seen.

While as a third highest mountain in North America, after Denali in Alaska and Mount Logan in Yukon, it doesn’t present a technically difficult challenge it’s still high enough to not be underestimated. Eventually, I was lured to Orizaba by flying over on Google Earth and realizing an adventurous traverse of this peak might be possible.

Itinerary and Logistics: If you want to learn only facts about my itinerary and logistics then scroll past all story below until you reach a section titled “Transportation, Accommodation, Food, My Itinerary, Acclimatization”.

Keeping the Backpack Light

If I wanted to traverse Pico de Orizaba it meant that I would have to carry everything I would bring to Mexico over the tall volcano, plus, water for two days as there is none on the mountain.

I forgot to weigh it but I think I left the house with about 14kg on my back. This included the 60L backpacking pack, thin $50 sleeping bag, mountaineering boots, light crampons and axe, and some old clothes so I wouldn’t stand out too much… if at all possible being about 20 cm (or half-foot) taller than most Mexicans.

Acclimatization on La Malinche

After arriving from Whistler, BC, the plan of climbing a 5600m mountain in a couple of days was the biggest physical challenge of the trip as my body had to adjust to the 5000m difference quickly. The good thing is that Mexico City sits at 2200m in the Central Mexican Plateau, high enough to start acclimatizing immediately, yet not too high to suffer any dangerous altitude side effects.

Clouds opened up once I was coming back down from La Malinche.

With Pico de Orizaba about 6h bus ride east of Mexico City, the perfect mountain for acclimatization, in my mind, was La Malinche volcano at 4461m and located about half way.

Sand and beautiful grasses at 4000m.

I ascended the volcano, also known as Matlalcueye or Malintzin, on the third day and loosely wandered above the 4000m mark for a couple of hours to help with acclimatization. I slept in a rental tent in a dead empty campground at Resort IMSS Malinzti (Centro Vacacional IMSS Malintzi). Starting there, at 3000m, I reached the summit in about 3h.

Visiting Tlaxcala and Staying With Locals in Huamantla

Maybe because of the summit fog, La Malinche didn’t capture my senses as much as the town of Tlaxcala the day before. Tlaxcala is the capital of the Tlaxcala state, the smallest in Mexico, and features many beautiful historical sites within a small area. Eating tacos from food stands with locals at a central park is another highlight as it offers a much cozier feel than in the big cities.

Tlaxcala centre.

With my weak Spanish, I was unable to find a bus in Tlaxcala that would get me to the foot of La Malinche so I bet my chips on striking a deal with a young local taxi driver, Victor. Common musical tastes and Google Translate app made the one hour drive pass quickly. We also made a fast stop to drink pulque, an alcoholic drink made from fermented sap of agave plant and a local specialty for millennia.

Murals paintings in State Government Palace in Tlaxcala.

Our friendship continued the next day and Victor picked me up after I came down from La Malinche and we headed off to Huamantla. This small town is one of only two that are known for a festival called La Noche Que Nadie Durme , or ” the night when no one sleeps”, occurring every August 14th, during which several kilometres of its streets are covered with colourful carpets made of painted saw dust flowers and other materials.

Traversing Pico de Orizaba from North to South

The next day, I hopped on a bus to Puebla as there is no meaningful bus connection between Huamantla and Tlachichuca, the last proper village before one departs for Orizaba.

Faith prevailed and not a single rain drop fell from these angry clouds as I got off the bus in Tlachichuca.

In Tlachichuca, I had the privilege to stay at Servimont, a hostel type of place but designed as an amazing museum that breaths mountaineering history and tells the story of a century old soap factory rebuilt as a mountain lodge.

The owner and a former local mountain guide, Gerardo Reyes, and his staff were very friendly. He was somewhat skeptical about my idea to traverse Orizaba alone as its south side is basically one big rolling stones scree. I knew it could be dangerous but I also thought it’s probably not worse than on any peak in the Canadian Rocky Mountains.

The next day, I caught a ride with Servimont’s driver up to a hut Refugio Piedra Grande that sits at 4200m on the north side of Orizaba. My plan was to hike up to about 4900m for further acclimatization, and drop some gear and food so I wouldn’t have to carry it all when I start the traverse.

My ascent route from Refugio Piedra Grande.

On my way up, I noticed there was a rescue going on as three climbers fell down the Jamapa Glacier. Two were in fairly good condition but the third one suffered a broken femur and pelvis. Shortly after I dropped my things I ran into four people carrying the victim. Naturally, I offered my help. For the next 6h we took turns on loose rocky trails, and well into the dark, carrying the person down to the hut.

The rescue was a good reminder that in Mexico you can’t rely on a swift helicopter rescue, pretty much like in Canada, and so the local mountain guides are usually the ones that end up on these heroic missions, even if it doesn’t involve their own clients. The same day, another climber died on the south side after being hit with a falling rock.

After the rescue, I decided to postpone my attempt by a day as there was no way I would wake up at 3am and go back up again. The food was running short so I thought twice before eating something.

I spent most of my free day outside the hut as it was somewhat dirty and smelly inside the hut.

I departed at 3.30am the next night along with other two people. We made good progress and reached the summit easily by 9am. I was told that most parties usually take about 7-8h.

On the way up, to my surprise, when picking up the food at the base of the glacier, two smiling mice ran out of my food bag! As that was all the food I had I was biting carefully around the mice teeth marks as the sunrise was unraveling.

I took this photo around 8am at maybe 5300m. If you manage to be on the summit at the sunrise, perhaps around 6.30am, the shadow might be 3 times longer.

The Jamapa Glacier was very firm so crampons and ice axe came handy. We didn’t rope up between the three of us as we were all planning to climb solo, and obviously no one brought a rope. As for crevasses, I saw one decent size hole about 100m below the summit. If you can see and follow the guides’ path you should be fine, however, you are definitely on a glacier so make your own judgement about not roping up.

Alex on top of the impressive summit crater. We came up together from the north side and he also returned that way.
The massive 1000m scree on the south side. I traversed to the left (looking up) below the summit rock and went down that way the first 400m to avoid being under the gun.

Once rolling down the dry south side scree I made a quick descent to Refugio Fausto Gonzalez at 4600m, reaching it just before noon. My original plan was to spend one night there, however, after seeing and smelling the inside I couldn’t help but run away.

My descent route with Refugio Fausto Gonzales marked with the red dot.

Surprisingly, the south side of the mountain was very quiet and I didn’t meet anyone on my 20km walk until I reached the nearest town of Santa Cruz Texmalaquilla.

In the little town, thanks to my weak Spanish, I befriended a local school janitor who took me under his wing when I pestered him with questions about buses, after I spotted him sweeping the classroom floor through wide open doors. Half hour later, we walked down the village together while he thought me Spanish words for all animals alongside of the road before we caught a taxi…

Visiting Puebla and Mexico City

My next destination was the Puebla city after my new friend put me on small bus called “directivo” on the outskirts of Esperanza. We arrived in about one hour and I was plunged into an evening busyness of civilization.

Puebla’s architectural diversity.
Part of Puebla features murals on every single wall for blocks.

Puebla is incredible and a must visit for anyone attempting Pico de Orizaba. In fact, I happily decided to stay and explore for almost two days as I somehow managed to end up with an extra day in my fast itinerary.

I spent my last day before an early morning flight exploring Mexico City, another worthwhile destination with miles of historical sites and the most museums in the world.

Random house in Mexico City.

Transportation, Accommodation, Food, My Itinerary, Acclimatization…

Here are some useful information to help you with your travels in case you were inspired by my trip.

Transportation:

  • You can travel almost everywhere in Mexico City using the subway system. I always felt safe and it’s very cheap – only 5 pesos, or 30 cents Canadian, per ride to any destination! You can also use it to go to the airport. Occasionally, you might use a taxi which are fairly inexpensive by western world standards.
  • Between cities, it’s best to use buses. TAPO is the main station in Mexico City while in Puebla it is CAPU. Again, the costs are very reasonable for a westerner.
  • You might consider hiring a taxi occasionally once in smaller towns if you want to save time, however, it’s definitely more interesting to use the public transportation as you will experience more of the local life.
  • For getting to Refugio Piedra Grande, it’s worthwhile to contact Servimont. I considered walking there until I realized it’s about 20km and how much water I needed to bring.
  • I used a tour bus for getting around in Puebla one day. I never do this yet it was cheaper than using taxis, and I got to see many interesting parts of the city in a country where language presented some barrier for me.

Accommodation:

  • I didn’t book anything before leaving for the trip, and I didn’t use AirBnB at all.
  • To stay at Servimont in Tlachichuka, it’s best to email them few weeks before as they could be very busy. I was lucky and they had plenty of space when I emailed them only 4 days before I showed up.
  • I stayed in lower budget hotels and hostels in Puebla (Hotel Star Express near bus station) and in Mexico City (Casa San Ildefonso near the historical city centre).
  • There are no fees to stay at Refugio Piedra Grande or Fasto Gonzalez, however, expect only very simple and potentially messy shelters.
  • Bring your own stove, water and food.
  • Usually, there are various options for accommodation in smaller towns but hostels could be very low in standard and cleanliness while hotels will be much better but might start at around $40 per night.

Food:

  • I bought a fuel gas canister for my Jetboil close to the centre in Mexico City, I forgot exactly where.
  • I ate mostly from street vendors or low cost restaurants without any stomach problems. It was always quite delicious and a nice experience as they appreciated my presence and trust.
  • Overall, food is quite cheap and buying groceries is fairly easy even in small villages.
  • For water, to avoid potential health issues, perhaps it’s best to buy bottled water or treat the one from the tap.

My Itinerary by Day:

  1. 5am landing. Morning in Mexico City and riding a bus to Tlaxcala.
  2. Exploring Tlaxcala. Staying at the Malintzi resort overnight.
  3. Climbing La Malinche. Night in Huamantla.
  4. Riding buses from Huamantla to Puebla and then to Tlachichuka. Overnight at Servimont.
  5. Ride up to Refugio Piedra Grande, and acclimatization hike and rescue in the afternoon.
  6. Relaxing around the refugio.
  7. Traverse of Pico de Orizaba – long day:
    3.30am start > 9am summit with 1h there > 11.30am Refugio Fausto Gonzalez > 3.30pm Texmalaquilla village > 7pm in Puebla
  8. Visiting Puebla.
  9. Morning in Puebla and riding a bus to Mexico City in the afternoon.
  10. Visiting Mexico City.
  11. 5am departure from the airport.

Acclimatization:

  • I highly recommend to use proper acclimatization practices for any summit above 4000m if you live below 2000m because 4000m is already high enough to suffer major health issues (even dying) if you push your body too much too soon.
  • For Pico de Orizaba, and other Mexican volcanoes above 4500m, I definitely recommend climbing to around 3600-4200m prior to your summit attempt and having 1-2 days of rest in between. There are plenty of suitable and beautiful volcanoes close to Mexico City or Pueble to do this.
  • My acclimatization went well despite living only at 600m, however, I climbed up to 7500m before and so I know my body well. Also, my ability to adapt is probably better than an average active person thanks to years of training for ski mountaineering races.
  • Great thing about Mexico City, Puebla and the surrounding area is that it all lays above 2000m which forces your body to start adapting as soon as you land.
  • People coming from Colorado, or living above 2500m, might be deal with even 5000m much better but it really depends on their fitness and health.

Mountain Gear:

While I also brought a light harness, few carabiners, slings and some other gear, I am only listing what got used:

  • Ice axe: CAMP Corsa Nanotech
  • Crampons: Petzl Leopard FL
  • Boots: Rebel Lite OD shoe
  • Pack: Gregory 60-65L
  • Stove: old Jetboil
  • Sleeping bag: cheap $50 synthetic sleeping bag for +12
  • Sleeping pad: Thermarest Prolite Plus

Filed Under: Trip Reports & Conditions Tagged With: Pico de Orizaba

Four Beautiful Days on Haute Route Imperiale Ski Traverse in Switzerland

May 13, 2019 By Stano Faban 1 Comment

With a shorter route, the Haute Route Imperiale is no less impressive than its famous cousin Haute Route that travels from Chamonix in France to Zermatt in Switzerland and has a few variations.

Offering plenty of options for side trips and much easier logistics, Martina, Daniela and I chose the Haute Route Imperiale after realizing we can do it during a 4-day blue weather window the forecasters were promising. We set out on April 26th.

Staying in the mountains for days at a time is always a special experience. It forces us to escape from busyness of civilization and to give into a simple routine of skiing, eating, laughing and sleeping.

Full route goes from Jungen over Durand Col and down to Zermatt. This map is oriented with North on the right side, and West on the top side.

The Imperiale route is entirely in Switzerland and can be done in 4-5 days comfortably if you are used to climbing 1000-1400m on consecutive days. Staying 2-3 extra days will offer you the luxury of many more beautiful side trips.

Good time for the Haute Route Imperiale is from early April to mid-May depending on snow conditions that season. After average winter snowfall the ideal time for this traverse is likely to be mid-to-late April.

» More information on transportation, huts, gear and other arrangements are detailed at the end of this article.

Route Variations

There are a couple of variations of the Imperiale ski traverse yet about two thirds of the route will be the same.

We set out for the variation #1 but we had to change plans and finish with variation #3 due to some health issues.

  1. Complete traverse: St. Nicolaus (Jungen) – Zermatt
  2. Complete traverse: St. Luc – Zermatt
  3. St. Nicolaus (Jungen) – Zinal
  4. St. Luc – Zinal

Day 1:
Jungen at 1900m » Turtmann Hutte at 2519m

Elevation gain: around 1500m (2 ascents, 2 descents)
Duration: 5-7h from Jungen
Possible side-trips: couple of excellent north facing ski runs

Our first day was hectic as we were driving to St. Niklaus from Italy in the early morning to catch a gondola to Jungen at 7am. The 10am gondola is too late considering crossing some south slopes later that day.

Solving the four day parking was a bit of a puzzle until the local iconic “gondolier” assured us we can leave our car on the small parking lot right at the gondola station, for free.

The small gondola that lifted us to Jungen from St. Niklaus.

After a scenic ride up to a magically hidden settlement of Jungen (1900m) it was time to walk for the next 45min to reach consistent snow. If we came a week earlier then most likely we would have been already on skis from Jungen.

Once skinning, we traveled up a flat valley in westerly direction and then slightly turning left (south) towards north slopes and the start of the longest ascent of the day.

When there are no tracks in this valley then you will definitely want to pay attention which col is your destination as there are some “misleading” options.

We decided to down-climb the top 100m of the south-west slope to avoid skiing over rocks and potentially triggering a small slab in a quickly warming snow. This whole first descent is only about 400m with a sharp contouring traverse left about mid-way down.

Ascent to the next col is straightforward and only around 140m. Pay attention to big south slopes coming from the left if you are in this small valley on a hot day.

The descent to the Turtmann hut starts with wide south slope and offers some good turns. Later, skiing turns into a game navigating many terrain micro features to find the best way to the hut.

Turtmann hut with Brunegghorn Glacier on the left and Turnmann Glacier on the right. Photo courtesy of Club Alpin Suisse.

Day 2:
Turtmann Hutte at 2519m » Cabane de Tracuit at 3256m

Elevation gain: around 1000m (2 ascents, 2 descents)
Duration: 4.5-6h
Possible side-trips: Brunegghorn 3833m, Tete de Milon 3693m

The second day started with a traversing descent, loosing about 80m, to reach a very obvious central gully that came down from rocks and a glacier above on our left side.

It took us about an hour to skin up the gully and reach a big plateau on the Brunegghorn Glacier. From here, you can continue up the glacier and climb the Brunegghorn for high summit and superb views.

Brunegghorn is the peak left of the centre.

We chose to skip Brunegghorn and ski down to connect with the Turtmann Glacier as we had other plans later that day.

The ascent up the Turtmann Glacier starts with steeper slopes before slowly mellowing into a gently rising plateau. We reached the Tracuit hut in a big wide col just before noon.

Bishorn on the left, Weisshorn in the centre and Tete de Milon on the right. The Tracuit hut is behind the bump on the very right.

After lunch and a nap we left for a 400m climb up an easy Tete de Milon peak which proved to hold excellent powder on its north facing glaciated side. While the snow was fabulous the visibility quickly deteriorated as we shared some good laughs on the summit.

The Tracuit hut is very modern and its most impressive features are the dinning room’s full-wall windows (bottom) and the bedroom windows (upper level) offering superb views of surrounding steep peaks.

Day 3:
Cabane de Tracuit at 3256m » Cabane Arpitettaz at 2786m

Elevation gain: only 300m without side-trips (1 ascent, 2 descents)
Duration: 2-3.5h without side trips
Possible side-trips: Bishorn 4159m, Tete de Milon 3693m

With a high peak insight, we set out for Bishorn early in the morning, an 800m climb and a 3-4.5h round trip. The views from this summit are truly spectacular with a sea of 4000m peaks and big dramatic glaciers all around!

The usual ski route up and down Bishorn comes from the left and follows the big glacier up to the summit. Possible steep skiing lines can be seen to the right of the summit.

We roped up for most of the climb and also put on crampons for the final summit push.

The descent is fine and long. Watch for opening crevasses on the way up so you can avoid them on the way down.

On the summit of Bishorn, with the incredible north ridge of Weisshorn behind us.

After Bishorn, we enjoyed lunch in the sun at the Tracuit hut before diving down a nice steeper descent that brought us into a warm and avalanche exposed valley. A 300m climb into a col on a ridge felt long and difficult as we often stopped to drink and cool down, but with help of some Italian music we conquered this massive climb 🙂

At the top, we down-climbed a short section to get off the ridge as the snow melted away couple of days earlier. Then a short, easy and traversing descent brought us to the lovely Arpitettaz hut.

Arpitettaz hut, with wonderful views all around, at the bottom in the center.

Thanks to its smaller size and a family atmosphere, this hut quickly became our favourite on this trip. The views were just a cherry on the cake!

Day 4:
Cabane Arpitettaz at 2786m » Cabane du Grand Mountet at 2886m » Zinal at 1680m

Elevation gain: 1200m without side-trips (1 ascent, 2 descents)
Duration: 5-7h
Possible side-trips: Blanc de Moming 3661m, Zinalrothorn 4221m (requires climbing)

Motivated for a big push to reach Zermatt that day, but open to an early exit if Daniela’s breathing problems persisted, we left the hut early in the morning.

Ascent route up Moming Glacier from the Arpitettaz hut.

A long yet really nice climb up the Moming Glacier brought us to a col with the most impressive views on the traverse.

Ober Gabelhorn dominating the horizon.

At the col, we agreed that pushing all the way to Zermatt that day would be a torture for Daniela and so we agreed that skiing out to Zinal is the best option while still completing majority of this beautiful ski traverse.

Having some extra time on our hands, we went up to a sub-summit of Blanc du Moming (turning right in the col) before heading back and roping up for an amazing traverse of the Moming arete – a steep ridge that divides the Moming and the Mountet glaciers.

Walking on the beautiful Arete du Blanc is a true highlight of this traverse!

Back on skis, after the arete, it was time to enjoy some spring skiing and a brief break at the Grand Mountent hut which is pitted in a truly spectacular place, deep below a series of steep 4000m peaks.

Impressive steep walls of Dent Blanche on the right with the traverse route through the Durand Col in the middle. We didn’t climb up this col as we turned sharp right down the valley to Zinal.

The descent to Zinal village was long and offered nice turns on a mellow Zinal glacier before we skied down an old road that ultimately brought us to wide flats before the village of Zinal.

Old houses in Zinal glow with history.

Since we ended up in a different valley than our car in St. Niklaus, we took a scenic bus ride down from Zinal to town of Sierre in the main valley. From there, we took a train up to Visp before switching onto a mountain train ride up to St. Niklaus.

Additional Information

Logistics/Transportation + Parking

Compared to the famous Haute Route, the Imperial version is much simpler for transportation as you can start and finish in the same valley, and getting back to your car (or main train routes) with just a simple bus or train ride down the valley.

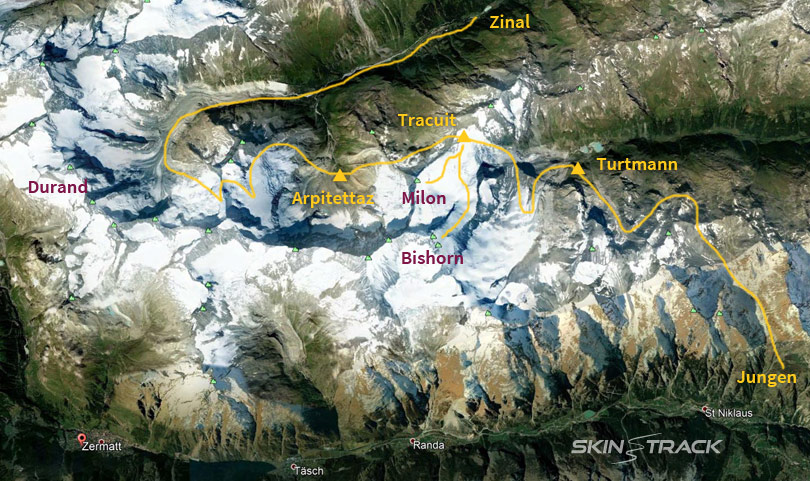
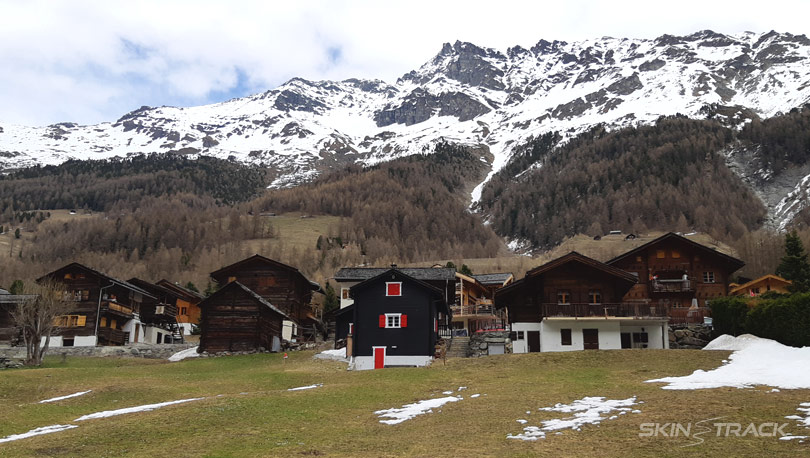
We parked in St. Niklaus which is about 30km down the valley from Zermatt. The same can be done on the Zinal side where you park at St. Luc and then ski out to Zinal.

Our logistics got slightly complicated as we skied out in Zinal instead of Zermatt, yet we still got back to our car in less than 3h of connecting buses and trains.

Hut arrangements + Food

Booking huts is easy but I recommend calling if possible then instead of just filling out the online form.

You will most likely get a discount if you belong to an alpine club in your country. Since you are in Switzerland the prices are slightly higher than rest of Europe but paying around 65-75 Euros for sleeping, dinner and breakfast is reasonable.

Huts:

  • Turtmann Hutte
  • Cabane de Tracuit
  • Cabane Arpitettaz

For food, all huts will provide you with fine dinner and breakfast but plan on bringing all your lunches and snacks for the whole traverse.

As there is no running water at the huts during winter-spring months you will have to buy it every day.

For staying at huts, it is required that you bring your own simple sleeping sheet (or sack) while the pillows and blankets are provided.

There is no need to bring slippers as they are provided at every hut.

If you need WIFI then you might get lucky at some huts.

For weather, just ask the hut custodians and they will happy to help you.

Recommended gear:

In addition to standard ski touring gear, I recommend to bring a rope and crevasse rescue gear. Then an ice axe and boot crampons.

Ski crampons can be useful as well but we chose to leave them behind. If you don’t plan doing any side trips then you can likely get by without boot crampons as well.

Other:

Having a topo map of the area is always good and you can buy 1:40,000 that covers the whole traverse and more.

For clothing, you will be travelling mostly around 2800-3500m so it can get cold when windy even when the sun is out.

Filed Under: Trip Reports & Conditions Tagged With: Haute Route, Haute Route Imperiale, Switzerland

Tantalus Range Traverse – 40km, 5000m, 18 hours: Eric Carter, Greg Hill, Ross Berg

August 2, 2018 By Stano Faban Leave a Comment

Despite being one of the most spectacular places in the Sea-to-Sky corridor (between Vancouver and Whistler, BC, Canada), Tantalus Provincial Park is one of the least well traveled. This is partially due to problematic access – the vast majority of users use helicopter – and partially due to the difficulty of the terrain.
tantalus-tr-5
Over many trips into the area, I’ve become more familiar with the terrain throughout the Tantalus Range. Single routes no longer seem as daunting of an effort and the appeal of the area is no longer just getting there and doing something, but trying to string chains of routes to maximize the time in the alpine and technical terrain covered.

2016: First attempt – Eric Carter with Nick Elson

In 2016, Nick and I had our eyes on the Tantalus Traverse. This route starts at the north end of the range (at the Sigurd Creek trailhead) and climbs over the shoulder of Pelion Mountain before ascending the North Ridge of Tantalus (a classic climb in south-west BC) and then descending to the south past the Haberl Hut, and down past Lake Lovely Water to the Squamish River. All said and done, we traversed Mount Tantalus from car-to-car in just under 11.5hrs.
While the trip was an incredible adventure and a proud accomplishment, it was hard to shake the feeling that we had run past a lot of summits that we really should have tagged. As Peter Croft says: “summits do matter!”, and almost immediately the seed was planted. What if we followed the same route but tagged as many summits as possible along the way? There’s no shortage as more than 16 named peaks lie in the vicinity of the park.

2018: Second attempt – Eric Carter, Greg Hill, Ross Berg

Length: 40 km, Elevation gain: 5000 m
Strava file: https://www.strava.com/activities/1722423067

An obvious loop follows the divide that is seen from the Tantalus highway viewpoint on Hwy 99 (just north of Squamish). This includes five summits:

  • Mount Pelion
  • Mount Tantalus
  • Mount Dione
  • Mount Serratus
  • Mount Alpha

Fast forward a few years of practice scrambling and climbing in the mountains and the “complete” Tantalus Traverse was still on my mind.
The Arcteryx Alpine Academy comes to Squamish every summer and with it, an influx of some of Canada’s raddest athletes. I’ve known of Greg Hill for his reputation as a skier for some time. In 2013, Nick and I broke his long standing record skiing around the Spearhead Traverse. This season was the first time we’ve actually crossed paths in person though. After an introduction from Adam Campbell and the assurance from local guide stud Ross Berg that snow conditions were still optimal, we decided to give it a go.
With the hope that we could do the whole traverse in less than 20hrs, we debated start times but settled on a “reasonable” alpine start of 2:30am. After stumbling through a backcountry rave being held at the trailhead, we were off up the Sigurd Creek Trail by headlamp. After climbing up northern slopes on Pelion, we emerged from the tree-line and started climbing open moraine, slabs, and glaciers. The first amazing view comes crossing the East Shoulder of Pelion. After a 2000m ascent, you get to see the full Tantalus Traverse laid out in front of you. It’s inspiring and daunting at the same time – there’s a lot left!
tantalus-tr-3
We scrambled a loose gully to gain snow slopes on the north side of Pelion up a beautiful crest to the summit. Descending back to the shoulder, we regained the standard route and crossed down towards the Tantalus-Zenith Col. After saying a brief hello to a heavily laden group doing a multi-day trip in reverse, we continued towards Tantalus.
The North Ridge presents some glacial difficulties but then gives way to excellent alpine scrambling on a sidewalk in the sky. Views are incredible down the steep Rumbling Glacier with Squamish and Howe Sound to the south, the Ashlu-Elaho Divide to the north, and the Sunshine Coast to the west. We romped along up the ridge and tackled the final 3rd class pitch that leads to the summit slopes. The sub-summit and final scramble to the peak are some of the most engaging and exciting climbing on the route.
With our second summit under our belts and generally feeling pretty good, we started the most complex portion of the day, descending off Tantalus. Luckily, having guided it many times, Ross’ experience here was invaluable for quickly locating the four rappel stations and moving as efficiently as possible. Despite taking our time, we quickly found ourselves back on snow and then it was just a short out and back scramble to summit three – Dione.
tantalus-tr-2
Low on water, we moved as quickly as we could down the roasting hot Dione Glacier towards the Haberl Hut. We gulped as much water as we could at the first melt-water stream we crossed, and then stopped at the hut to quickly boil some instant noodles. The salt was incredible and gave us a much needed boost.
The West Rib of Serratus was one of the few sections of the day I hadn’t actually previously done. It’s pleasant 4th class scrambling on good rock. We’d already spent so much of the day on that type of terrain, however, that we just hoped we could get through it quickly. Soon enough we were on the summit, polishing off the remains of our food with only Alpha remaining to the East.
The North Face of Serratus is a classic steep ski descent but had softened up nicely in the afternoon sun so we made quick work of it, boot skiing down to the lower glacier with just a few crevasses to avoid. From here, we had to drop surprisingly far down to gain the Serratus-Alpha Col. With the feeling that the day was in the bag, we plodded up the West Face of Alpha (3rd class) in what was the hottest and most unpleasant climb of the day.
tantalus-tr-4
Luckily the unpleasantness of climbing Alpha was completely washed away by the psych that we felt on reaching the summit. We had accomplished our goal of five peaks and were on track to get back to the river before dark if we moved quickly. It’s all downhill from here! We made quick work of descending the East Ridge of Alpha and nailed the route back to Lake Lovely Water. It’s poorly marked and often not much of a footbed so we were a little nervous we could get off track there. From the Lake, the trail down is good (compared to the rest of the day) and we put our heads down and pushed hard to get to the river. Fatigue was showing and we each had several wipe-outs.
We put on headlamps just as we arrived at the Squamish River cable car station and stopped our watches after about 18hrs of mountain travel. All that remained was to cross the river and walk a few short km to our car. Unfortunately, this was what we were worried would be the crux of the day. With the cable car itself locked up on the far side of the river, our options were swimming, which seemed needlessly dangerous, or tightrope walking on the haul cable while clipped in to the upper cable above our heads, via ferrata style. Greg launched off first so he could get a head start on the trip back to the car so Ross and I sat on the near station and cheered him on (heckled). The upper cable that you clip your tethers to has four metal cones anchored to it for aircraft visibility. They require that you kind of push around them after clipping past but we’d heard recent reports that several of the cone had wasp nests in them so we were pretty nervous. We were wearing all our rain clothing in the hopes it would protect us from bites.
tantalus-tr-1
When Greg passed the first cone, we held our breath, hoping there wouldn’t be any wasps. He made it past without any bites but not without losing his balance and bowing way out towards the river with his feet on the lower cable. After that, he got in a rhythm and pretty quickly, it was my turn. I got clipped in and started walking. There may have been some whimpering and self doubt but Ross reminded me that there was no other option so I’d better get on with it! Soon enough, I found my rhythm as well and before I knew it, I was back on terra-firma waiting for Ross.
While it will be a few weeks before I really feel like I need to deal with crossing that river again, I still have unfinished projects in the Tantalus Range. I know it won’t be that long before I’m back.
A big thanks to Greg and Ross for prodding me to join them for the day. It was a great crew and we had a really good time!

Gear Notes

I used Scarpa Iguana approach shoes for this trip. They were really good for climbing and decent to run in, but terrible on snow (as they are not built for that). Even with crampons that fit (Petzl Leopard), they aren’t very stiff so being comfortable climbing steep snow is important.
The new Ultimate Direction SCRAM pack is going to be awesome. It’s designed with this exact type of trip in mind. Stay tuned.
Because we only anticipated making rappels (4 x 30m on Tantalus and 2 x 30m on Alpha), we brought skinny ropes. The Petzl RAD Line is awesome for ski mountaineering and rappelling but using such skinny cord on rock is a bit disconcerting. It’s important to ensure that the ropes are running correctly over the rock edges and that they won’t roll along the edge as you move along the rappel, causing damage.

Route Notes

The Tantalus Traverse and many of the peaks we tagged are described in the book Alpine Select by Kevin McLane. This is firmly alpine climbing territory and shouldn’t be considered running. GPS tracks can be found online and are helpful for some of the macro-route finding. Micro-route finding is also a challenge (especially sections like the descent off Tantalus but even the shortest route through the Zenith Col or down to the Russian Army Camp) so being able to assess and move efficiently is key.
I wouldn’t recommend the full traverse without getting some shorter trips in the range first and obviously having the right combination of skills.

Filed Under: Trip Reports & Conditions Tagged With: Eric Carter, Greg Hill, Ross Berg, Tantalus

Short Movie: Skiing the Hardrock 100

October 5, 2016 By Stano Faban Leave a Comment

In theory, skiing 100 miles should be easier than running them. But this all depends on terrain, snow conditions and overall winter challenges.
In this short fun movie, a couple of fellow skimo and mountain running athletes (Paul Hamilton, Scott Simmons, Noah Howell) ski the course of the famous Hardrock 100 – one of the toughest 100 milers in North America if not in the world.
And to come full circle, Jason Schlarb, an ultra-runner and the producer of this movie, went on to win the 2016 Hardrock 100 alongside Kilian Jornet!

Filed Under: Trip Reports & Conditions Tagged With: Hardrock 100, Jason Schlarb, Noah Howell, Paul Hamilton, Scott Simmons

Mount Baker: Early season ski trip report

November 5, 2015 By Stano Faban Leave a Comment

Last weekend brought a nice dump of snow to the Pacific Northwest. Rainier was forecasted to get walloped and further north, we got a decent amount of snow as well.
A few brave souls explored the alpine as the snow was still falling on Sunday but I didn’t get out until Tuesday. It was worth the drive down to Mount Baker (or Kulshan) and I was able to start skinning below tree line. The lower glaciers suffered significant losses over the hot summer and, despite the snow, were still heavily crevassed making skiing a bit limited.

Filed Under: Trip Reports & Conditions Tagged With: Mount Baker

Best Ski Trip Reports of 2014/2015 Season

July 26, 2015 By Stano Faban 1 Comment

Last year, we posted our picks for the best ski mountaineering trip reports from North America in the 2013/2014 season. We decided to do it again this year with the following criteria: a well written report with exciting photos and true ski mountaineering, not just ski touring.
While last year was marked by a series of exciting reports on FKTs in North America, this year that front was much quieter. Instead, we have a handful of cool trip reports to take your mind off the unbearable summer heat.

The legendary and elusive Trevor Hunt at the top of Ledge Peak
Skiing in the Tetons with the Dorias bros
I was lucky enough to spend a day skiing in the Sky Pilot area (near Squamish, BC) with Dynafit athlete Trevor Hunt. While warming up on an easy couloir, we got a good view of Ledge Mountain and a series of steep ramps above cliffs. Conditions were perfect and Trevor returned the next day to solo it for the first descent. His report is as emotion filled as it is possible to convey via the internet and his spectacular photos barely reveal the seriousness of the descent. Check it out here.
Next up is a report from our Utah friends, the Dorais brothers. Jason and Andy have been fixtures on the skimo racing podiums in the US and have also been stepping up their game in big mountain terrain. After returning from the Ski Mountaineering World Championships in Switzerland, along with Tom Goth, another top US skimo racer, they ticked off the Teton Trifecta in excellent style. A technically demanding series of descents, presented with words from Andy and excellent photos from the group here.
Also be sure to check out the recent film documenting the Dorais bro’s approach to life and skiing by Duct Tape Then Beer Productions at the end of this post.
Carl K contemplating the Middle Teton
Noah Howell in Montana
Continuing… Carl Kohnstamm is a 21-year old Montana native transplanted to Squamish BC. Carl is a stand out solid-at-everything ski mountaineer with some serious lines on his resume in Montana, the Tetons, and on the Coast. His understated reports reveal just enough to comprehend his motivations and his photos speak for themselves. While on a semester at University of Montana, he took his breaks seriously and made a couple of great trips to the Tetons including a strong solo outing on the Middle Teton that he details on his blog.
Another report is from Noah Howell, formerly of Powderwhore Productions, is well versed in story telling and generally an impressive photographer. While he may look a rather unlikely skimo racer, he seems to be one of the few who truly race for the fun of it. When he isn’t racing skinny skis on the North American series, he seems to have an affinity for getting a little further afield than most of us and embracing the suffering that accompanies such trips. His report from a spring trip to the Beartooth Mountains is illustrative of this approach to technical ski mountaineering descents.
Last up, not a specific trip report but a blog to follow for its beautiful pictures and excellent beta if you find yourself skiing in the Cooke City area, the Cook City Chronicle by Beau Fredlund.
And that should be enough reading to stoke the excitement for winter! 🙂
If you have any other awesome trip reports that you think must be included, link them in the comments below!

Dorais brothers movie

Filed Under: Trip Reports & Conditions Tagged With: Andy Dorais, Carl Kohnstamm, Jason Dorais, Noah Howell, Teton Trifecta, Trevor Hunt, Trip Reports

2014 Canadian Skimo Team Camp at Rogers Pass

December 29, 2014 By Stano Faban Leave a Comment

This is a guest post from a recent Canadian Skimo Team training camp in Rogers Pass. I was unable to attend so I want to thank Peter Knight for the text and Travis Brown for the photos.
The Alpine Club of Canada had taken a page out of Alison Redford’s playbook and generously block-booked the hut for us so we would have lots of elbow room to eat and sleep as just Michelle Roberts, Martha Burley, Steve Sellers, and Travis and I were attending.

2014-asulkan-camp-travis-1

After a 3-hour ski up to the hut, through tracked out snow and watching numerous groups ski down, the sleeping bags and hut booties seemed more inviting than a couple of short laps above the hut in wind affected snow.
Monday brought a lazy start but with some ambitious goals. None of the weekend groups had skied above the hut and the weather and avalanche conditions were looking good, so we set our sights up to the top of Youngs Peak. Travis punched the track up the steep headwall and we quickly topped out.
2014-asulkan-camp-travis-2
I was expecting to pound out a couple of laps on the Steps of Paradise, but soon we were skiing down the other side towards the Forever Young couloir, which was untouched since the last snowfall. Meanwhile, some German ski mountaineering racers had topped out the couloir from the road so I had some company at the top while I waited my turn. We all made it down safely with varying levels of slough management techniques.

Michelle and Martha with Forever Young behind them.
Typically these camps are a chance to ski lots of vertical, but with tired legs from racing two days before this adventure was an interesting diversion. After a couple of afternoon laps of the triangle moraine it was time for a classic staple of these SMCC Asulkan ski camps: the bonk-slog up the tree triangle back to the Asulkan hut at the end of the day.
Shortly after the last stragglers arrived back at the hut, the wind got much stronger and battered the hut all night. The wind sustained through the morning and brought warm temperatures along with it. Freezing levels rose above the hut, motivation levels did the opposite. Trees were uncovered by the wind and their snow was blown into the outhouse thanks to some broken locks. And it was raining. It was time to bail.
The ski down from the hut was interesting as the snow got slower and less supportive as we worked our way down. The snow could be described as elephant snot or fluffy powder depending on whether the person you were talking to was from Fernie or not. On the way down we encountered what is likely another full house at the Asulkan. Nobody was pumped to hear that it was raining at the hut.
Well at least I got back to Edmonton at a decent hour 😉

Filed Under: Trip Reports & Conditions Tagged With: Asulkan Hut, Forever Young couloir, Peter Knight, Rogers Pass, skimo training camp, Travis Brown

  • Page 1
  • Page 2
  • Page 3
  • …
  • Page 5
  • Next Page »

Primary Sidebar

  • Facebook
  • Instagram
  • YouTube
Our Facebook Page

skimo-manual-banner-300px
 

Recent Articles

  • Kilian Jornet Interview: About His New Foundation, His Own Environmental Impact, and How He Wants To Help Athletes and The Outdoor Industry To Protect Nature
  • How Fast Are Glaciers Really Melting? How Will This Affect Your Mountain Adventures? Interview with Pascal Egli
  • Book Review – Art of Freedom: The Life and Climbs of Voytek Kurtyka
  • Forest Skis: Innovative, Custom Build, For Backcountry Skiing and Freeride
  • Lighter and Completely Redesigned: New CAMP Ultralight Ski Mountaineering Ice Axes

Categories

  • Contests & Giveaways
  • Crazy Tracks
  • Events & Races
  • Gear, Tech & Food
  • General News & Articles
  • Industry Press Releases
  • Movies & Books
  • News Shorts
  • People (Interviews)
  • Racing 101
  • Reports & Results
  • Reviews
  • Skimo Racing
  • Training, Tricks & Tips
  • Trip Reports & Conditions

Footer

About SkinTrack

Travelling through snowy mountains on skis is like flying… and experiencing life at its core.

Gear reviews, interviews, adventures, contests, skills, skimo training, race reports – we connect you to all things related to self-propelled skiing.

SkinTrack.com, created by Stano Faban, was born out of passion for ski mountaineering and ski touring. Over the years, it has become one of the most popular ski mountaineering blogs in North America.

Recent Articles

  • Kilian Jornet Interview: About His New Foundation, His Own Environmental Impact, and How He Wants To Help Athletes and The Outdoor Industry To Protect Nature
  • How Fast Are Glaciers Really Melting? How Will This Affect Your Mountain Adventures? Interview with Pascal Egli
  • Book Review – Art of Freedom: The Life and Climbs of Voytek Kurtyka
  • Forest Skis: Innovative, Custom Build, For Backcountry Skiing and Freeride
  • Lighter and Completely Redesigned: New CAMP Ultralight Ski Mountaineering Ice Axes

Useful Links

Comparing the lightest: Skis | Boots | Bindings

Skimo Training: Training Plans | Videos

Stay in Touch

  • Facebook
  • Instagram
  • Twitter
  • YouTube

Copyright © 2025 SkinTrack.com. All rights reserved.