• Skip to primary navigation
  • Skip to content
  • Skip to primary sidebar
  • Skip to footer

SkinTrack

  • Lightest Gear
    • Skis
    • Boots
    • Bindings
    • Skins
    • Packs
  • Skimo Training
    • Training Plans + Skimo Manual
    • Transitions Videos
  • Facebook
  • Instagram

Training, Tricks & Tips

Skimo Training Locations Series: Diamond Head Trail – Squamish BC

December 3, 2015 By Stano Faban 7 Comments

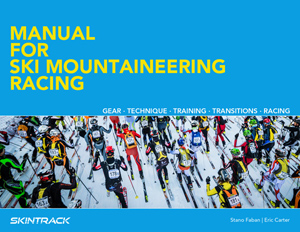
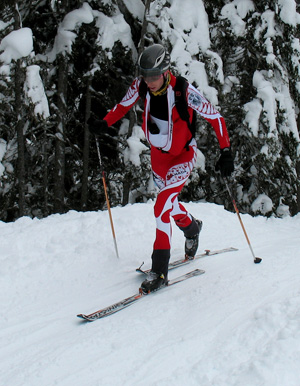
The idea of this series is to highlight a local skimo training zones. Not the big, rad lines in the backcountry that you go to for huge missions, but the day in, day out, reliable training spots. It could be on piste or backcountry but it’s where you go to crank out intervals or hone your descending.
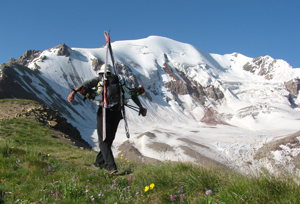
For our first in the series, we have my local training spot: Diamond Head Trail in Garibaldi Provincial Park outside of Squamish.
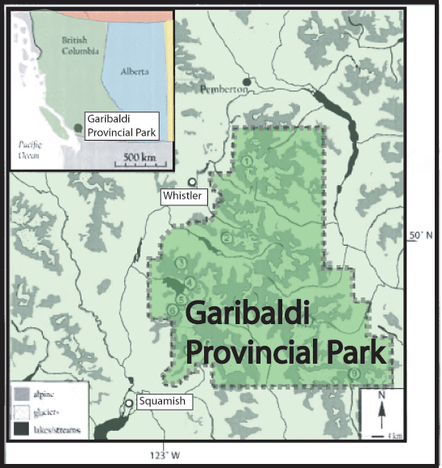
BC's South Coast and Garibaldi Provincial Park. The Diamond Head Trail is accessed from Squamish.
BC’s South Coast and Garibaldi Provincial Park. The Diamond Head Trail is accessed from Squamish (bottom left).

Where is it?

Garibaldi Park spans a big chunk of the Coast Mountains between Squamish and Pemberton. Near the southern end, it is accessed via the Diamond Head Trail.

What makes it special?

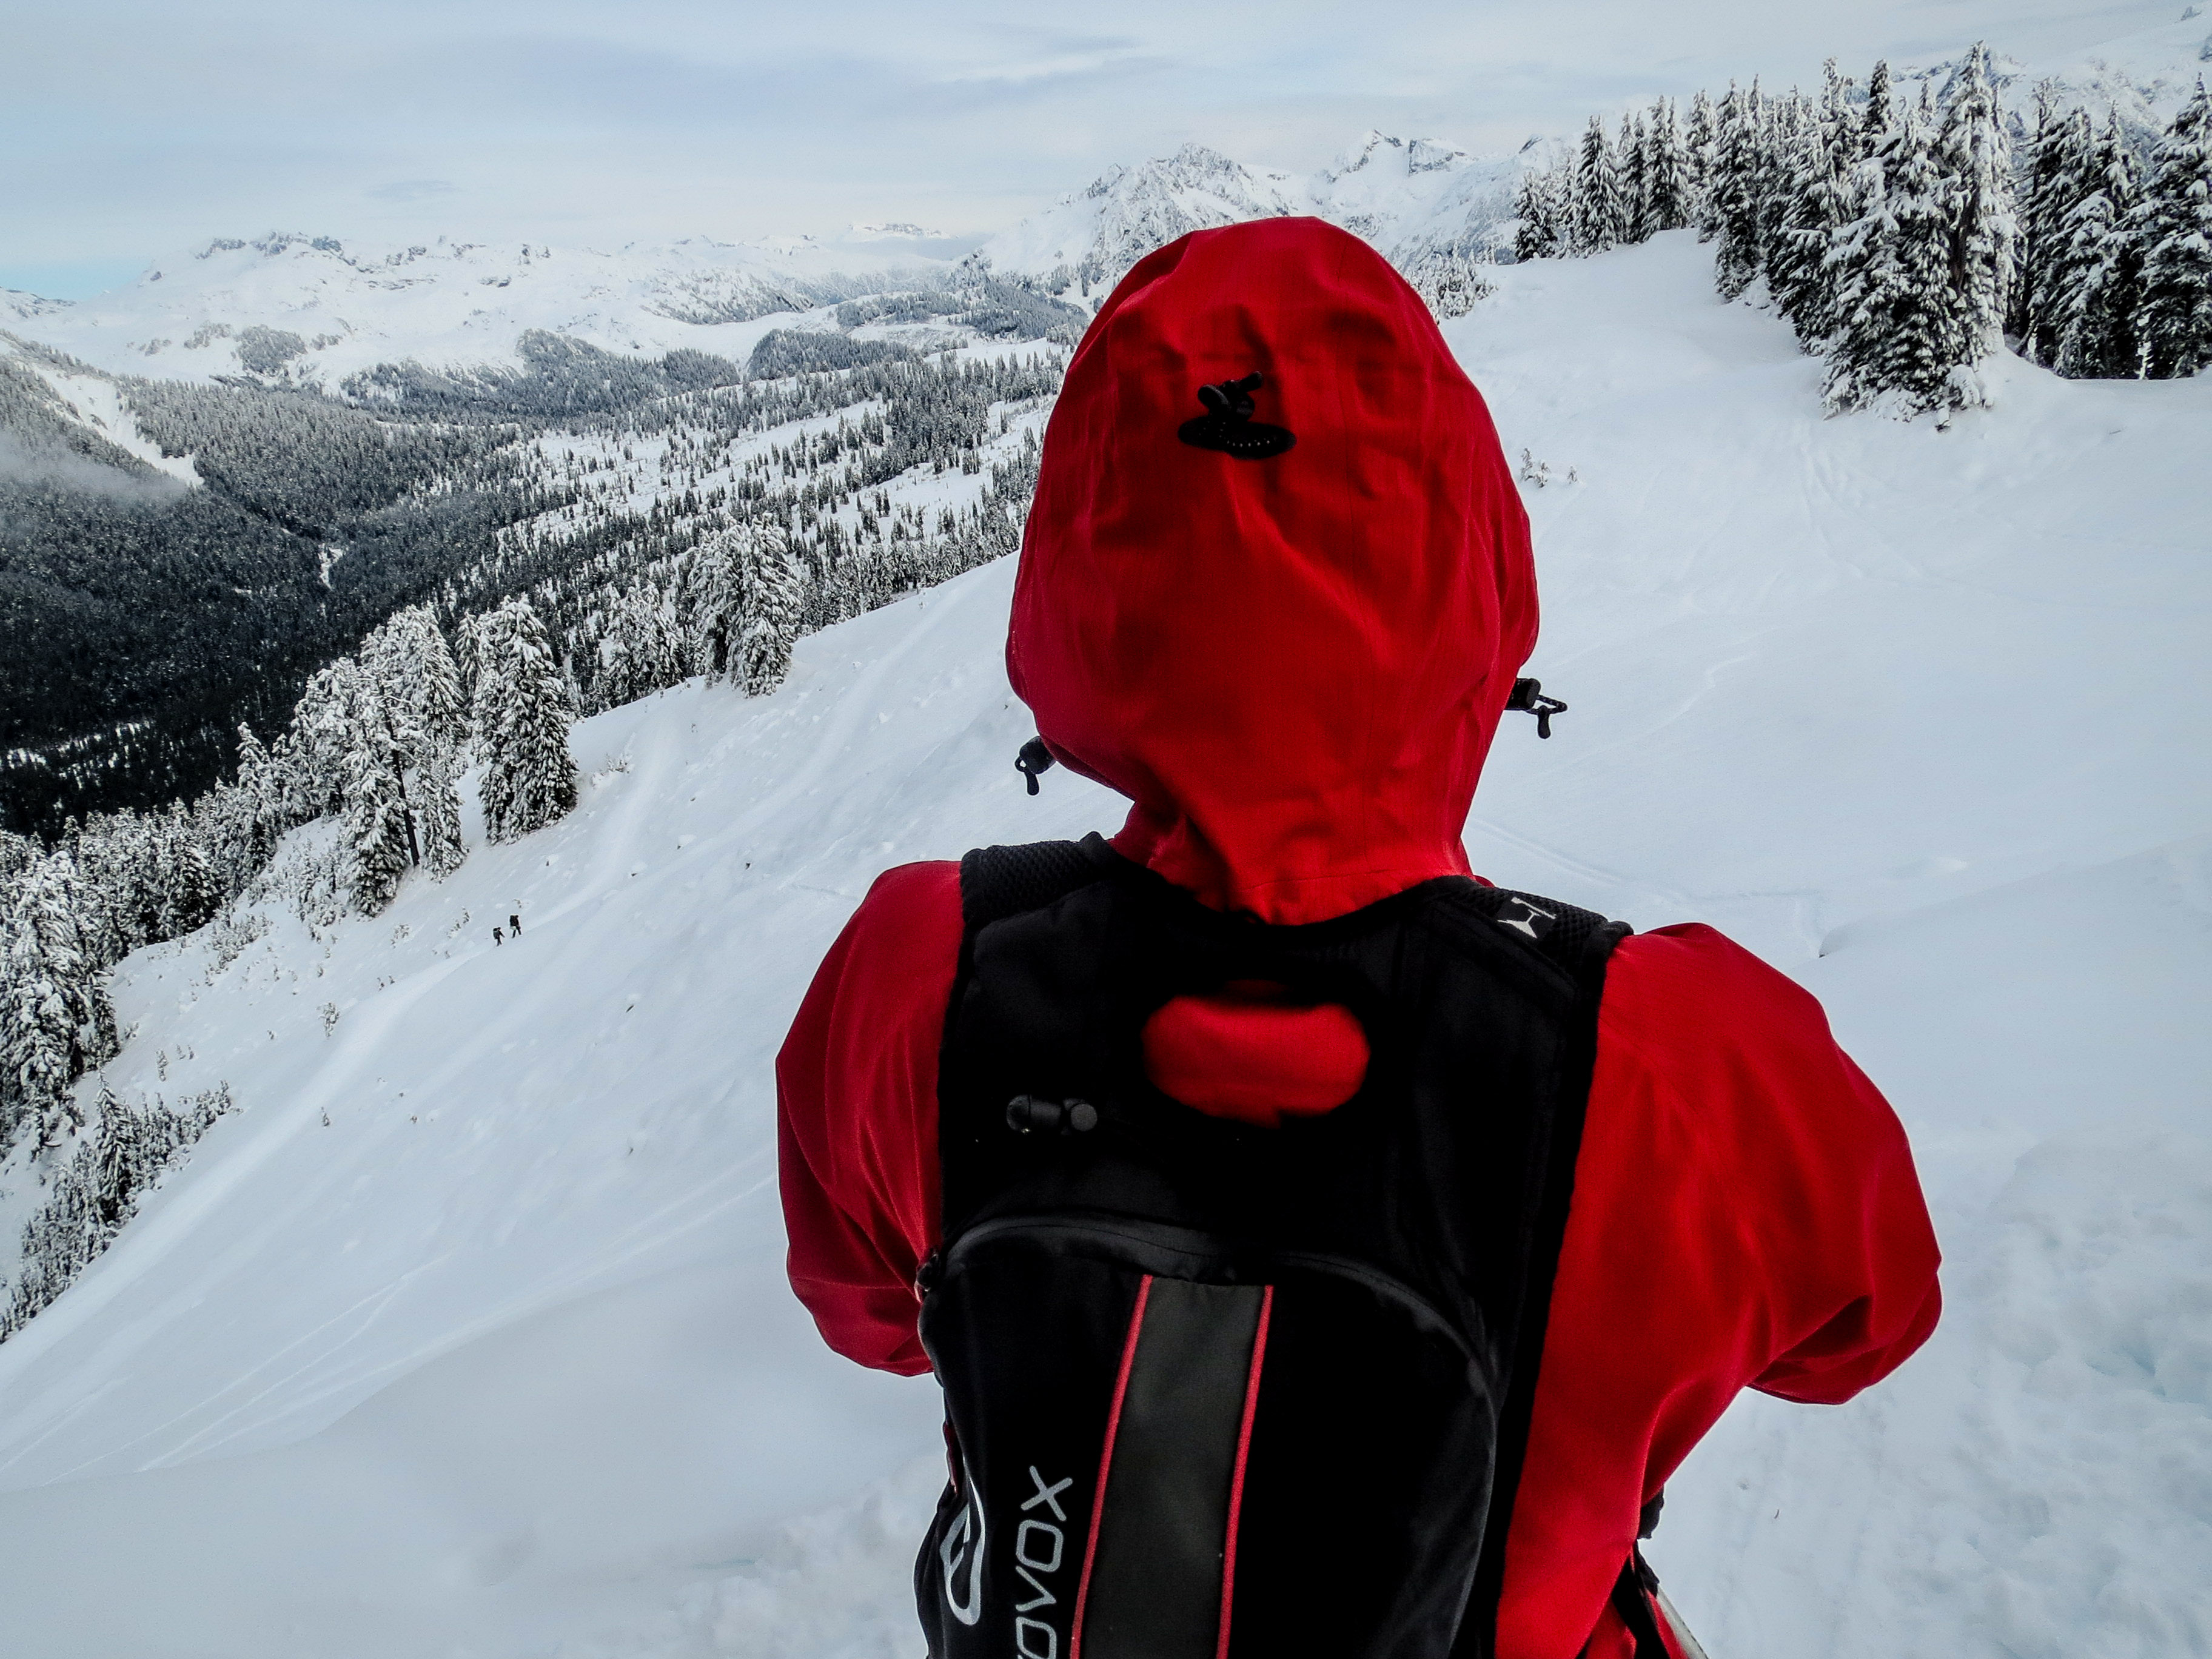
The Diamond Head Trail/Red Heather area gets some of the biggest snowfall in the region. That also means in North America.
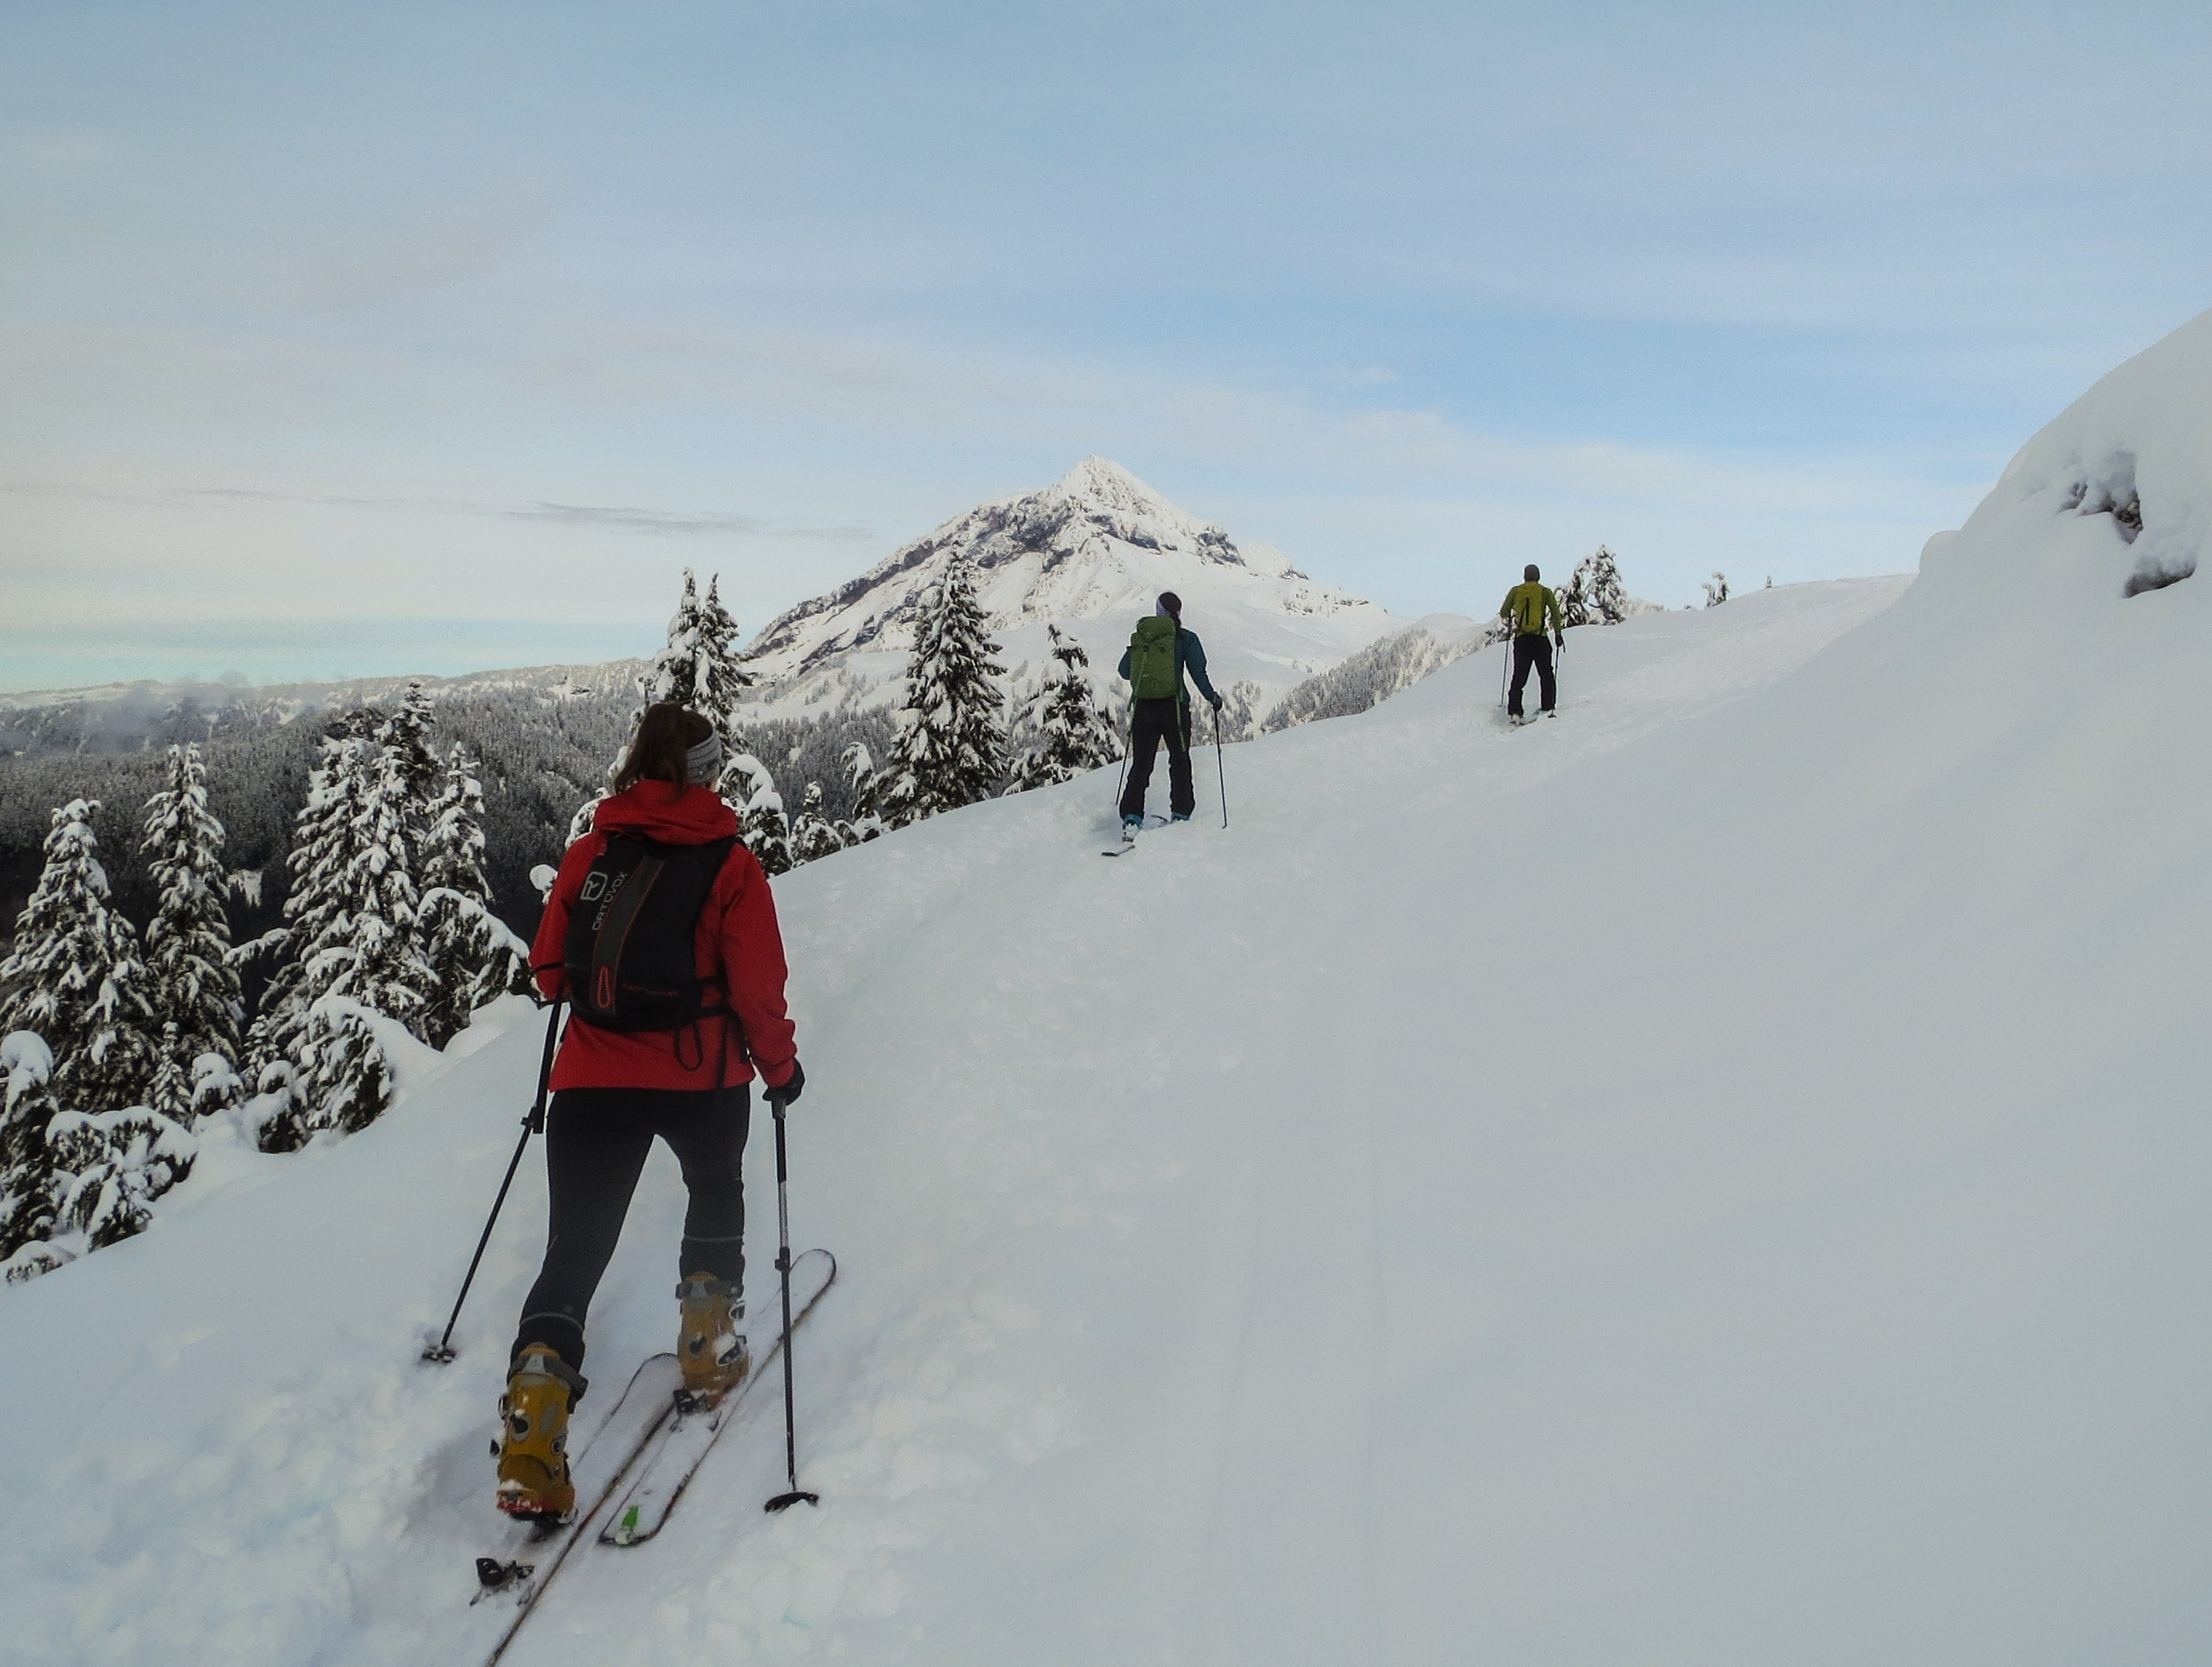
The big old cedar trees, that line the ten feet wide trail, tower over you while you skin and heavy snow stacks high on the branches giving it a serious wintery feeling. By mid-winter, when enough snow has fallen, the switchbacking road can be short cut on the descent, through the trees for an excellent run back to the car. This trail is also the beginning of bigger adventures and provides access to the Elfin Lakes Cabin (20k round trip), Atwell Peak (the volcano that looms over Squamish) and the Garibaldi Neve Traverse (a beautiful high alpine traverse from Squamish to Whistler).
While I’ve spent lots of days skinning on the road, it has also been the start of some epic days in the alpine.

Interval training and Lactate testing on the Diamond Head Trail.

Where is the trailhead/parking?

Drive through Squamish (60km north of Vancouver, BC) and turn right off Highway 99 at Mamquam Road. Pass Quest University where the road turns to dirt. Turn left onto Garibaldi Park Road and be prepared to chain up. Parking is at the end of the road.
» Google Map directions.

What are the rules?

Chains may be required if the road has not been plowed recently or if there is ice. Winter tires don’t cut it and this is ranger enforced on busy weekends. If you get stuck because you didn’t put chains on, expect a hefty off-highway towing bill.
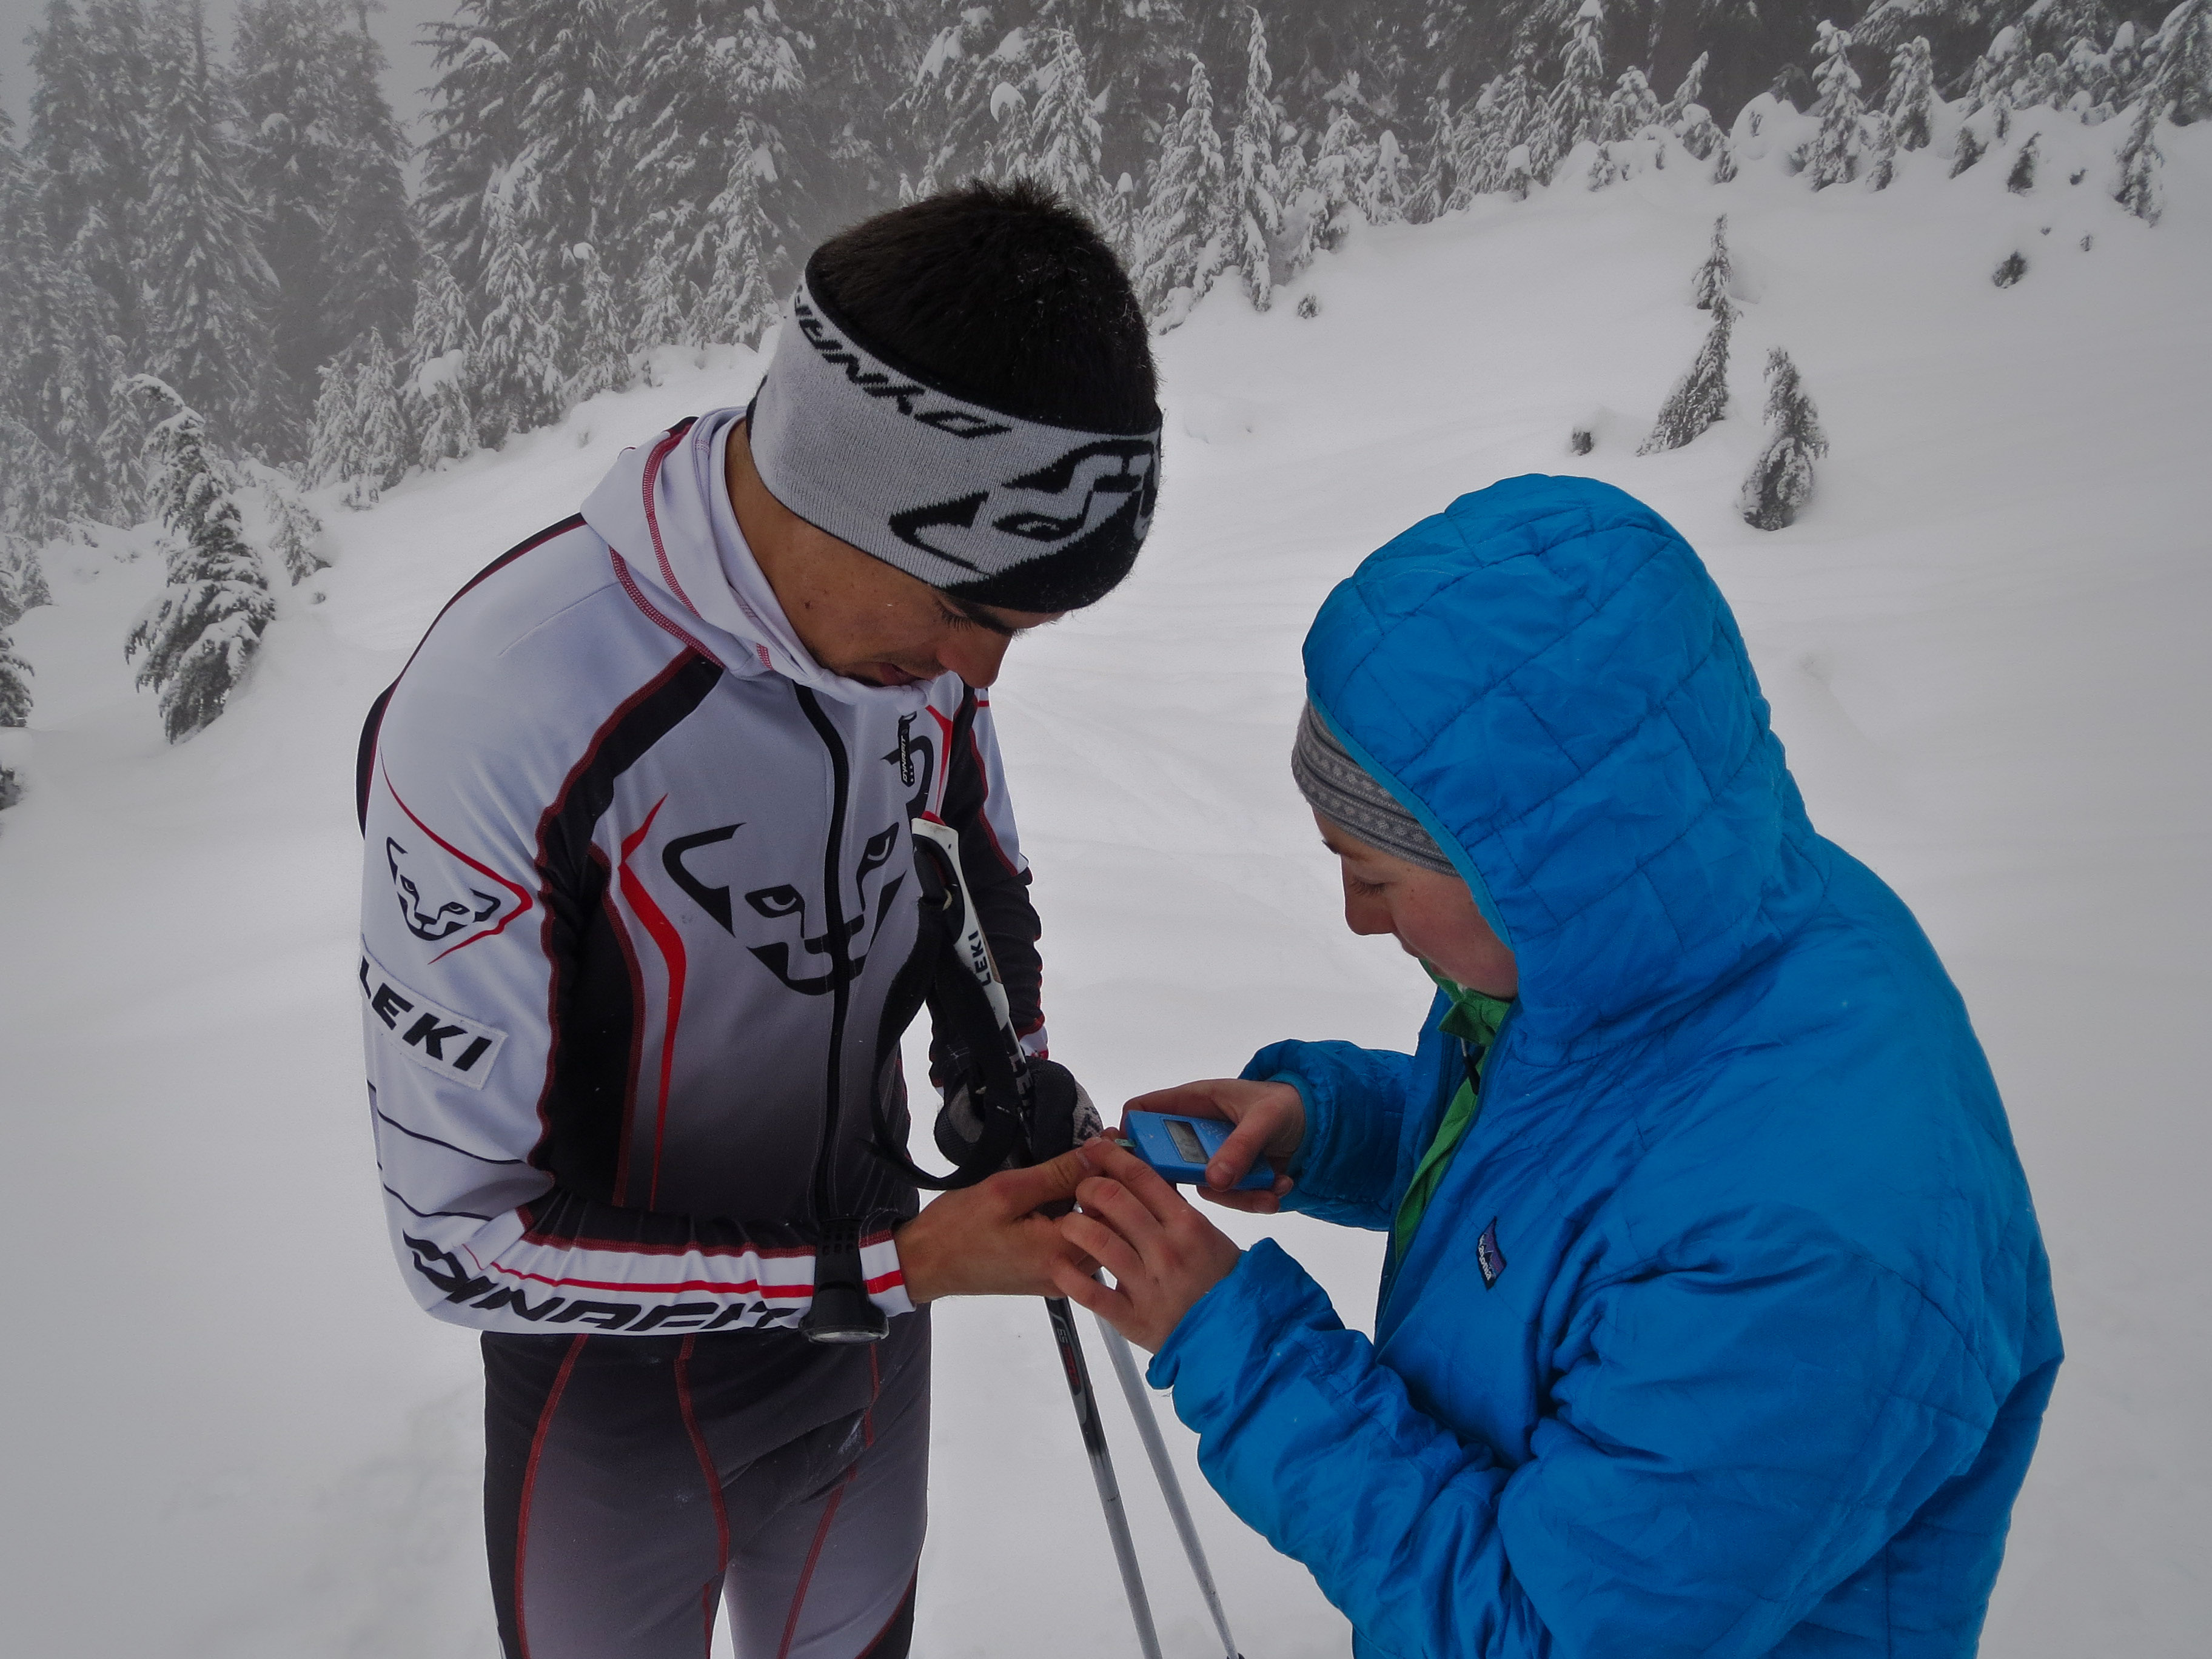
The trail is always open and is frequently quite busy on the weekends but quiet during the week. There is no significant avalanche danger below the Red Heather Cabin though it is the backcountry so dangers always exist.

Nightime interval training on the lower Diamond Head Trail.

What is the local training group?

There are no organized training groups in Squamish but expect to meet a bunch of other skiers looking for quick access to the backcountry here. Check the Garibaldi Skimo Club on Facebook to connect with other light and fast inclined people on the Coast.

What workouts are best to do here?

The low angle road and usually well buffed surface makes it perfect for fast intervals. Doing 2x 10min of 30sec on, 30sec rest is great for lactate tolerance and technique development. Once you’ve finished your workout, there are nice north facing slopes off Round Mountain (also called Paul Ridge) that hold some great powder!
Stay tuned to SkinTrack and the Training Zone Series for more of the best training locations around North America and beyond! Got a zone you would like us to showcase? Leave us a comment below and we will get in touch!

Skinning on the upper road with Garibaldi and Atwell Peaks in the background.
Good skiing can be had on the North facing slopes of Round Mountain in good avy conditions.

Filed Under: Training, Tricks & Tips Tagged With: Diamond Head, Squamish, Training Zone

Skimo Training Series: Training tips for September-October

September 24, 2015 By Stano Faban 2 Comments

September marks change of seasons in North America and Europe. One minute you are suffering through the heat of summer then the next it is end of the month and the first snow is dusting the high peaks. During the upcoming weeks, there are a few things you can do to help get ready for ski season.

Eric Carter and Melanie Bernier getting in some early "skinning" mileage.
Eric Carter and Melanie Bernier getting in some early “skinning” mileage.

1) Start mimicking ski movements

Most of us have been running, cycling, or rock climbing all summer so it’s time to start working again on specific muscles for skinning and skiing.
Those with a big road climb in their area can break out the roller-skis. If you aren’t willing (or don’t have a big climb close by) to go to that level of training dedication then uphill ski walking is a good alternative. Find some hills that are steep enough to force you into a walk and use ski poles to push off with full extension in your elbow.
By getting those unused muscles in your back and legs moving, before the snow flies, you will have less soreness to start off when you finally put real skis on your feet.

2) Introduce intensity into your training

This time of the year is a good time to start including intensity training into your weekly routine. Skimo races are frequently at or above lactate threshold pace so Tempo and Threshold work early in the season is key. Start gradually with shorter intervals at lower intensities but work your way towards long interval sessions that mimic climbs in a race.
One of our favourite workouts is the Uphill Hour:
Following an easy warm-up, hike with poles or roller-ski uphill at Tempo pace for 45-60 minutes. Finish with an easy cool down.

3) Plan your race calendar

By October 1st, most race dates are usually decided or you at least have an idea of when your goal race might be since most events have stable dates year to year.
Check SkinTrack race calendar (coming soon), the USSMA calendar, and the ISMF World Cup schedule. Analyse where you need to drive or fly and start planning how far in advance you need to be there. Someone travelling to Utah or Colorado, or even to race Mezzalama in Italy, from near sea-level in Boston or New Hampshire should have very different acclimatization plans than someone that lives in Crested Butte.

How to get ready for a skimo season?

If you have more questions about how to get ready for the upcoming season, check out our skimo training manual – it is full of specific advice on fall intensity sessions and tips on how to plan your race season.

Filed Under: Training, Tricks & Tips Tagged With: interval training, roller-skiing, skimo training

Copying Kilian Jornet is Likely Not Ideal for Our Performance and Health

September 20, 2015 By Stano Faban 7 Comments

This article is not only for mature and young athletes but for their parents as well.
Without a doubt, Kilian Jornet has been the most influential figure in endurance mountain sports over the past decade. I don’t know anyone that hasn’t been inspired by him at least a bit.
There are videos, and stories, showing Kilian winning a stacked World Cup ski mountaineering race and smashing a field of well-known ultra-runners only few weeks later, despite a five-month long break from running. In between, he is skiing up and down Mont Blanc for breakfast. I mean, how can you not be inspired?
I am a fan but I want to bring attention to couple of points that I think the general athletic public is perhaps not aware. In recent years, I observe many mountain/endurance athletes mimic Kilian’s training and I think, such copying, can likely do more harm than good to us in terms of long-term performance and more importantly health.

If we can think of Performance (personal goals) and Health as consequences of the four factors in blue then we can see that health is more important than performance in the long run because it directly affects many aspects of the whole training process. (But pretty much everything is linked together whether directly or indirectly.)
If we can think of Performance (personal goals) and Health as consequences of the four factors in blue then we can see that health is more important than performance in the long run, because it directly affects many aspects of the whole training process. (But pretty much everything is linked together whether directly or indirectly.)

Kilian versus Us: Physiology, Training, Recovery, Resources

I am not trying to pick on Kilian here, I am simply using him as an example because he is arguably the most decorated endurance athlete right now and he is a man of extremes. If you are getting inspired by him then that’s all great, and know I am as well, but perhaps keep the following points in mind when increasing your training loads.

Physiology

There is no doubt in my mind that Kilian Jornet is a freak of nature. He regularly dominates elite fields in two different mountain sports – ski mountaineering and running – in events ranging from 20 minutes to 40 hours! He seems to recover crazy fast and is never injured.
This could be due to the fact that the two sports still have long ways to go in terms of competition evolution, or that his physiology is that much better that he might not need to be racing at 100% to achieve many of his wins. Most likely, it is a combination of both.
Whatever the case, I am fairly certain that if Kilian was a road marathon runner, or a professional cyclist, he would be top 10 in New York Marathon, or Tour de France, perhaps even win.

Training

As athletes, we respond differently to different types of training programs but there are some general principles that work quite well universally. We should shape our programs based on the demands of our goal competitions as the best performance gains are made when a training program promotes the desired adaptation effects in a long-term sustainable manner.
The above means that if you want to run ultras then you will need to spend lots of time running long miles, but if your goal are 1-3 hour races then your training needs be quite different – less overall volume, frequent high(er) intensity sessions, etc – to provide you with the most benefits for the time spend.
Kilian Jornet seems to be somewhat spared of these training specificity rules. No matter how many hours of training, combined with unprecedented vertical climbing he does, he is still arguably the fastest when the race is longer than 20 minutes. According to his website, Kilian trains 20-35 hours over 7 days a week, pretty much year round. He averages around 1000 hours and 550,000 vertical metres annually.
For you and me, raising our training volume anywhere close to his levels, even for few weeks, it is very likely to set us on a path of over-training and health issues such as joint problems, muscle imbalances, hormonal and immunity imbalances, and others.

Recovery

Ability to recover well and fast is crucial to successfully improve your performance. Quality and speed of your recovery allows you to do more in training and to have an edge in competition.
Given all of the above, it’s clear that Kilian Jornet’s body must have an exceptional recovery ability. This allows him to train and race more than almost anyone in the world, and all without getting injured! I am not aware of any other athletes that push(ed) their bodies so much, for so many years, and haven’t been sidelined with an overuse injury even for couple of weeks. Will he pay the price later or he is physiologically just so superior?

Resources

With physiology, training, and recovery building on each other, we need to also consider resources when comparing ourselves to Kilian.
If you ever seriously focused on improving your performance, even for a short period of time, then you likely discovered that not enough recovery time and quality easily erodes your efforts. I believe, for most mountain athletes, this ultimately comes down to resources expressed as money and time. Between work, training, and other commitments there simply is not enough time for proper recovery on regular basis, and no money for some quality methods such as massages, physio, etc.
I don’t think Kilian is rich but he certainly has more time – to listen to his body, to take care of it, to relax his mind. He has worked hard to arrange things this way but for most of us this is not possible so it should be taken into consideration when setting up our training plan.
Killian is a full time professional athlete and at any time he isn’t training he is recovering. He also has a great support network – this also fits under the resources umbrella.

Kilian versus Us: Long-term health

Professional athletes get paid with an understanding that they are trading their bodies for money but even they still hope the trade-off won’t have serious consequences.
As amateur athletes, junior racers, or parents, we should consider future consequences a little bit more, especially, given the fact that we don’t have the same recovery resources available to us.

Bottom line

With everything said throughout the article, I don’t want to discourage you from challenging yourself, but I hope I was able to illustrate why you should be thinking of the size and the kind of the impact your training and activities will have on your performances and health. Kilian is using his talent to its full potential, and that is very inspiring, just don’t forget he is a bit special 😉

Filed Under: Training, Tricks & Tips Tagged With: Kilian Jornet, Training

Transitioning from Skimo to Summer Training

April 20, 2015 By Stano Faban 4 Comments

spring-skiing-skimo-transitionSpring arrives at different time in different years. Some of us finish the last race of the season in February or March and are ready to hang up the skis. Others, with sufficient snow or motivation, are able to push the ski season well into May or even beyond.
Regardless, at some point most of us have to pack the skis away for the summer and switch to dryland training.
In this article, we want to provide you with a some tips and cover a couple of key things to keep in mind when you switch to summer training.

Equipment

skimo-spring-transition-skis-2Make sure to take take care of your equipment:

  1. Put a layer of warm (yellow or white) storage wax on your skis and leave them un-scraped. This will prevent the bases from oxidizing over the summer.
  2. Remove the batteries from your beacon and store it properly with the battery compartment open (so if you do grab it, you will remember to put new ones in).
  3. Wax your skins and apply them to a glue-saver plastic backing for long term storage.
  4. Make a list of gear that needs to be replaced or repaired and take advantage of end of the season sales. Three specialized skimo stores we recommend are:
    • Skimo.co – http://skimo.co/
    • Cripple Creek BC – http://www.cripplecreekbc.com/
    • Boulder Nordic Sports – https://www.bouldernordicsport.com/shop/c-377-alpine-touring.aspx

Transition Gently

Skimo racers are all about fast transitions but it is never a good idea to immediately jump right into training for another sport.
skimo-spring-transition
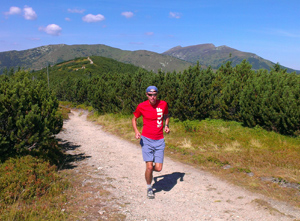
Most of us are runners or cyclists in the summer and it may be tempting on your first run or ride to try to hit the same volume as when you ended the previous summer.
In an ideal scenario, as the ski season is winding down, you will start to mix in a few easy runs and rides throughout the week to fill in as the ski days dwindle. This is the best way to ease into your new season and to avoid injury.

Take Downtime of 2-3 weeks

While ski touring does not have the high-impact component that running does, it is still hard on our bodies in a different way. With running, it is likely that an athlete will experience musculoskeletal injuries or at least will feel sufficiently beat up to take some rest. Skimo athletes, due to the nature of the sport, are less likely to experience such injuries or symptoms, therefore, are able to push their bodies further towards overall fatigue and overtraining. Because of this, it is especially important to take several weeks of rest at the end of your ski season.
eric-climbing-spring-trainingDuring downtime, we advise athletes to ‘move’ but don’t ‘train’. Fun, easy runs and rides are good if your body feels up to it but even better is to get out and enjoy nature in a different way for a little while – rock climb, paddle, or just hike. Once your mandatory two weeks have passed, consider a third based on how you feel.
Downtime is also important for mental well-being. At the end of the season, most of us are pretty tired of ’training’. Time away from your (racing) sport will allow you to remember why you love them, and by the end of your rest period you should be itching to get back on your bike or lace up your shoes! If not, reevaluate your situation and perhaps seek an experienced coach to help you out

Write your Annual Training Plan!

skimo-manual-banner-300pxWith the spare time you will have in your downtime block, it is the perfect time to develop your Annual Training Plan (ATP). This process is detailed in SkinTrack Manual for Ski Mountaineering Racing so take a look there for more information.
By planning your next season during the rest period, you give yourself the benefit of an entire year to prepare rather than deciding things in a rush as you go.
Keys points for creating your summer training plan:

  • Long slow distance training is the key to developing a successful base for ski mountaineering. The mode (running or cycling) is less important but the hours are.
  • Mountain running should be used instead of flat running whenever possible to help maintain muscle strength necessary for climbing and downhill skiing.
  • Choose a summer race schedule that complements your skimo training. This means races of similar duration and terrain (1-3 hours with significant vertical gain and descent). While ultra-marathons may be the sexy events of trail running right now, they are not the ideal way of preparation for skimo racing for most of us.
  • Stano and I personally find it difficult to get in the strength room at the beginning of the summer. It is just too nice outside to “waste energy” inside. That being said, strength is an important component. Plan to start strength training mid-summer and continue through the fall and early winter.
  • Take time for some adventures. Just like during the winter, it is important to get away from racing and explore the backyard. Plan some long days in the mountains to practice your technical skills and endurance, and you will see the benefits when winter returns.

Takeaway Points

  • Deal with gear issues and store it properly.
  • Take two to three weeks downtime with no ‘training’.
  • Plan your summer and next season.
  • Train hard and wise – make the summer count!

Filed Under: Skimo Racing, Training, Tricks & Tips Tagged With: skimo summer training, skimo training, spring skimo training

Using Heat Training to Improve Performance

June 30, 2014 By Stano Faban 1 Comment

camelsWhat is Hyperthermic Training?

We are all well aware of the negative effects that heat can have on race performance. Body temperature is one of many important factors affecting our performance but it is a big one. Even in a moderate climate like the Coast, racing temperatures can reach extremes. The best athletes are those whose bodies 1) are the most efficient at dissipating heat and 2) can maintain a higher core temperatures than others and therefore a higher energy output. Luckily for us, we can train our bodies to acclimatize to heat.
It is important as a summer or winter athlete to train not only to run, but also train to run in the heat. Just as we use running and other forms of exercise as a training stress, hyperthermic training uses heat as a training stress. The goals of hyperthermic training are twofold: the first is to increase exercise capacity in the heat (heat acclimatization). The second is to actually increase overall exercise capacity. As you will see below, hyperthermic training can be useful to all athletes, not just those competing in the heat.

Benefits of Heat Training

I put a little symbol next to each of the potential benefits of hyperthermic training to tell if it is beneficial for heat acclimatization (#) or overall endurance performance ($).

  1. Plasma volume is increased. With more fluid in circulation, the heart can pump less hard to maintain the same cardiac output. This results in a reduced heart rate at any given workload, in other words, a reduced relative intensity. An added benefit of an increase in plasma volume is that the body senses a decrease in red blood cell concentration, this results in an EPO response (much like training at altitude) that increases your total red blood cell volume (and therefore oxygen carrying capacity). Increased plasma volume also allows faster dissipation of core heat. #$
  2. Muscle/tissue blood flow is increased. Blood not only brings oxygen and fuel to muscle cells, it also clears away metabolic substrates. Increasing flow allows better fuel (so much so that one study showed a 40-50% decreased dependence on muscle glycogen during exercise) and oxygen delivery as well as increasing substrate clearance. #$
  3. Thermoregulatory control is improved. By increasing our heat dissipation capacity, primarily by lowering the threshold core temperature for the onset of sweating, hyperthermic training allows our body to run at a cooler temperature at any given intensity (or increased intensity at the same temperature). #$
  4. Muscle hypertrophy. Hyperthermic training has been shown to dramatically increase the release of Heat Shock Protein and Growth Hormones. These releases are big (a two-fold to sixteen-fold increase!) and both are very important in muscle recovery and regeneration. #
  5. Oxidative stress is reduced. Aerobic exercise increases production of reactive oxygen species and a sauna bath changes the antioxidant response to exercise. #
The author poorly managing body temperature while running to Sigurd Peak. (G Robbins Photo)

Recommendations for Heat Training

Researchers have identified a variety of successful methods for hyperthermic training. The majority utilize a dry sauna capable of 80-100 degree celsius temperatures. Because heat reduces exercise capacity, the current belief is that hyperthermic training for improvement in performance should be completed post-exercsie. Several studies have used a 30 minute sauna, 2x per week for three weeks before an important competition as their protocol. Other studies use longer or more frequent exposures. Exposures above 1 hour/day and more frequent than 3 days/week become very time consuming (likely better spent actually running) and may increase risk of complications.
Like any other training modality, hyperthermic training should be factored in while determining the overall training load. Complications may occur and as with any training program, your doctor should be consulted if you have any risk factors that contra-indicate sauna use.

References:

  • Scoon et al., (2007) Effect of post-exercise sauna bathing on the endurance performance of competitive male runners. Journal of Science and Medicine in Sport.
  • Costa et al., (2014) Heat acclimation responses of an ultra-endurance running group preparing for hot desert-based competition. European Journal of Sport Science.
  • Garrett et al., (2012) Effectiveness of short-term heat acclimation for highly trained athletes. European Journal of Applied Physiology.
  • Sawka et al., Thermoregulatory responses to acute exercise-heat stress and heat acclimation. Handbook of Physiology.
  • Sutkowy et al., (2014) The effect of a single Finnish sauna bath after aerobic exercise on the oxidative status in healthy men. Scandinavian Journal of Clinical & Laboratory Investigation.

Filed Under: Training, Tricks & Tips Tagged With: Acclimatization, Heat, Hyperthermic, Training

How to make a ski hook for rapid backpack skis attachment?

May 6, 2014 By Stano Faban 4 Comments

A recent conversation with a SkinTrack follower on Twitter prompted me to write this DIY/How To article. Over the years, I have owned couple of skimo racing and ski touring packs so I have a good experience with what works and what doesn’t (meaning, it works less than I would like). So let’s go.

Final products: 2 ski hooks. Left one is a single rod, middle one double which makes it stronger, and the right one was my template.

Two good systems for fast ski attachment

In the last 10 years or so, two systems were developed allowing skimo racers to attach their skis to their backpacks without ever taking their pack off.
The first one, before ISMF rules allowed the hook system, was very secure and quickly became popular. It worked like this:

  1. You took off your skis and put them together.
  2. Then holding them both in one hand, you put the tails of your skis through a loop (flat webbing/sling) on the bottom right or left side of the pack.
  3. You slid them down until the heel bindings stopped the skis in place.
  4. You pulled the skis closer to your neck with one hand and wrapped a strong bungee cord around them once.
  5. Then you clipped a carabiner at the end of that cord to a plastic or a metal ring that was about half-way down one of your shoulder straps (always the opposite strap to the side where the bottom loop was).

The second system, being widely used now, is the ski hook system. It is not as secure as the first one but it’s very fast. It works the same way like the above until step #4 at which point you just hook a metal hook that is attached to a strong bungee around your skis and you are done. No wrapping or clipping.
Here are photos showing the difference between the two systems:

There's a strong bungee inside that black protective sleeve. You wrapped it around and then clicked the small carabiner into a plastic ring.
There’s a strong bungee inside that black protective sleeve. You wrapped it around and then clicked the small carabiner into a plastic ring.
This is a hook system on a Dynafit Manaslu 35 backpack. Hook is at the end of a strong bungee that is attached about half-ways down on the right side shoulder strap.
This is a hook system on a Dynafit Manaslu 35 backpack. Hook is at the end of a strong bungee/elastic that is attached about half-ways down on the right side shoulder strap.

Making a ski hook system

Since the ski hook system is the more popular one let’s take a look at how you can make one for your pack. Or how you can make a new better hook if you don’t like your current one.

Bottom-side loop

A basic requirement that both above systems have in common is that you need a loop on one of the sides at the bottom of your pack. Depending on a pack you have this might be easier or more difficult to setup but at the end it should look like this:

My regular touring Dynafit 35 L backpack, on the left, uses a very ridged plastic or rubber-like loop. My current 4-years old Ortovox race pack uses just webbing which I like to wrap in colorful duct-tape so it doesn't bend
My regular touring Dynafit 35 L backpack, on the left, uses a very rigid plastic or rubber-like loop. My current 4-years old Ortovox race pack uses just webbing which I like to wrap in colourful duct-tape so it keeps the loop from collapsing and is easier to see when in a hurry.
Also, depending on the width of the skis you are planning to carry you should make this loop big enough. Tails and under-the-foot widths of skimo race skis are around 80 mm and 65 mm respectively. Widths for regular backcountry skis are hard to talk about since all of us have different preferences.
The material I recommend to use for the loop is webbing or an old sling, then wrap it in some duct-tape to make it more rigid (Gorilla tape is the most durable).

Manufacturing the ski hook

Ski hook is not a ski hook – some work great while others not well enough. So what makes a hook work well?
I discovered that if the ski hook is made from a strong, flat piece of material (2 cm wide is enough) then it works the best. And, of course, the dimensions and the way it is bend play big roles too.
Without reinventing the wheel I took my two favourite packs and took a closer look at their hooks – the way they are shaped and the dimensions they have. Surprisingly, they are very similar despite the metal pieces they are made of are totally different.
Here is how they compare:

As you can see, dimension-wise they are very similar except the width. The Ortovox hook on the right secures the skis a bit better but is also a bit bulky.
As you can see, dimension-wise they are very similar except the width. Shape-wise, from the side, they are almost the same as well. The Ortovox hook on the right secures the skis a bit better but is also a bit bulky.
For this How To tutorial I decided to make the Dynafit style ski hook since it works well with a wide variety of skis and the materials and tools needed are easier to come by.
This is what you need (or what I used):

  • 40 cm long piece of 1/8″ (3.15 mm) thick, easy to work with yet very strong metal rod (or wire with similar properties and diameter), preferably one that will not rust.
    I bought something labeled as “solid brass” which appeared easy enough to shape and apparently doesn’t rust.
  • Then you will need lineman’s or combination pliers,
  • and vice could be useful as well.

Here’s the process:
Step 1 – Dimensions

These add up to 18 cm for one end, so 36 cm in total. I went with 4 cm extra to account for the curves and curls. It worked perfectly.
These add up to 18 cm for one end/arm, so 36 cm in total. I went with 4 cm extra to account for the curves and curls. It worked perfectly.
Step 2 – Curl both ends of the rod so you don’t cut yourself. (You can use a file to smooth the ends before you curl them if you want.)
The loops will be handy for running bungee cord through them.
The curls will be handy for running a bungee cord through them.
Step 3 – Bend the rod exactly in half. I used a balcony railing to wrap the rod around and then finished it using a vice.
At the bottom, you can see that after bending the rod and curling the ends I ended up with about 18,5 cm of running length.
Step 4 – Bend the 5,5 cm part to 90 degrees using a vice because now you will be bending two rods at once.
Step 5 – To finish off, bend the 9 cm part to 90 degrees which will leave you with about  3,5 cm piece in the middle.
Since I was bending both rods at once again I started in a vice but ultimately had to finish it with my hands and pliers since I didn't have enough space in the vice to finish to 90 degrees.
Since I was bending both rods at once again I started in a vice but ultimately had to finish it with my hands and pliers since I didn’t have enough space in the vice to go to 90 degrees.
Step 6 – Maybe you should try the single rod hook first to get used to the material. I didn’t but made one at the end since some race packs use that version (which in my opinion is very wobbly).
Final products: 2 ski hooks. Left one is a single rod, middle one double which makes it stronger, and the right one was my template.
Final thoughts on manufacturing the hook:
I believe the secret of a good ski hook is in 4 things:

  • Making the 90 degree bends as tight/sharp as possible,
  • keeping everything else as straight as possible,
  • making the parallel parts long enough (not obsessing about extra weight),
  • and making it either a double rod hook or from a flat material.

I ultimately don’t know why single rod hooks don’t work as well but it is either due to one of the following reasons or a combination of them. On some backpacks the hooks are:

  • either too short,
  • or the 2 bends are more like a one big curve,
  • or simply a single rod doesn’t have enough side leverage to hold the skis in place sufficiently.

Attaching bungee cord to the hook

I couldn’t find a strong/thick enough bungee at home so I used a thinner one I use for making skin attachments. (Working on that How To tutorial as well.) However, if you are just replacing your existing hook you will have some cord to work with.

I just used a figure eight know for the attachment.
As you can see above, I bent the two ends/rods of the hook away from each other based on the Dynafit ski hook. This should add your home made hook stability/leverage once wrapped around the skis. However, it would be beneficial to insert a piece of small plastic tubing in between the rod ends that would always keep them apart because if you use a softer material the ends will be pulled together once the bungee is under load.

Attaching bungee to your pack

You will need to do this if you are building a brand new carrying system on a pack, and you should not need to if you are just replacing a bad hook.
If you are building a brand new ski hook system then depending on what kind of straps, plastic or metal pieces your backpack has on its shoulder straps this will be easy or more difficult.
Important – remember to attach your cord with a hook to the opposite shoulder strap than on what side you placed your bottom-side loop. And use a strong bungee.
On the photo below, I am pretending the pack has clean, smooth shoulder straps so I am just attaching the bungee to the top of the strap to prevent it from moving once under load. It would be desirable to attach it further down the shoulder strap if you can figure out how to secure it there. Duct-tape? 🙂

sdfd

Ultimately, to figure out the right length of the bungee you will need to play around a bit. My suggestion is to start with a bungee or an elastic not longer than 10-15 cm when stretched.
That should be all you need to know on how to make your own ski hook.

Filed Under: Gear, Tech & Food, Training, Tricks & Tips Tagged With: ski hook

Hydration & Overhydration in Endurance Sports: Book Review of Waterlogged by Tim Noakes

April 25, 2014 By Stano Faban 2 Comments

waterlogged-book-tim-noakesWaterlogged book overview:

  • Usual full price: around $25.00 USD
  • Pages: over 400
  • Pros: lots of details, very useful, fairly easy to understand, chapter summaries
  • Cons: lots of similar stories to drive the point home
  • Suitability: from beginners to serious athletes in any sport, lots of great knowledge and practical advice
  • How we go it: Birthday present (disclosure notices)

Bottom line:

In my opinion, “Waterlogged – The Serious Problem of Overhydration in Endurance Sports” is a must read for anyone that is interested in hydration. Tim Noakes – a well respected and credible sports scientist – effectively dismantles lots of myths and pseudo-science that were promoted onto the sports community in the last 30+ years.
In order to get the most out of the book you do not have to read it cover to cover, unless you need every single detail to convince you he is right.

Amazon carries the Waterlogged:

  • $16-25 at Amazon.com

Book description and Our review:

The book was published on May 1st, 2012 and the 400 pages make quite the bible! However, once you start reading you quickly understand that Tim Noakes spent over three decades to research hydration and overhydration himself as well as he reviewed over thousands of scientific papers and books published on these subjects to present us with his conclusions.
Noakes mostly wrote the book to prevent any future deaths from overhydration during endurance sports but in the process he also answers why, what, and how much do we really need to drink to maximize our performance.
He also exposes the hydration industry for its misleading information:

Dehydration in those who drink ad libitum (at one’s own thirst) has no proven detrimental effect on athletic performance. – Tim Noakes in Chapter 5 where he discusses Gatorade at length
Neither muscle cramps nor heat illnesses are caused by sodium deficiency. – Tim Noakes

Waterlogged chapter list to show you everything Noakes discusses:

Chapter 1 – Perspectives on Human Physiology and Hydration

Chapter 2 – Thirst as a Signal for Fluid Intake

Chapter 3 – Water’s Role in Thermoregulation

Chapter 4 – Salt Balance in the Body

Chapter 5 – Emergence of the Sports Drink Industry

Chapter 6 – The Shaky Science of Hydration

Chapter 7 – Early Drinking Guidelines

Chapter 8 – Discovery of Exercise-Associated Hyponatremia

Chapter 9 – The Biology of EAH

Chapter 10 – EAH and EAHE on a Global Scale

Chapter 11 – Guidelines for Fluid Intake

I went on to read this book some months after watching couple of Tim Noakes presentations that I found on YouTube. Through those videos as well as further reading-up on him as a scientist I opened the book with great enthusiasm and a general belief that what he concludes should be true. This allowed me to skip pages occasionally as Noakes, for me, went into too much detail and repeated similar examples/stories too many times.
Each chapter seemed to be constructed roughly the same – he presents what he found or thinks, then provides overwhelming evidence to support this, dismantles old beliefs, and nicely goes onto summarizing the whole chapter knowledge and recommendations on just one page. So just like a I said above, if you believe him as a scientist, you do not have to read every single paragraph or even page.
In this 4 min video Tim Noakes discusses basic principles of hydration:

And if you care, in this 15 min TEDx talk Tim Noakes discusses his body of work which also includes Central Governor theory that basically states that not (only) muscle fatigue but brain regulates athletic performance:

Pros:

  • Tons of detail and scientific evidence.
  • Lots of practical advice and knowledge you can apply to your every day life and training.
  • Superb value for the buck.
  • Fairly easy to understand.
  • The summaries at the end of each chapter are well done and easy to understand.

Cons:

  • It’s long.
  • You might need to look up some medical and biology terms, but not too often.

Waterlogged on Amazon.com:

  • $16 – $25 at Amazon.com (various models)

Filed Under: Gear, Tech & Food, Reviews, Training, Tricks & Tips Tagged With: dehydration, Hydration, Tim Noakes, Waterlogged

Getting ready for the Power of Four: Only 2 weeks to go!

February 17, 2014 By Stano Faban Leave a Comment

Our occasional contributor and skimo racing enthusiast Jeremy Rietmann shares his way of preparing for the Power of Four while holding a full-time job. It is always a good and entertaining read from him.
One of the best races of the COSMIC Skimo race season is nearly here – the Audi Power of Four, a challenging course traversing over 25 miles from Snowmass to Aspen Mountain. Race day is Saturday, March 1st, just two weeks away.
With nearly 12,000 feet of elevation gain and a high point of 12,382 feet at the summit of Highland Peak, this race is truly one of a kind in the U.S. This race continues to be my seasonal favorite, with great terrain, LOTS of climbing, great bowl skiing and a zippy luge ride down the Congo Trail to keep things entertaining late in the race.
Have you been training? In real life it takes all forms.

sfsd
In my case this year, between spending time in the skintrack and wearing my feet out walking the concrete jungle of NYC, I would also raise my heart-rate by shoveling my roof.
My race partner’s (Dennis Flannigan) training has included:
fdg
Time in the skintrack with his wife Amy and their lazy, unapologetic son Timothy. And some powder skiing when time permits.
Feeling ready to test your mettle?
Grab a friend or a fast looking stranger and head over to the registration page to get signed up. If you don’t feel quite ready for the Full Course, no worries. Instead, sign up for the Recreational Division course traversing Aspen Highlands and Aspen Mountain. With 8,000 feet over 15 miles, your legs will still know you had a good day out!

Filed Under: Training, Tricks & Tips

Podcast Interview with Melanie Bernier: Lots of tips from her training for skimo racing, gear, nutrition…

December 28, 2013 By Stano Faban 6 Comments

melanie-bernier-episode-1-600x300-banner
This is the first ever episode of SkinTrack.com podcast! It’s not fully podcast-like in a sense that you can download it (will come later) but you can definitely just sit back and listen instead of reading.
For this first episode, I chose to interview my good friend Melanie Bernier who is one of the most inspirational people I know, and a fellow member on the Canadian National Ski Mountaineering Team.
Melanie is one of the most accomplished skimo racers in North America with a 4th place from 2013 Pierra Menta being one of her career highlights. She is fine tuning her game every season and her improvements are results of long-term daily hard work, strong commitment and big passion for skimo.

In this interview we discussed:

  • Melanie’s last winter Euro racing campaign and her most favourite moments
  • her upcoming trip back to Europe for more World Cup action
  • current training
  • nutrition (Paleo diet)
  • her current racing gear
  • skimo pole lengths
  • and her future goals

Resources related to this podcast episode:

  • How to determine your skimo poles length?
    http://www.skintrack.com/skimo-racing/racing-101/how-to-choose-right-length-kind-skimo-racing-poles/
  • How to structure your skimo racing training?
    http://www.skintrack.com/skimo-racing/how-to-structure-your-day-to-day-skimo-training/
  • Pierra Menta
    http://www.pierramenta.com/

I really hope that you enjoyed this interview format and please leave a comment below if you liked it. If not then please leave suggestions on what can be improved going forward with these podcast episodes. Thank you!

Filed Under: People (Interviews), Training, Tricks & Tips Tagged With: Melanie Bernier, Paleo diet, Pierra Menta, podcast, skimo racing poles length, skimo training

How to structure your day-to-day skimo training? Sharing personal experience and tips

November 29, 2013 By Stano Faban 12 Comments

In this post, I am going to share with you my experiences on structuring day-to-day training. From those you should be able to pick up some tips that will help you structure yours.
As the saying implies  – “There’s more than one way to skin a… mountain” – there is not the way, only a way. And because we all have different work and life commitments our training can drastically differ from one athlete to another.

3 + 1 cycle

stano-racing-stodenzinker
Racing in Austria in 2012. It didn’t go very well due to lack of solid training structure the weeks before. But some times it does work 😉
This is my preferred way of structuring training but it has one drawback as you will see.
What does 3 + 1 stand for?
It means you train for 3 days then you take a day off, and then repeat. Some of you may have just realized what could be challenging about following this structure – after two cycles it no longer fits our society’s 7 day calendar.
That could be an issue, could be not, but let’s take a look why I like to follow it when stars align and I can repeat couple of these.
I found out long time ago that just plain more training doesn’t mean I am going to improve. It’s the right amounts of volume, intensity and rest that will do it.
The day off:
I like the 3 + 1 cycle because I feel very confident that I will not overtrain even without obsessing much about the right balance.  One day of rest in a four day cycle seems enough to prevent any negative effects. It’s kind of an “idiot proof autopilot” system.
The 3 days of training:
I found that to train 3 days in a row is ideal to tax my body physiologically yet not enough to burn myself mentally, thus, always keeping a positive attitude going into the next session.
The way I prefer to structure those 3 days is:

  • Day 1 – getting back to it:
    After a day of rest this one features easy endurance (zone 1) with some technique drills and couple of pick-ups of no more than 1-2 minutes each (zone 3). Overall time of the session depends but preferably I would not go over 2-3h.
    I find a not-too-hard gym session on this day to be also a good warm-up as it feels like it readies all my balance and coordination systems/receptors.
  • Day 2 – intensity:
    After a warm up day, where I also refreshed my technique, it’s a great time do go hard. I try to make sure to always come to this day not very tired, which the schedule of the 2 days before is meant to accomplish.
    What I do on this day depends on where I am in the big picture – how much time to my goal there is. Sometimes these would be full out 3 min intervals (zone 4-5), and sometimes these might be longer 8-20min tempo-like intervals (zone 3-4). Point is, I should be hurting.
  • Day 3 – going long:
    After going hard the day before I like to do a longer endurance session (zone 1). Depending on the period in the year this could be anywhere from 2.5h to 7h. This is a good day to go out with friends and enjoy a nice day in the mountains, whether that be skiing, hiking, mountaineering, or biking/cycling.

The intensity day:
I would not repeat the intensity day in each cycle but only in every second. Here and there I try to thread the line to do it in back-to-back cycles but I usually feel so tired by the time the third cycle comes that I just figured it’s not the best way for me.
The not so off day:
Just like with the intensity day, here and there, I would not have a complete rest day in every second cycle. And when that’s the case the activity is only something very relaxing and no more than 1-1.5 h. Either a short ride, an easy soccer or tennis game, or a short hike will do. Swimming is great too.
Bottom line for 3 + 1 cycle:
I feel that this is a super effective way of structuring my training without having to monitor myself much to avoid overtraining. And this cycle also works great for me around a race weekend:

  • Thursday off
  • Friday warm-up (up to 1-2h)
  • Saturday race
  • Sunday ski powder for couple of hours

2 + 3 cycle

Now, let’s take a look at another cycle that I like and can be followed from week-to-week easily as it is structured around 7 days rather than 4.
The 2 + 3 means: 2 days of training + day off + 3 days training + day off = 7 days.
The off days:
Just like with 3 + 1, you can either do completely nothing or have only light activities on every second of those days.
The intensity day – 3 day block:
When I follow this cycle the hard day falls on the middle day during the 3 day block, exactly structured as in the 3 + 1, and only once per week.
The 2 day block:
If I am doing strength training in that period then one of the strength days would fall likely on the first day of these two, followed by a longer endurance session the next day. Or I will do back-to-back endurance sessions of about 2-5h and likely changing sports each day (running, biking, skiing, strength).
Bottom line for 2 + 3 cycle:
This cycle structure works well. It should keep you from overtraining yet working you hard enough. And the 3 day block can be easily fitted around race weekends (or just weekends) if you start your weeks with Monday off (which is great as we all need to get back to work).
But if you want you can always flip it to be 3 + 2 depending which days you want off. If Sundays then you will need to start with a session on Monday. You can figure out the rest.

Mistakes repeated

Despite all the experience I let my structure go loose mid-way last season. At the time it didn’t seems like it but just few weeks later it was obvious. I skied way too much to aid my speed and by the last races I ended up as weak as a sick dog.

What should you do?

That depends on how much time you can/want to devote to training. Overall, I say the 2 + 3 schedule is best if you need to follow a repeating 7 day structure.
Training 3 or 4 days a week:
If you can train only 4 days then I would either structure it as 2 + 2 (2 days on + 1 off + 2 on + 2 off), or as 3 + 1 (3 days on + 1 off + 1 on + 2 off).
If only 3 days then I think it’s best to go with 2 + 1 (2 days on + 1 off + 1 on + 3 off). But once you can only train 2-3 days per week your improvement potential is quite limited, yet by experimenting you can surely figure out the most effective plan within those constraints. My hint here would be intensity.
Let’s hear it in comments below:

  • Are you structuring your training?
  • If yes, how?
  • If not, which one of the above could be for you?

Filed Under: Skimo Racing, Training, Tricks & Tips Tagged With: skimo training

  • « Previous Page
  • Page 1
  • Page 2
  • Page 3
  • Page 4
  • Page 5
  • Next Page »

Primary Sidebar

  • Facebook
  • Instagram
  • YouTube
Our Facebook Page

skimo-manual-banner-300px
 

Recent Articles

  • Kilian Jornet Interview: About His New Foundation, His Own Environmental Impact, and How He Wants To Help Athletes and The Outdoor Industry To Protect Nature
  • How Fast Are Glaciers Really Melting? How Will This Affect Your Mountain Adventures? Interview with Pascal Egli
  • Book Review – Art of Freedom: The Life and Climbs of Voytek Kurtyka
  • Forest Skis: Innovative, Custom Build, For Backcountry Skiing and Freeride
  • Lighter and Completely Redesigned: New CAMP Ultralight Ski Mountaineering Ice Axes

Categories

  • Contests & Giveaways
  • Crazy Tracks
  • Events & Races
  • Gear, Tech & Food
  • General News & Articles
  • Industry Press Releases
  • Movies & Books
  • News Shorts
  • People (Interviews)
  • Racing 101
  • Reports & Results
  • Reviews
  • Skimo Racing
  • Training, Tricks & Tips
  • Trip Reports & Conditions

Footer

About SkinTrack

Travelling through snowy mountains on skis is like flying… and experiencing life at its core.

Gear reviews, interviews, adventures, contests, skills, skimo training, race reports – we connect you to all things related to self-propelled skiing.

SkinTrack.com, created by Stano Faban, was born out of passion for ski mountaineering and ski touring. Over the years, it has become one of the most popular ski mountaineering blogs in North America.

Recent Articles

  • Kilian Jornet Interview: About His New Foundation, His Own Environmental Impact, and How He Wants To Help Athletes and The Outdoor Industry To Protect Nature
  • How Fast Are Glaciers Really Melting? How Will This Affect Your Mountain Adventures? Interview with Pascal Egli
  • Book Review – Art of Freedom: The Life and Climbs of Voytek Kurtyka
  • Forest Skis: Innovative, Custom Build, For Backcountry Skiing and Freeride
  • Lighter and Completely Redesigned: New CAMP Ultralight Ski Mountaineering Ice Axes

Useful Links

Comparing the lightest: Skis | Boots | Bindings

Skimo Training: Training Plans | Videos

Stay in Touch

  • Facebook
  • Instagram
  • Twitter
  • YouTube

Copyright © 2023 SkinTrack.com. All rights reserved.