• Skip to primary navigation
  • Skip to content
  • Skip to primary sidebar
  • Skip to footer

SkinTrack

  • Lightest Gear
    • Skis
    • Boots
    • Bindings
    • Skins
    • Packs
  • Skimo Training
    • Training Plans + Skimo Manual
    • Transitions Videos
  • Facebook
  • Instagram

Stano Faban

Skiing Gran Zebrù (Königspitze): 3851m Tall Pyramid in Ortler Cevedale Group – Alps, Italy

May 27, 2020 By Stano Faban Leave a Comment

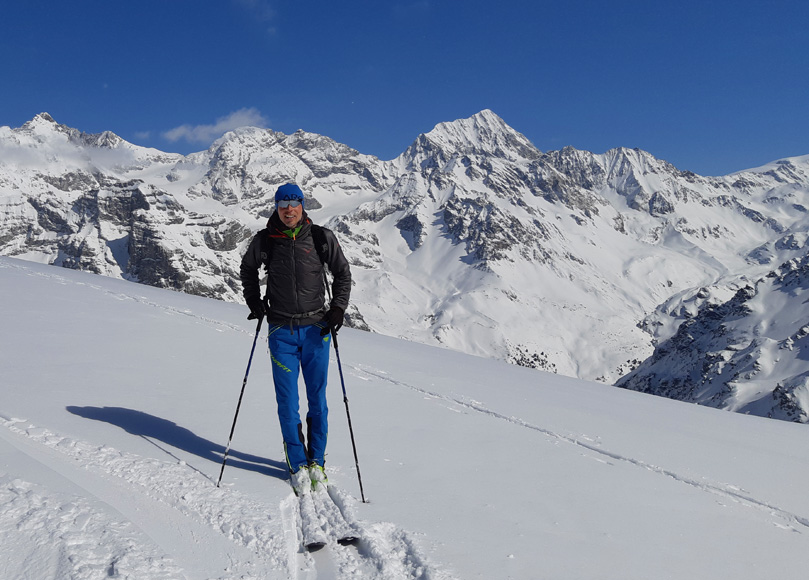
Gran Zebru to my left with with its famous north-west ridge, Suldengrat. You can’t see here our ski route (on the right and behind) but this is one of the most spectacular views of this mountain.

Since the country-wide coronavirus lockdown ended here in Italy the conditions have be great for spring ski mountaineering… and so another alluring peak was ticked off my never ending wish list.

Proudly towering above its surrounding valleys, Gran Zebrù creates an instant feeling of respect and admiration. It truly is a grand mountain that moves you.

With a beautiful summit ridge, big east face and a couloir at the bottom, Gran Zebrù offers an amazing ski mountaineering experience on its south-east route.

Location and Access

To start your day, drive about 20min east of Bormio (Valtellina, Italy) to Santa Caterina di Valfurva and take a left fork to reach parking at Rifugio Forni (2100m) about 15min further. This area for ski touring is generally known as “Forni” and this parking lot is a starting point for many tours in the area.

Then follow trail signs to Rifugio Pizzini (2706m) either on skis or hiking – this can take 1,5-2h depending on conditions. This valley is south facing so you will likely need to hike majority of the trail/road by late May but usually it’s possible to skin up from the bottom until late April.
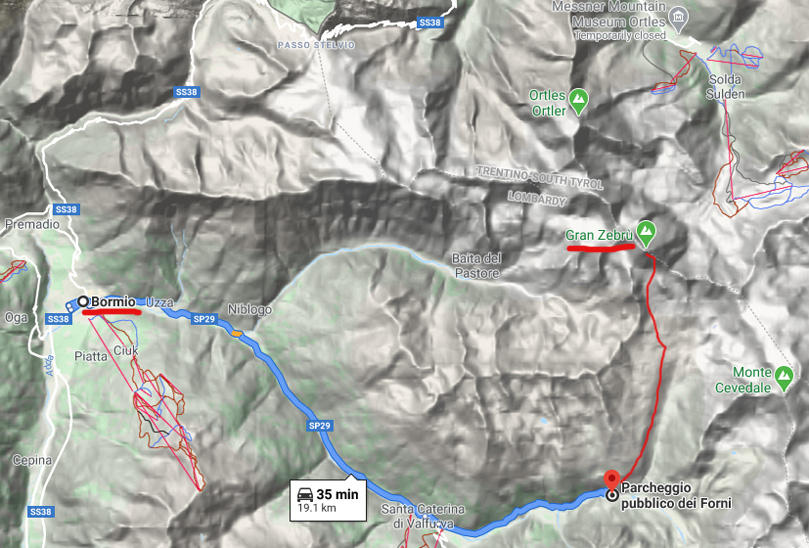
Don’t plan to drive over famous Passo Stelvio (top of map) between November and late May as the road is closed.

The whole ascent from parking lot to the top of the mountain is just under 1700m, so doable in a day, but given the east exposure of Gran Zebru’s upper big face and south exposure for the bottom couloir you should strive to summit by around 9-10am.

Also, consider that in spring conditions you will be climbing up with crampons and an ice axe for about 700m so the progress will be slower. With that, I recommend to stay at the Rifugio Pizzini at still start around 5-6am to cover the 1100m to the top.

The ascent and skiing on Gran Zebrù (Königspitze)

There are multiple routes you can choose from to ascend this mountain but for skiing the traditional south-east route is most appropriate as it is without much technical climbing or skiing. Still, majority of skiing will be on slopes around 40 degrees, with 45 only at the very top.
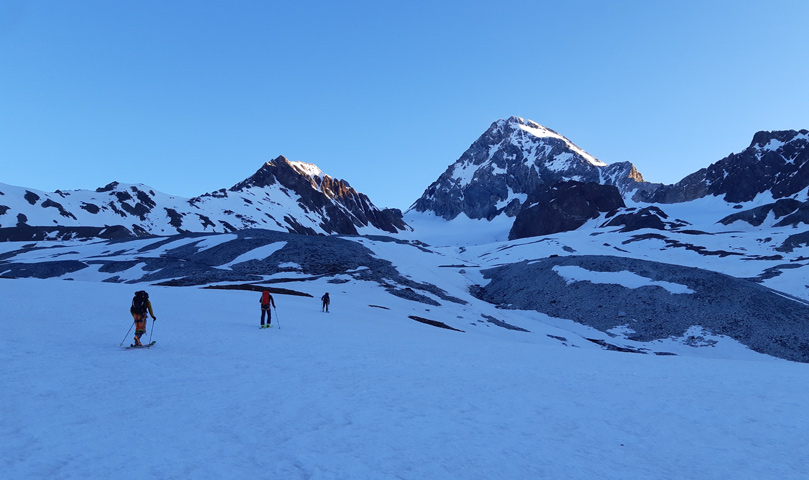
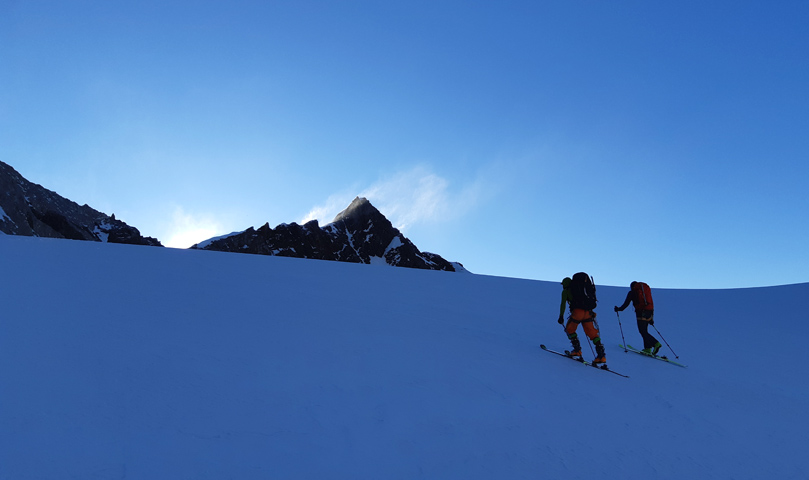
Skinning just passed the Pizzi hut with a view of the route: From the summit, follow the lit up slopes of the east glacier and then drop down the slim couloir. On the way up, we went left of the big rocky bulge and we skied to the right of it on the way down.

You will be skinning up gentle slopes the first hour (about 400m) beyond the hut, only steepening as you approach the bottom of the couloir. From there we put on boot crampons and kept them all the way to the summit, however, it’s possible that conditions might allow you to skin up some of the big east face, perhaps February to April.
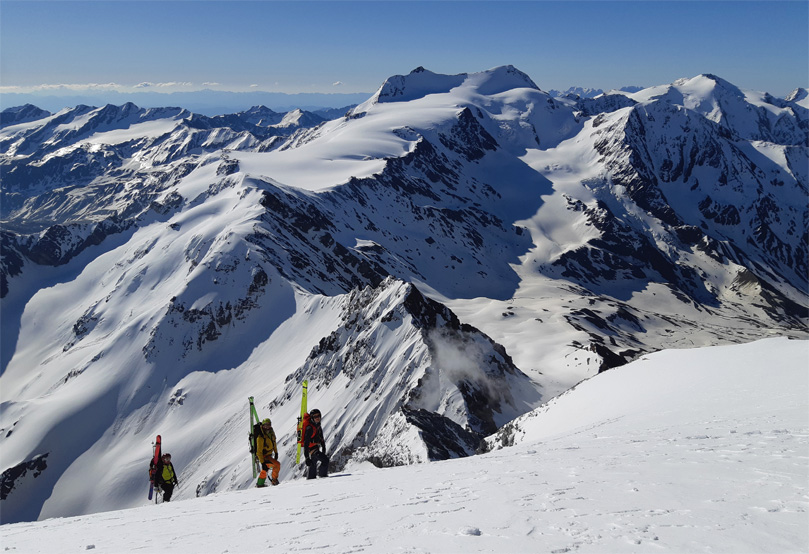
Looking south-east towards the big glacier on Mount Cevedale. We were at about 3700m at this point.

As you can see on the photo above, there is a big wide convexity on the big slopes of the east glacier so observe the snow conditions carefully as it is an easy spot for the wind to load.
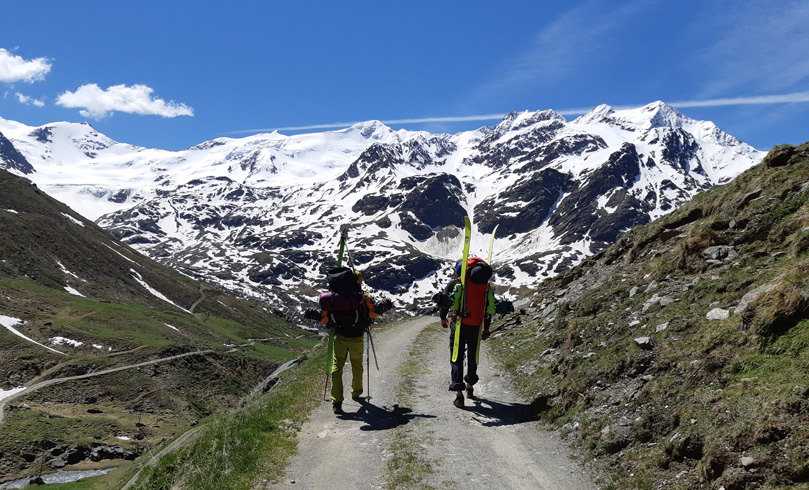
Half way down from the hut and looking south towards Punta San Mateo in the centre and Tresero on the very right.

The next photo is from a mountain guide, Eraldo Meraldi, and the dashed line shows an ascent via west couloir (around 450m and 50 degrees) if you want to do a loop. The solid line shows our way. The small photo shows two variations at the top – we went up the left way and skied down the right on that follows the ridge longer. On the big glacier we went up and skied more in the centre than his line shows.
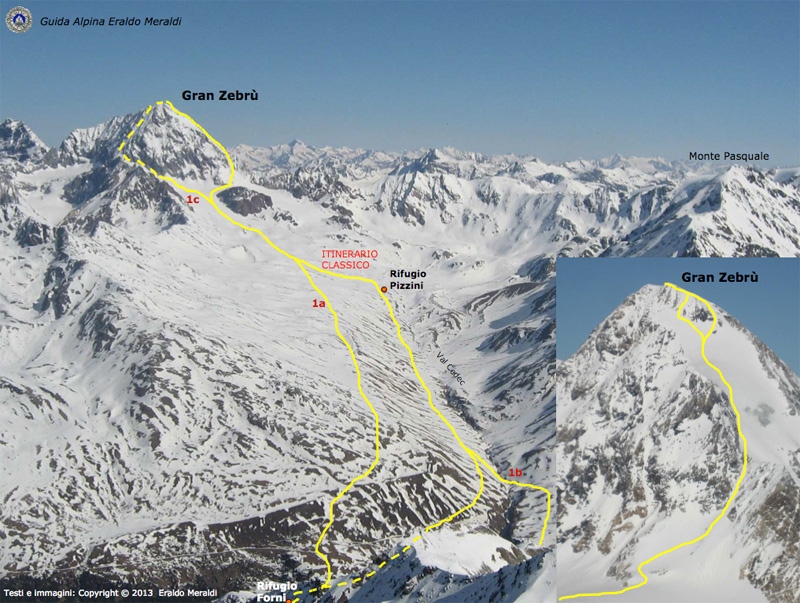
When you are in the area in the spring then definitely consider Gran Zebrù as on of your more challenging objectives. For less mountaineering and more ski touring you can go up Punta San Mateo or Tresero, starting at the same parking lot.

Filed Under: Trip Reports & Conditions Tagged With: Forni, Gran Zebru, Ortler, Valtellina

Ski Touring Paradise: Four Alluring Peaks in One Valley – Val Cantone di Dosde, Valtellina, Italy

May 24, 2020 By Stano Faban Leave a Comment

There are many excellent ski touring places in Italy but to find four such beautiful peaks, each with 1000m descent, in one small valley makes Val Cantone di Dosde literally a ski mountaineer’s paradise… I found it this May!

The four peaks a skier should be interested in are Pizzo Dosde, Cima Lago Spalmo, Cima Viola, Cima Saoseo – all just around 3300m in altitude. The valley floor is at about 2100m.

Location and Access

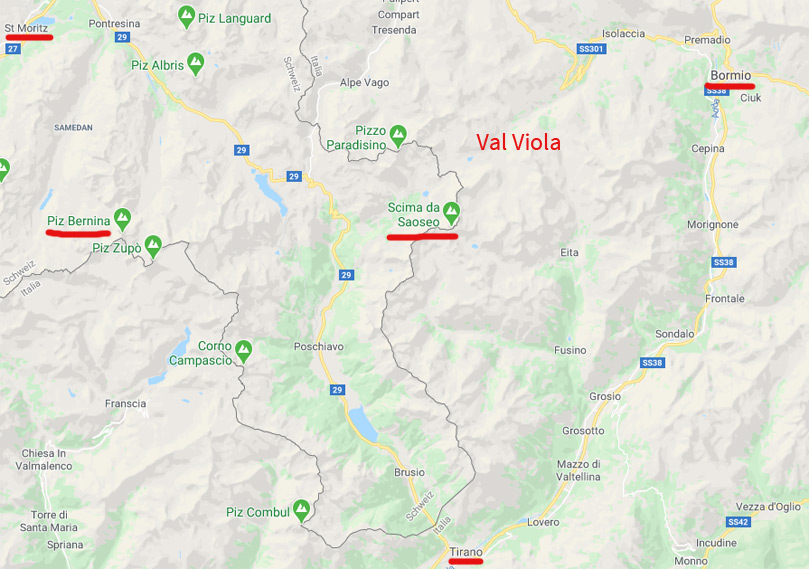
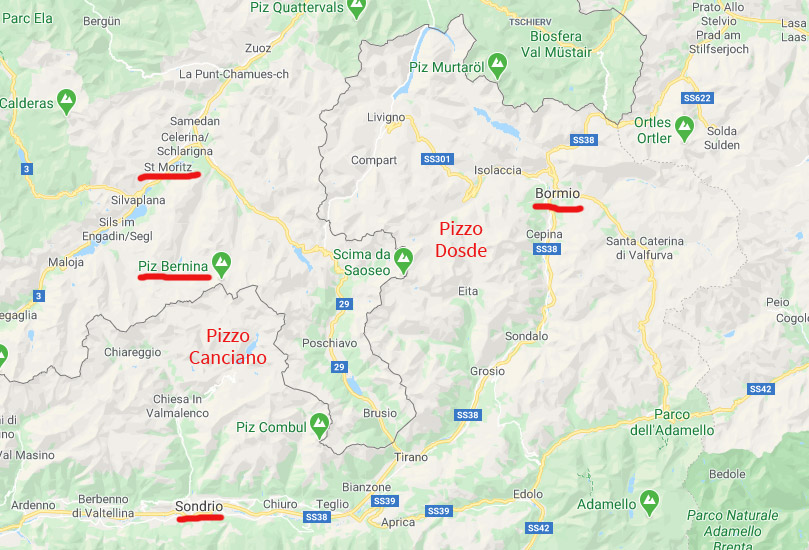
To start your day, drive about 25min west of Bormio, on the road to Livigno, and park at Arnoga at 1850m – see map below.

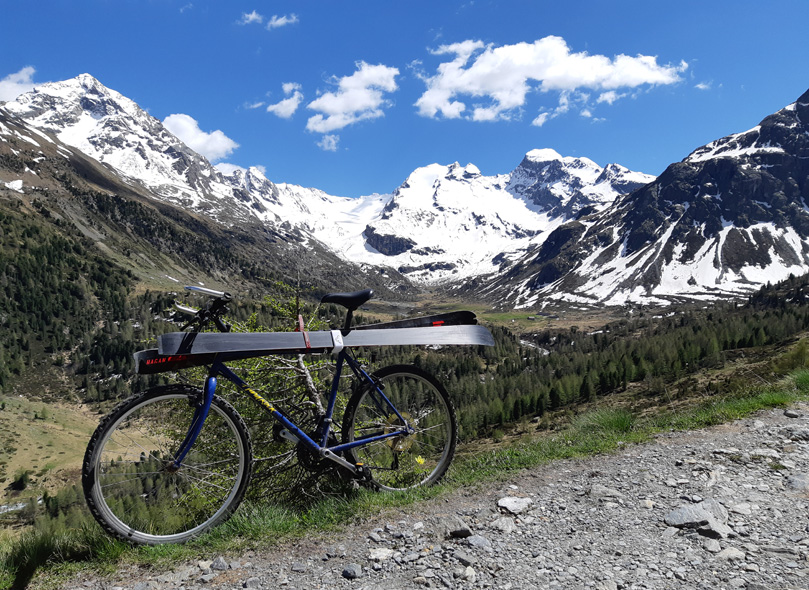
Approach to Val Cantone di Dosde leads through a more famous Val Viola valley that offers hikers, bikers and skiers a variety of options and amazing views in every season.

Val Viola is your access point and easiest to reach from Bormio or Livigno.

There are seasonal restrictions when you can drive in Val Viola and in the winter the approach on skis will be quite long. However, by May the restrictions are lifted and so your can drive further with a permit or you can hike or bike the first 7-8km before you turn south (or left) to Val Cantone di Dosde. Elevation gain for this approach is only about 250m.

An interesting point is that a hut in this valley – Rifugio Federico Dosde – is operated by Adriano Greco, the famous ski mountaineering racing legend. I had the pleasure to me him during on of my days. However, as all other huts it is closed usually from October to March.

Notice on the left that Val Viola crosses over to Switzerland. The skiing is all in Italy in Val Cantone di Dosde.

Pizzo Dosde, 3280m – South Slopes

This peak offers excellent panoramic views as it stands alone. The upper south slopes ski well in spring snow and most likely also mid-winter.

The ascent is not difficult or steep, and possible to do all on skis, however, you will need to pay attention to slopes above and also read the terrain well to find the safest and an efficient route.

I went up and down the same way but I didn’t ski all the way to the valley as I continued onto another excellent peak, Cima Lago Spalmo.

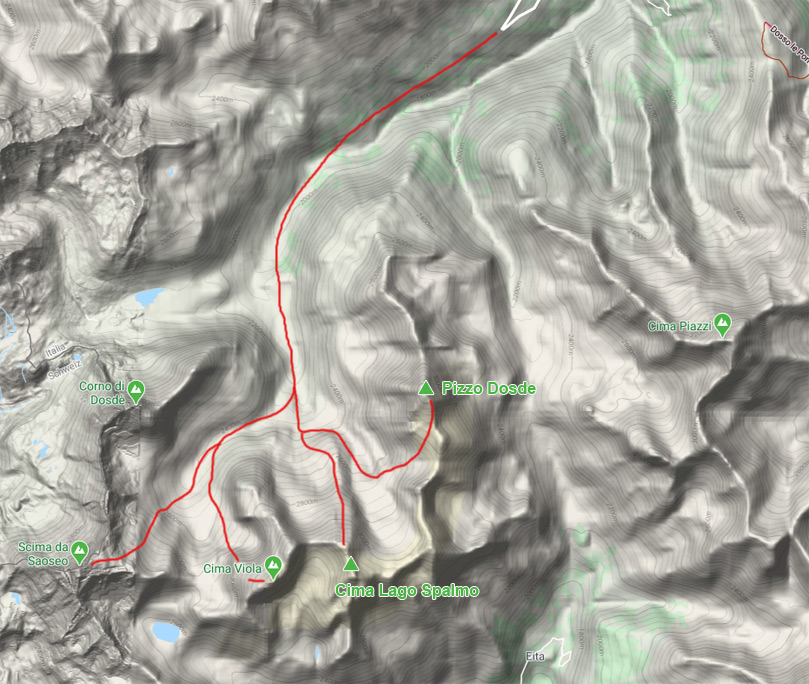
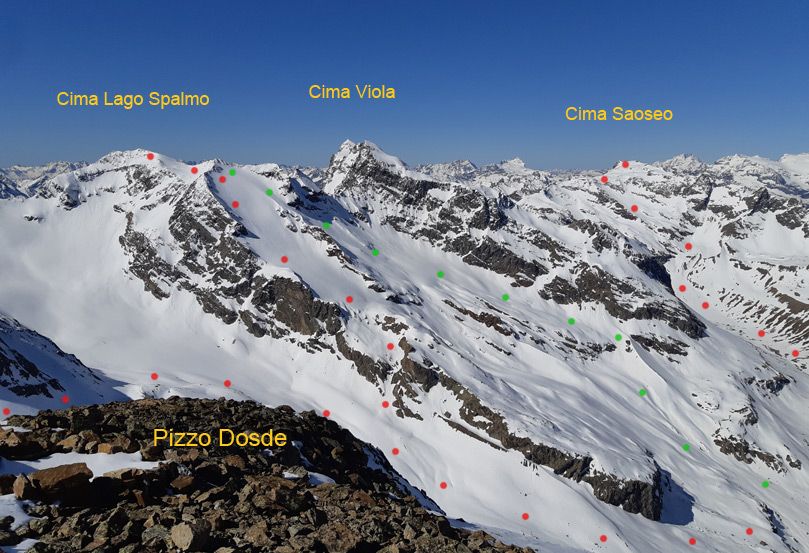
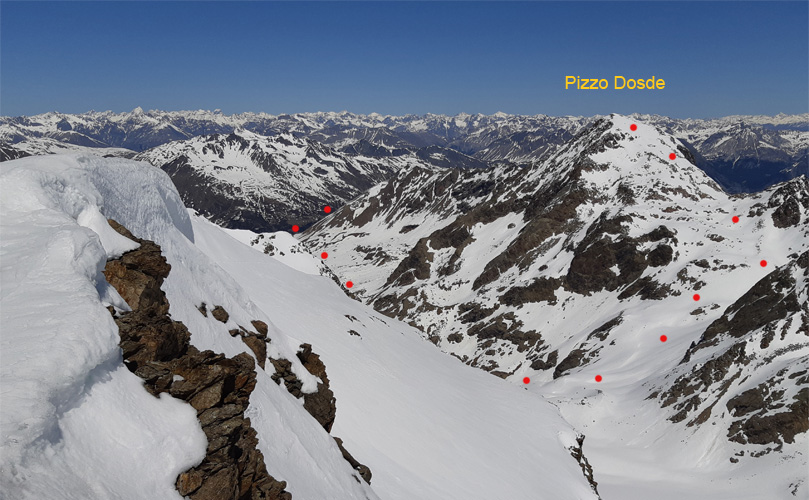
I did the very left red route to ascent Pizzo Dosde then ski down behind the big bulging rock, left of center, and ascended a short couloir to continue up the north glacier of Spalmo. If you are going just to Spalmo you can follow the middle red ascent route or my green descent.
Excellent views of the other 3 peaks in this valley from top of Dosde! You can see the short couloir I went up and onto the north glacier of Cima Lago Spalmo, with my descent in green.
View of my ascent route on Pizzo Dosde as seen from Cima Lago Spalmo.

Cima Lago Spalmo, 3291m – Skiing North Glacier

While this peak also offers great views skiing its north slopes and glacier are its biggest attraction! The true peak is hidden further behind a small pyramid that you will see from the valley as you approach.

Repeating the photos from above for reference…

As you can see, the ascent is up fairly steep and on big slopes on a glacier, however, I was able to skin up most of the way. Crevasses were well covered even in this low snow year (north aspect and high elevation).

There are a variety of high quality descent options, just choose appropriately for the current conditions and time of day.

Cima Saoseo, 3264m – East and North Slopes

Once atop, you will be standing on the Italian-Swiss border. Thankfully, there are no customs officers, just amazing views to the west!

Looking to the west and into Switzerland from Cima Saoseo (3264m), with 4050m high Pizzo Bernina in the background – the most eastern 4000m peak in the Alps. Below is Val da Camp valley.

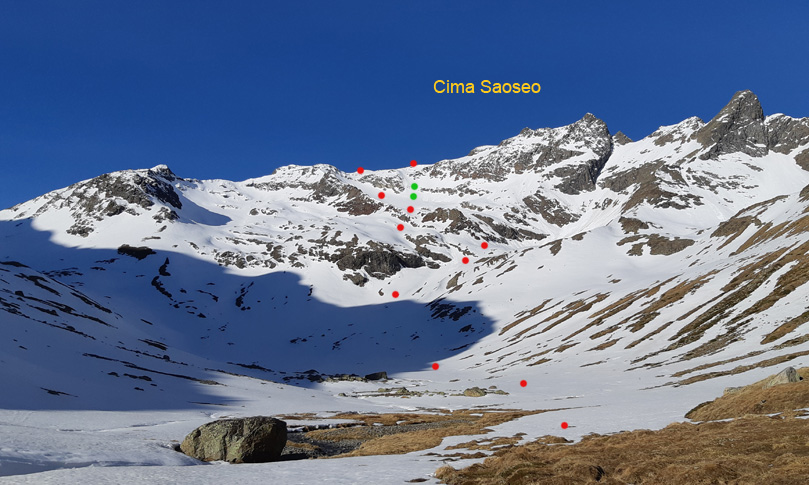
To ascent this peak you will make a sharp right below the slopes of Cima Lago Spalmo and continue up a long flat valley before you begin the true ascent. There is no glacier on this peak.

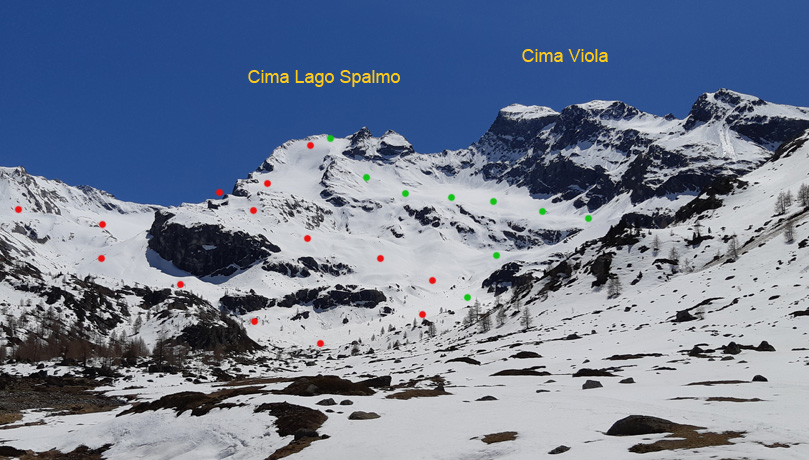
My skin track in red and a variation on the descent in green. The summit is still quite far behind the horizon. To the left and not in the photo is Cima Viola.
I boot-packed a short section to gain the shoulder but it’s likely duable on skins mid-winter. For my descent, I chose a steeper line.
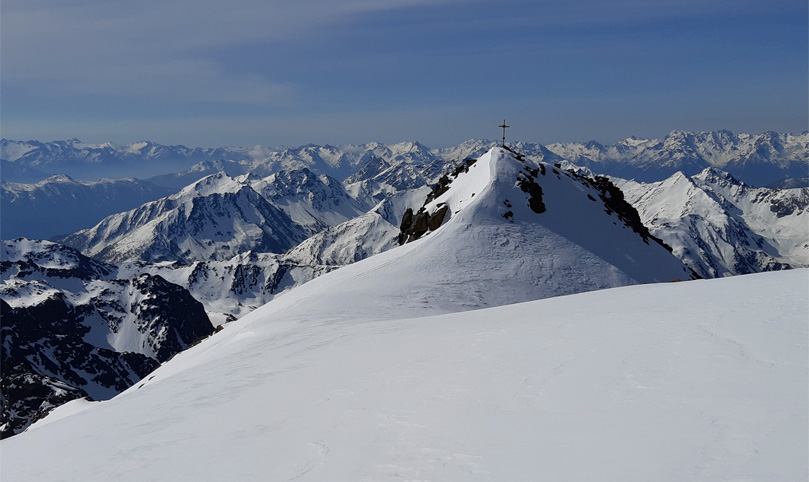
Looking south over the summit cross of Saoseo.

Cima Viola, 3374m – North-West Glacier and Slopes

The highest peak of the four and also the one with most descent options, non of them easy and some fairly extreme.

Cima Viola is also the most complex of the four mountains due to route finding and overall hazards. My photos of the peak from Saoseo helped me choose the best option couple of days later.

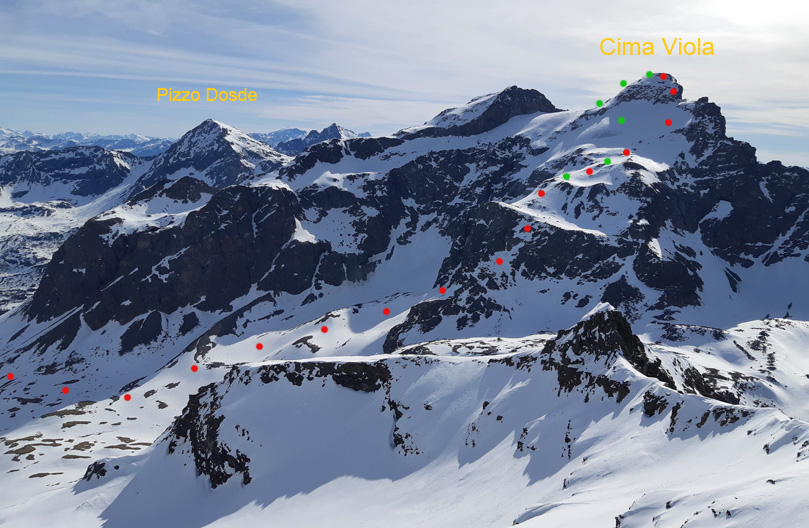
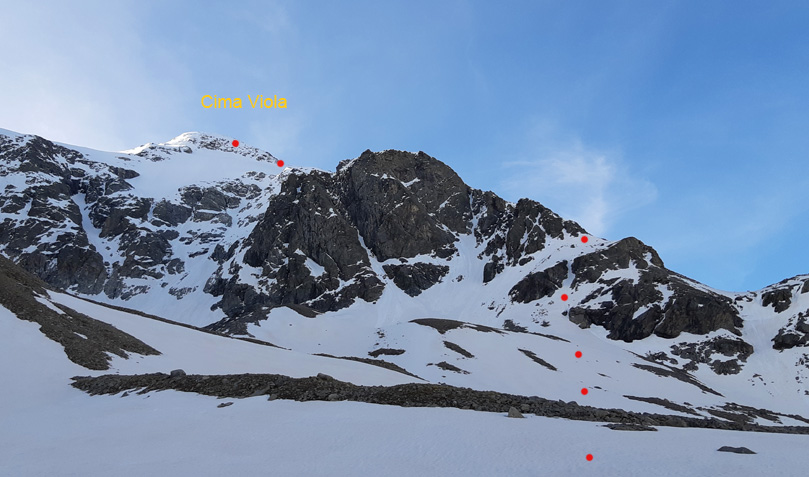
My ascent route going up mostly on the west side of Cima Viola and then down the north ridge off the summit before reconnecting with my ascent track. Notice the beautiful ramp traversing from right to left which has an exit to the valley via a steep 200m couloir that is hidden on the very left.
Switching from skinning with ski crampons to boot crampons and back is probably a usual exercise on Cima Viola. You can see that it is possible to ascend or ski the more direct lines from the summit, however, there are many more hazards.
Looking north and marveling over the long traversing ramp on Cima Viola.

When to Ski Here

While I skied in this valley only in May I believe the snow must be excellent all winter!

The terrain is complex but also open enough, and with many options, that an intermediate experienced ski tourer should be able to find great turns and stay safe at any time of the year.

If you have questions, send me a message via SkinTrack’s Facebook page.

Filed Under: Trip Reports & Conditions Tagged With: Cima Lago Spalmo, Cima Saoseo, Cima Viola, Pizzo Dosde, Valtellina

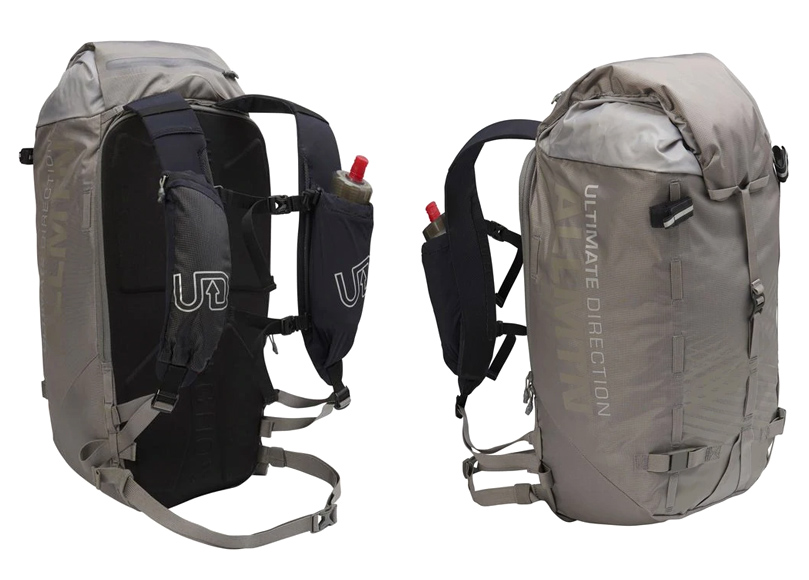
Review of Ultimate Direction All Mountain Pack: Ski Touring Is Not Its Virtue Yet It Works Well

May 21, 2020 By Stano Faban Leave a Comment

Overview

Suitability: climbing and mountaineering rather than ski mountaineering and ski touring
Usual price: around $165 USD
Weight: 590g (size S/M)
Ice axe carry: 2 with quick access
Pros: light weight, durability, fit
Cons: lacks 1-2 separate pockets to be a better ski pack

Bottom Line

As an “all mountain” pack it works quite well for ski mountaineering and touring, however, it takes some time to adjust to its lack of dedicated pockets or compartments that we all like on specialized ski packs.

Review

Truth be told, this pack has never been designed as a true ski mountaineering or touring pack. It has been only my decision to push its limits as a ski pack because that’s my main passion, and I am on a search which single pack would “do it all” the best. You can read the packs full description on the UD website.

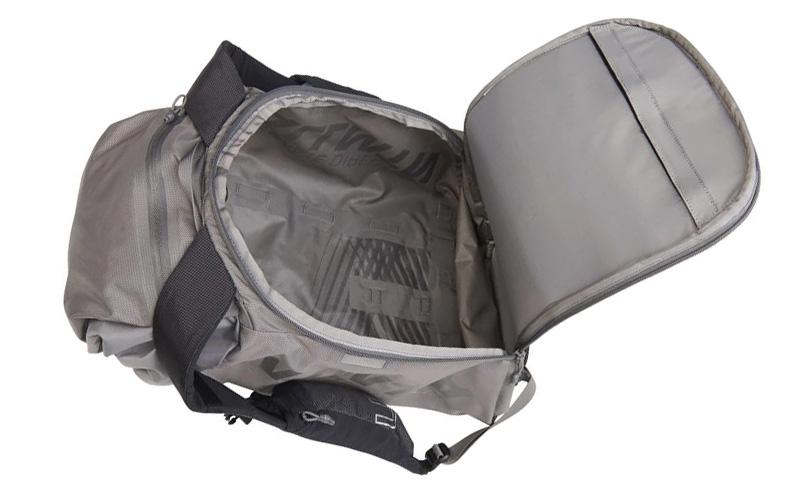
I have used the Ultimate Direction All Mountain pack for skiing for about 20 days in total over the last couple of months. It has been a “learning curve” the first few times out as the pack has only 1 big compartment and 1 very small pocket on the top lid.

I shuffled my gear inside a lot to find what works best because it was quickly obvious that transitions will take longer as things will kind of disappear inside.

However, after my “trial period” I came up with a pretty good system and started to appreciate the pack much more. Probably the feature I like the most on this Ultimate Direction pack is the easy access through its back panel that has a zipper all around. Without it I wouldn’t use it as often.

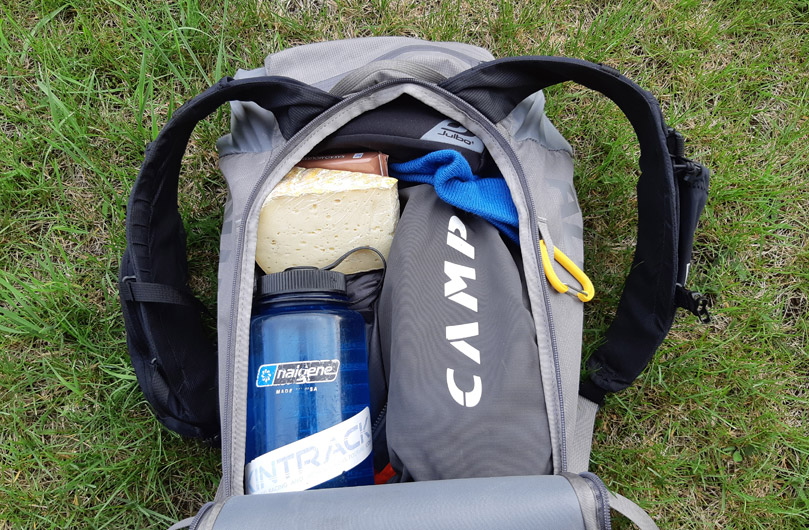
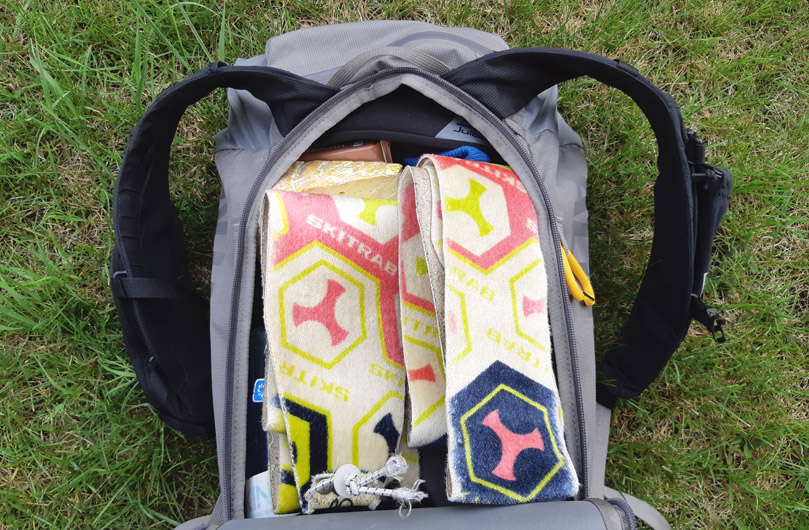
My best system relies on access via the back panel. Below the bottle and crampons there are wind/rain pants and first aid kit. Behind is the shovel bladed, and on the sides are shovel handle and a probe. The googles at the top are a bit squished while an insulation jacket is between the shovel blade and the bottle with crampons. The cheese seems to like this pack 🙂
Once you add skins, the pack is at its absolute volume limit.

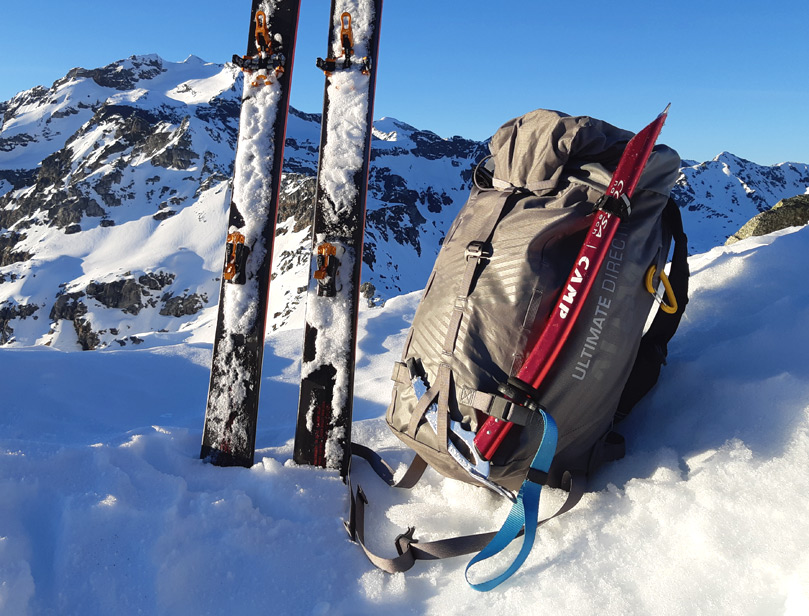
This pack also comes with a removable, diagonal, quick ski carry system that is based on skimo race packs which is a great to have when your main activity is skiing.

The pack fits very well and feels secure at all times thanks to its simple hip-belt and two chest straps – I have been using only one as I like easy access to my jacket’s zipper.

The shoulder straps have a clean design while still providing some storage. The left one has a pocket for a flask or a small bottle – sometimes I use for my phone so its handy for photos. The right shoulder strap has water-proof, zippered pocket that will accommodate most smartphones – I usually use it for a knife, lip cream and few small items.

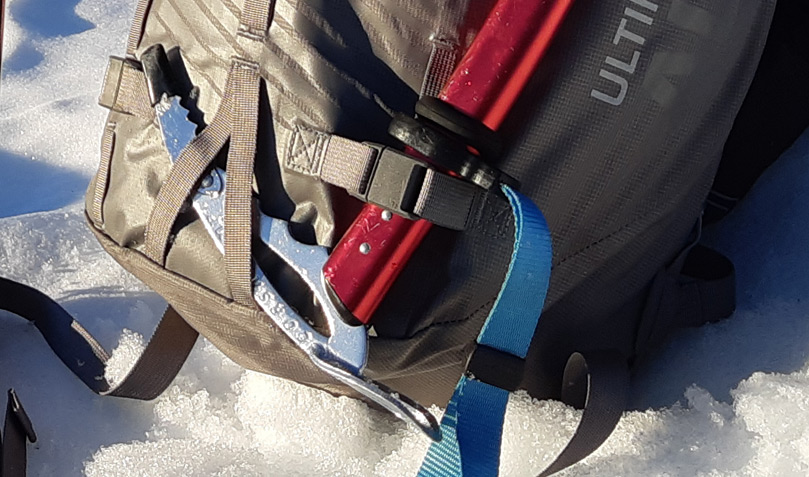
There are attachments for two ice axes that have quick-access buckles – meaning, that you can take an axe out without taking the pack off your back. This is a great feature, however, the bottom quick-access straps could use extra 1-2 cm (1/2 inch) slack as it’s little cumbersome to buckle in the ice axe shaft in place when the pack is fully stuffed.

Just reach back and press the grey buckle and you can easily pull out the ice axe in an instant.

So far, the pack is proving to have great durability. This is likely thanks to its construction simplicity and the use of Nylon ACE RIP fabric that is light yet strong.

The webbing on the outside of the pack is very useful for hanging extra gear.

The shortcomings of this pack for skiing, in my opinion, are its lack of compartments (or pockets) as these would make a life of a ski mountaineer much easier. Right now, all your gear plunges into one main compartment – shovel, probe, jacket, pants, food, water, first aid, googles:

  • At minimum, a dedicated zippered crampons pouch at the bottom would allow for more efficient gear organization, especially when you don’t bring crampons along. This pouch could have zippered roof so if you if need the one big compartment then you can easily create it.
  • Ideally, the pack would have another floating pouch at the top of its main compartment to store google, glasses, camera or sandwich so they can be protected by being always on top of all the other things.

What We Think Could Be Improved

As mentioned above, the lack of compartments hinder this pack to be much more suitable for ski mountaineering, without necessarily becoming worse for anything else, I believe.

Then using distinctive colours for the belts, or at least the buckles, would improve usability of this pack as one could quickly see where these elements are without much attention.

As my last point, I think the pack could have 2-3 litres of more capacity.

Filed Under: Reviews Tagged With: Ultimate Direction

Freedom Skiing In Valtellina: 5 Peaks In 3 Days As Italian Coronavirus Lockdown Eased

May 12, 2020 By Stano Faban Leave a Comment

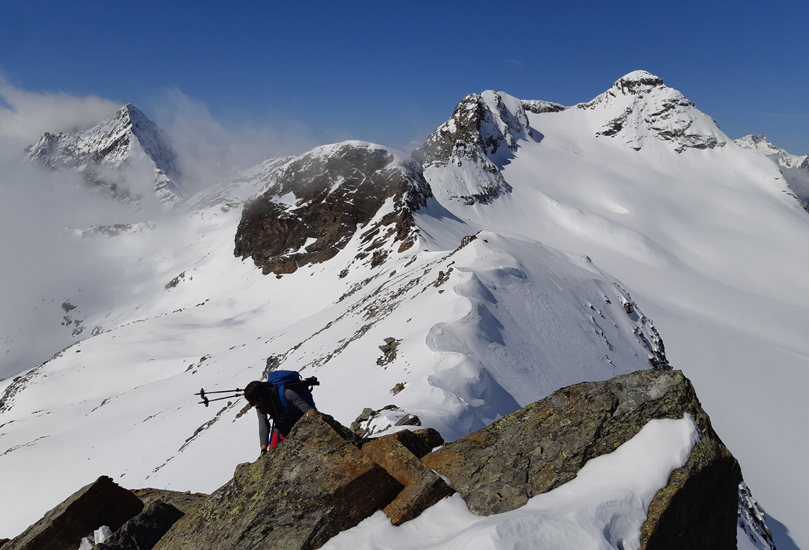
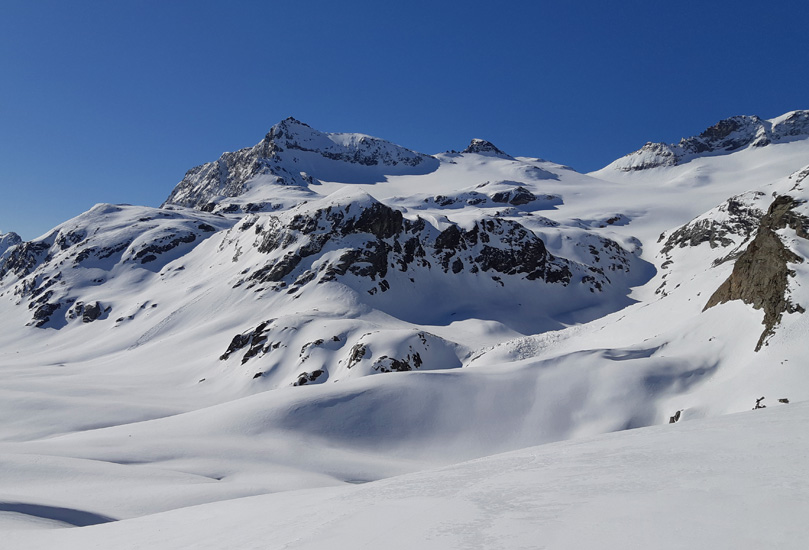
Following a spectacular ridge on Pizzo Canciano (3103m) with Martina Pini. The three-peaks of Cima Papa (3197m) in the middle were next on our menu. We skipped the familiar Pizzo Scalino on the right (3323m).

Fresh air of an early morning, with blue skies above us, after a couple of strides on skis everything felt very natural yet somehow odd.

Still feeling like partisans, as more strides passed and one hundred became one thousand, the anxiousness transformed into joy that we were freely out, that we are skiing again!

Pizzo Canciano, or Piz Cancian in Swiss, as seen from Passo di Campagneda (2626m). This peak can be climbed from the Swiss side or as we did from the beautiful Valmalenco valley in Italy.

After two months of the lockdown under the beautiful peaks of Valtellina in northern Italy – just south of Sankt Moritz, Switzerland – there was a lots of anticipation mixed with uncertainty.

Now, the ski conditions here are quite good and the valleys are fairly empty as most already transitioned into summer sports. With new snow in the forecast, there are more ski adventures to be had this winter… trip reports are coming 😉

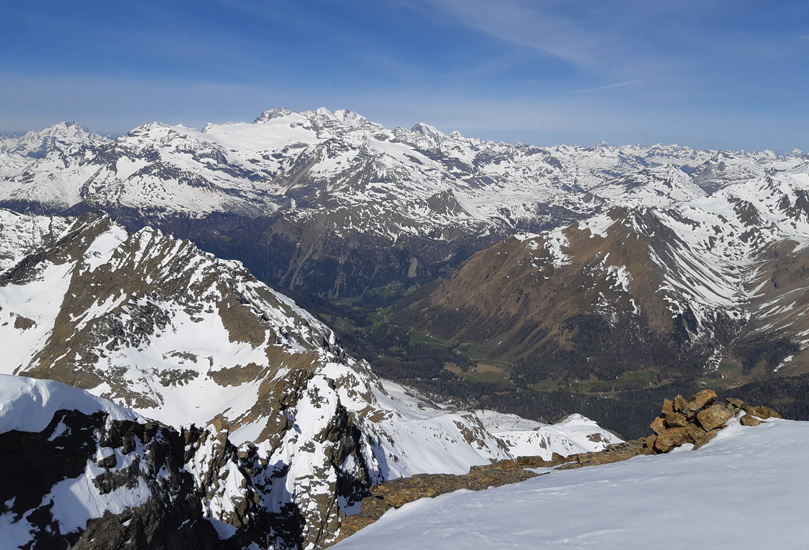
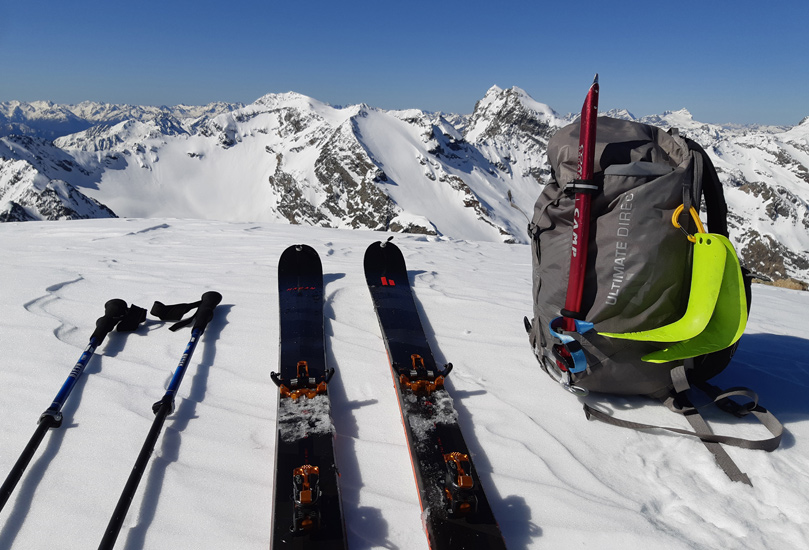
From the top of Pizzo Dosde (3280m) looking towards the next peak that day and its beautiful 800m north glacier of Cima Lago Spalmo (3291m).
Looking into Switzerland from Cima Saoseo (3264m), with the 4050m high Pizzo Bernina in the background – the most eastern 4000m peak in the Alps. Below is Val da Camp valley.
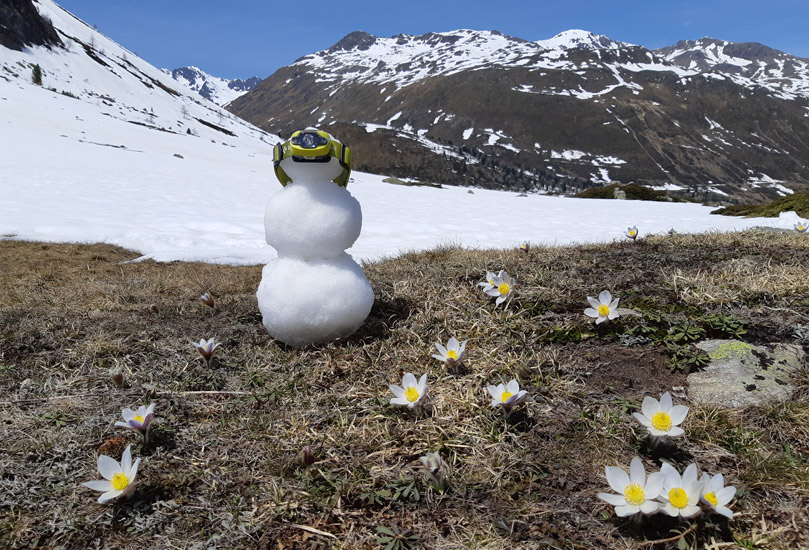
Pupazzo di neve, or a snowman in English, guarding gorgeous flowers in Val Viola.

Filed Under: Trip Reports & Conditions Tagged With: Valtellina

John Baldwin Interview: Multi-Week Ski Traverses, Exploring Canada’s Coast Mountains, Creating Ski Maps and Guidebooks, Modern Navigation…

March 12, 2020 By Stano Faban Leave a Comment

John Baldwin is arguably one of the greatest pure North American explorers. He has chosen to do most of his travels on skis and has authored several books and maps so others can experience the great Canadian wilderness with a bit of guidance.

Over the years, I have had the great pleasure of skiing and hiking with John Baldwin and Linda Bily, John’s wife, on several occasions and we always had plenty of fun.

John and Linda are probably best described by their own quote from their book Soul of Wilderness:

Ours are not heart-stopping tales of conquest and hardship…. The purpose of our trips is simply to see as many of these special places as we can.

Note: All images are copyrighted by John Baldwin and Linda Bily, and were used with their permission.

John Baldwin’s Guidebooks and Maps

John on one of his earlier ski traverses on Lillooet Icefield.

John has authored several books, including ski guide books and maps, that focus on his beloved Coast Mountains and western British Columbia.

People’s most popular publication of his has been the Exploring the Coast Mountains on Skis that is a superb guide to ski mountaineering in the Coast Mountains of western British Columbia from the Washington border to the Alaska panhandle.

For a full list of John’s books, maps and online purchase visit his website JohnBaldwin.ca.

Interview with John Baldwin

Q: Whether it is a multi-week ski traverse or just a day trip, what is most important to have a remarkable mountain experience?

There is a term called forest bathing that has become more popular recently. I think this is a big component of ski touring – you might call it mountain bathing or snow bathing.

I think moving through the mountains on skis is a great way to connect with nature and the outdoors. I feel that a sense of wonder and gratitude for the mountains are part of this.

Q: I remember when we met for the first time… both of us skiing solo in the mountains above Vancouver. I was new to Canada but already studying your ski guidebook. You quickly became my inspiration for exploring. Who were the people that inspired you and in which ways?

There are many levels to answer that question…

There were the people that helped me to learn how to go into the mountains – my leaders in Scouts, my high school French Teacher Hans Fenz.

Then there are people who inspired me by their mountain activities – Don and Phyllis Munday, Dick Culbert and Glenn Woodsworth, John Clarke, Chic Scott, Galen Rowell. All of these people had an idea that grabbed them and they followed that idea with passion.

It’s good to be curious about life – that is something I learned from my father and it’s good to appreciate the beauty in life – that is something I learned from my mother.

The most important lesson is to follow your heart.

Q: You have created and published your books and maps with little outside help. You self-thought most of the skills you needed. Is this an obvious extension of your wilderness adventures? Do you like to be self-reliant in all aspects of life?

That is partly true, I like a hands on approach when I do things. I enjoy the learning and exposure to all kinds of things that comes from that. At the same time, I did rely on others with some of the technical aspects of publishing and using complicated mapping and graphic design software.

Also, when you are doing something for the first time – either in the mountains or writing for example – you have to follow your own vision because there is no else to follow.

Skiing over the wast Juneau Icefield that crosses the Canadian boarder with Alaska and extends 140 km north to south and 75 km east to west.

Q: You have dedicated your life to exploring Canadian Coast Mountains which line the west coast of British Columbia for hundreds if kilometres. What lured you specifically to them for so long?

The simple answer is that I grew up in Vancouver staring at the southern end of the Coast Mountains and became curious about what lay up there.

I fell in love with the magnificent land that lay hidden in the clouds. And it has taken most of my life to just get to some of their most amazing places.

I didn’t consciously ignore other places or activities, I just did what I wanted to do most at each step of the way.

John at a camp on Homathko Icefield with Mount Waddington, the highest mountain in British Columbia behind by LB

Q: During all your long remote expeditions, your groups have never had a major accident. How did you manage that? You survived a massive fall in your twenties, was that an early wake-up call?

Many of my trips were before satellite phones, and Spot or InReach devices. It was essential to plan each trip carefully.

The mountains are very powerful. It is important to be respectful and appreciate that when you are in them. Yes, I suppose in a way, falling off the mountain helped me appreciate that. One wrong step and you can fall 500m!

You don’t need to be afraid and fearful when you are in the mountains but you do need to be aware of what you are doing and where you are.

Q: You have an incredible sense for reading terrain and interpreting a map. Is this something you have always had, or it has naturally developed within you over the years?

I am an engineer and I have always been good at map reading and visualizing things in three dimensions. Staring at maps and using them to constantly navigate through new terrain has also helped immensely.

I think we also have an innate sense of terrain in all of us. We have been travelling over the earth for millions of years and we are meant to do that.

Q: Do you use Google Earth or other modern applications?
I use it a lot for inspiration and researching new ideas. Once outside, I prefer to read terrain and look at a paper map or phone map occasionally, mostly without compass or GPS. You could say, I am trying to be romantic about it…

Absolutely, Google Earth is amazing! To be able to see the landscape in such detail is incredible… But there are limitations – it often doesn’t show crevasses very well and like a map you still need experience to really be able to read the terrain well.

I strictly use Google Earth for planning and it’s fun to look at for new areas. It has also been invaluable for making my ski touring maps. I also use caltopo.com and hillmap.com, which are really useful online mapping tools that can translate from a map to a satellite image.

Q: Do you think that those who rely a lot on modern navigational tools – phone apps with GPS, or simply following a downloaded GPS track – are robing themselves of a more profound experience? Aren’t these modern tools making us a bit dumber perhaps?

There are no rules, use whatever works for you. I do agree with you that overusing modern navigational tools will not help you learn how to interpret terrain.

My advice is to always try and estimate where you are before you use a GPS and see how well you did. That way you will learn.

Most ski traverses in Canada start and end with long walks in the wild forests or valleys.

When GPS devices first came out I used to race a friend and his GPS to see who could estimate our location faster. I often would win (and back then when the GPS signals were weaker, I was often more accurate).

Ski routes are not hiking trails and their GPS tracks cannot be followed like a video game. You need to be constantly looking around and assessing avalanche conditions, crevasses, changing micro terrain, rocks etc.

With practice you should be able to look at a map in the morning and know where you are for most of the day and only need to refer to the map when there are very specific spots that you need to navigate through.

Q: I know that you prepare most of your expedition food at home. Do you use any sports bars or store freeze-dry food?

I sometimes use nutrition bars on day trips but I don’t like most of them.

For longer trips, I usually make up my own snacks. For meals, I will use some freeze dried ingredients but never freeze dried meals in a bag.

Q: How much food in weight do you bring per person on a week-long ski traverse? What is most important to you about the food you bring?

The old rule was about 900g (2lbs) per person per day.

It’s important to bring healthy nutritious food that you like. You can make your own simple meals that cook relatively quickly. I have never lost weight on any three week trip.

Backpacks for only even a week-long ski traverse easily weigh 20-25kg (50lbs) as one needs to carry, on top of the food, also a sleeping bag, pad, tent, cooking stove… For more technical traverses, add glacier and mountaineering gear, and soon you are at 30kg (65lbs).

Q: You have managed to organize your life to have plenty of time for adventuring. Despite living close to Vancouver’s downtown, you live simply. Have you ever thought about living in a small town?

First off, I grew up in Vancouver, so that is my home and that is a big part of why I live here. I also love living near the ocean – I feel it is like the base for the Coast Mountains.

I have thought about living in a small town but I was never able to find work there so it never happened. I also find that when I am in the city that I only live in a small part of it, and can ride my bike and do most errands locally so that it feels a lot like a small town.

Q: When you are stuck on a big glacier in a storm, how do you spend the time? Do you read books?

People pay big money to go on meditation retreats. Just think of a storm day as a free retreat 🙂
It’s good for you to have time to just daydream and rest.

I often bring a book for storm days. I enjoy books about the true stories about people and parts of BC. I would trade books with others in the tent too.

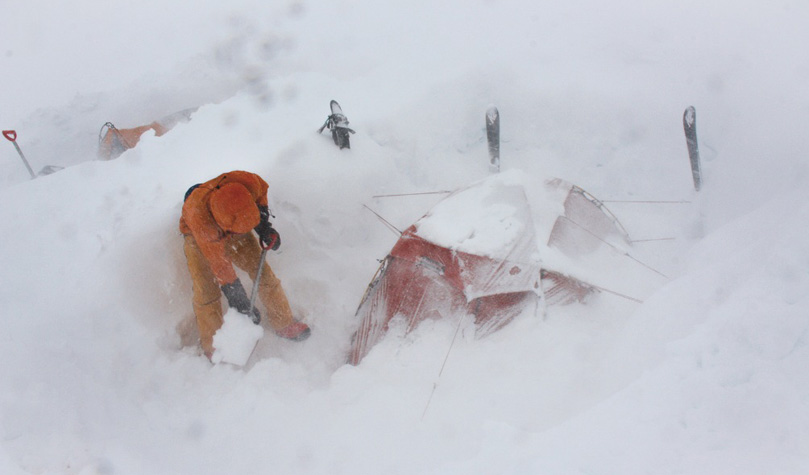
John digging out the tent once again during 5 day storm on Juneau Icefield.

Q: What projects are currently occupying you? Any new trips or books in the plans?

In the summer, I was busy going through all my old photos for Chic Scott who wrote a biography about me for the Alpine Club of Canada Summit Series. The pdf is available free online or you can order a printed copy.

Now, I am reprinting some maps right now with some small updates. I am also doing another printing of my guidebook.

Then I am always planning trips and looking at maps and Google Earth. And I have been sewing a new ski touring day pack as I love making things.

Filed Under: People (Interviews) Tagged With: Coast Mountains, John Baldwin, ski traverse

Traverse of Pico de Orizaba Volcano in Mexico: North America’s Third Highest Mountain

March 5, 2020 By Stano Faban Leave a Comment

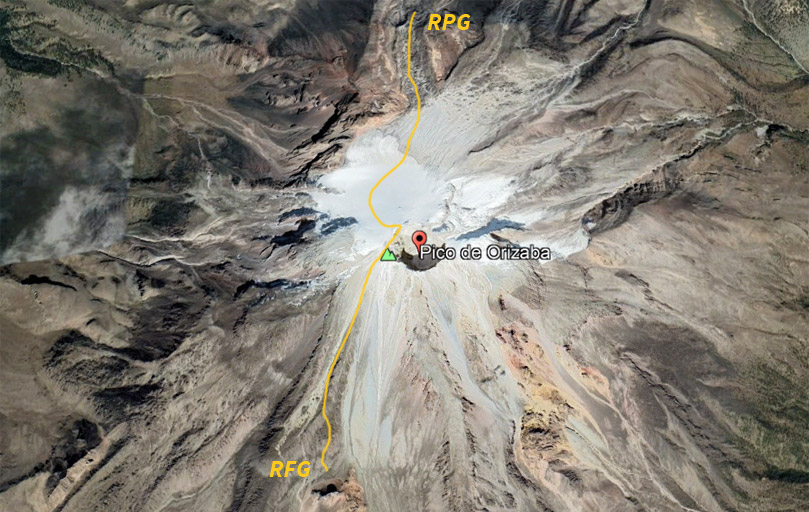
The main part of the traverse, from Refugio Piedra Grande on the north side to Refugio Fausto Gonzalez on the south.

I like to mix mountain adventures with cultural experiences and so without too much planning and speaking only few Spanish words was enough to inspire me for a trip to Mexico in early November last year.

The highlight was going to be the whole trip but I needed a specific excuse… Pico de Orizaba (Citlaltépetl), a 5636m volcano, seemed good enough.

With flights booked only ten days apart, I was slightly nervous if my wish list wasn’t too ambitious – visit Mexico City and Puebla, climb two volcanoes, and hopefully manage it all by normal bus transportation.

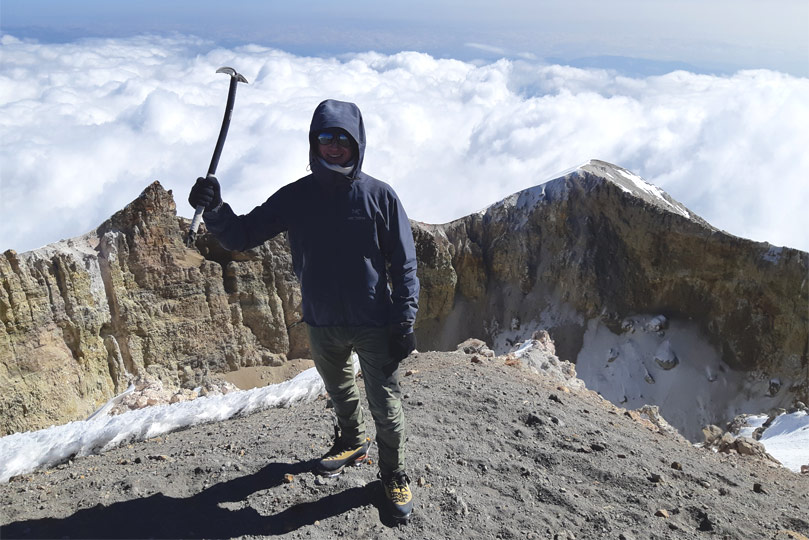
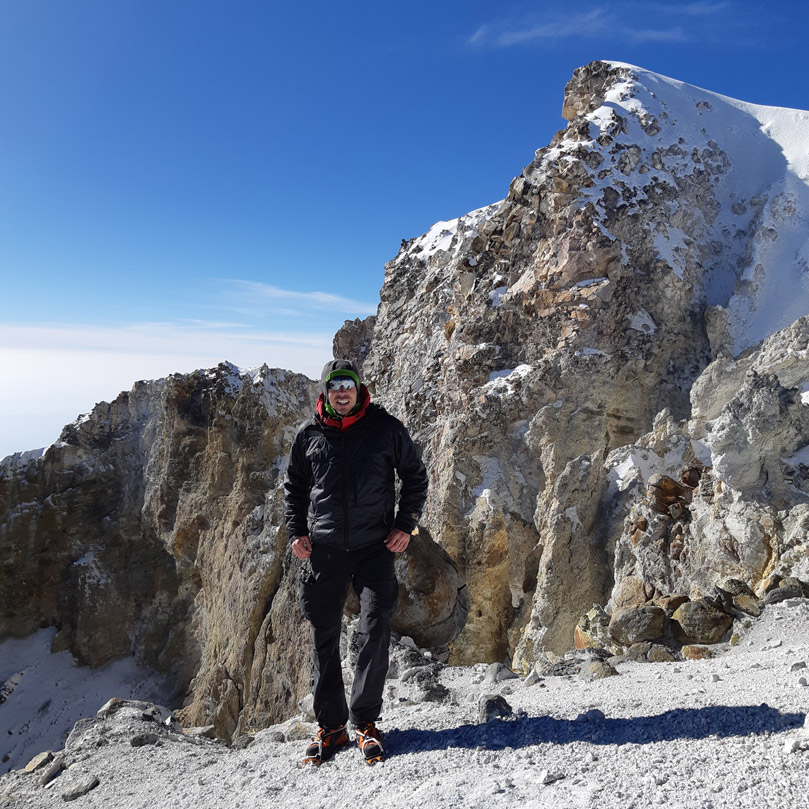
That’s me, Stano Faban, at the Orizaba’s crater, one of the most spectacular summit features I have ever seen.

While as a third highest mountain in North America, after Denali in Alaska and Mount Logan in Yukon, it doesn’t present a technically difficult challenge it’s still high enough to not be underestimated. Eventually, I was lured to Orizaba by flying over on Google Earth and realizing an adventurous traverse of this peak might be possible.

Itinerary and Logistics: If you want to learn only facts about my itinerary and logistics then scroll past all story below until you reach a section titled “Transportation, Accommodation, Food, My Itinerary, Acclimatization”.

Keeping the Backpack Light

If I wanted to traverse Pico de Orizaba it meant that I would have to carry everything I would bring to Mexico over the tall volcano, plus, water for two days as there is none on the mountain.

I forgot to weigh it but I think I left the house with about 14kg on my back. This included the 60L backpacking pack, thin $50 sleeping bag, mountaineering boots, light crampons and axe, and some old clothes so I wouldn’t stand out too much… if at all possible being about 20 cm (or half-foot) taller than most Mexicans.

Acclimatization on La Malinche

After arriving from Whistler, BC, the plan of climbing a 5600m mountain in a couple of days was the biggest physical challenge of the trip as my body had to adjust to the 5000m difference quickly. The good thing is that Mexico City sits at 2200m in the Central Mexican Plateau, high enough to start acclimatizing immediately, yet not too high to suffer any dangerous altitude side effects.

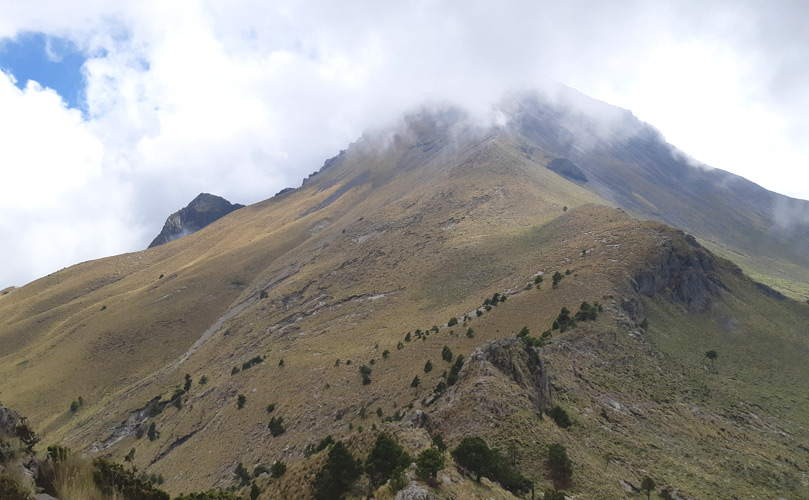
Clouds opened up once I was coming back down from La Malinche.

With Pico de Orizaba about 6h bus ride east of Mexico City, the perfect mountain for acclimatization, in my mind, was La Malinche volcano at 4461m and located about half way.

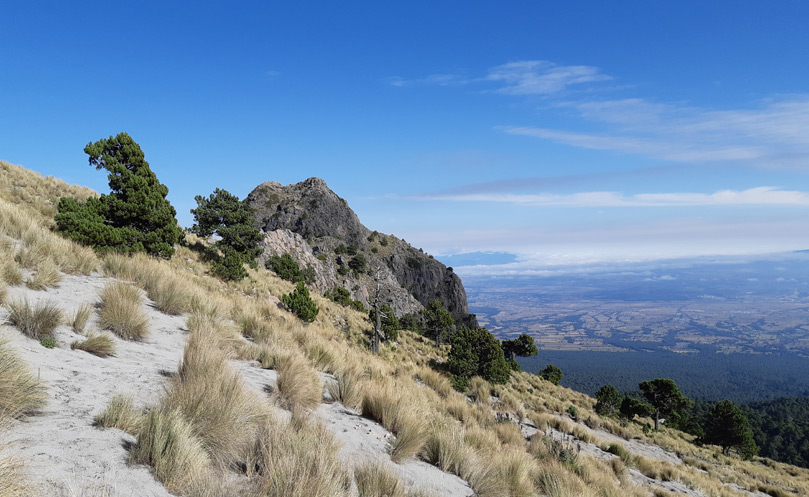
Sand and beautiful grasses at 4000m.

I ascended the volcano, also known as Matlalcueye or Malintzin, on the third day and loosely wandered above the 4000m mark for a couple of hours to help with acclimatization. I slept in a rental tent in a dead empty campground at Resort IMSS Malinzti (Centro Vacacional IMSS Malintzi). Starting there, at 3000m, I reached the summit in about 3h.

Visiting Tlaxcala and Staying With Locals in Huamantla

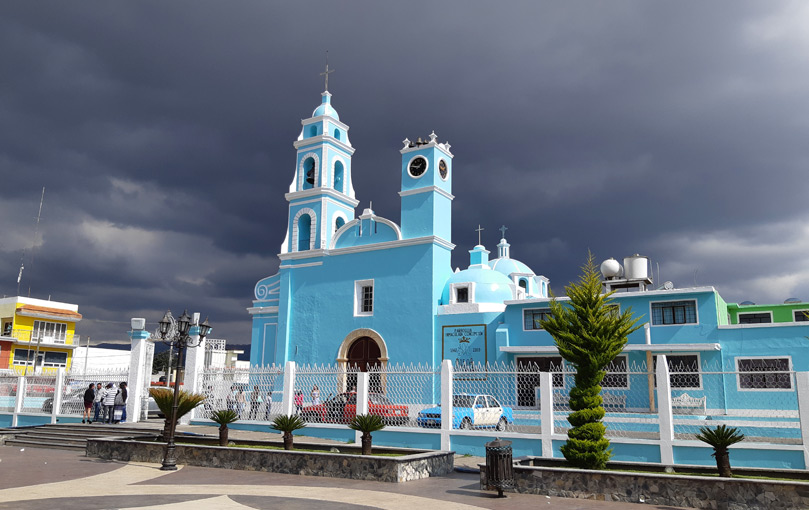
Maybe because of the summit fog, La Malinche didn’t capture my senses as much as the town of Tlaxcala the day before. Tlaxcala is the capital of the Tlaxcala state, the smallest in Mexico, and features many beautiful historical sites within a small area. Eating tacos from food stands with locals at a central park is another highlight as it offers a much cozier feel than in the big cities.

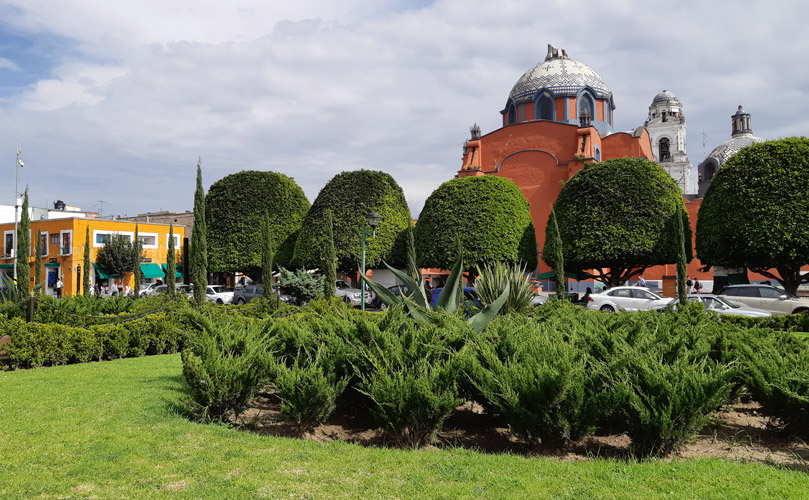
Tlaxcala centre.

With my weak Spanish, I was unable to find a bus in Tlaxcala that would get me to the foot of La Malinche so I bet my chips on striking a deal with a young local taxi driver, Victor. Common musical tastes and Google Translate app made the one hour drive pass quickly. We also made a fast stop to drink pulque, an alcoholic drink made from fermented sap of agave plant and a local specialty for millennia.

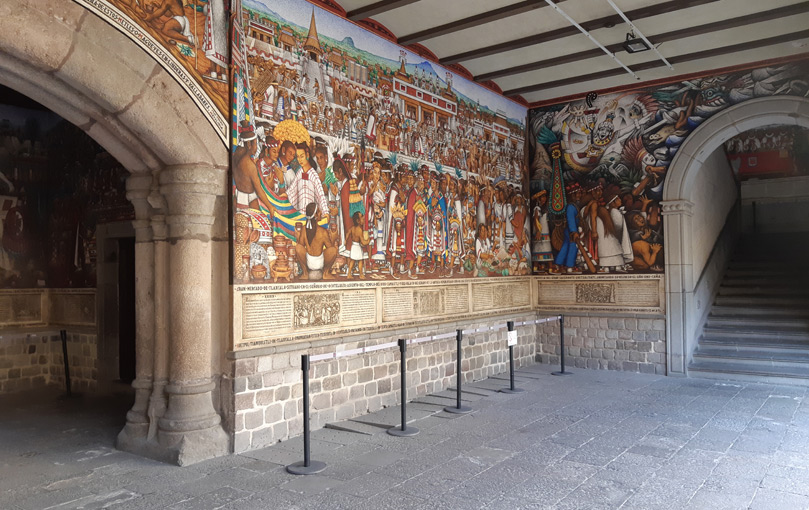
Murals paintings in State Government Palace in Tlaxcala.

Our friendship continued the next day and Victor picked me up after I came down from La Malinche and we headed off to Huamantla. This small town is one of only two that are known for a festival called La Noche Que Nadie Durme , or ” the night when no one sleeps”, occurring every August 14th, during which several kilometres of its streets are covered with colourful carpets made of painted saw dust flowers and other materials.

Traversing Pico de Orizaba from North to South

The next day, I hopped on a bus to Puebla as there is no meaningful bus connection between Huamantla and Tlachichuca, the last proper village before one departs for Orizaba.

Faith prevailed and not a single rain drop fell from these angry clouds as I got off the bus in Tlachichuca.

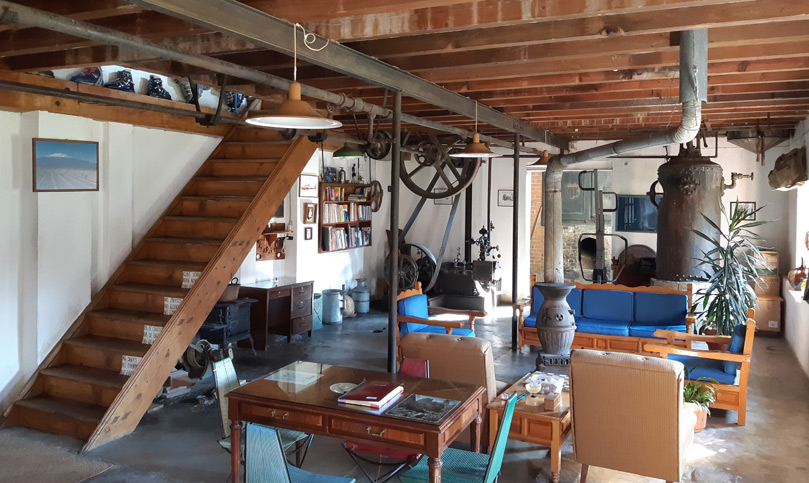
In Tlachichuca, I had the privilege to stay at Servimont, a hostel type of place but designed as an amazing museum that breaths mountaineering history and tells the story of a century old soap factory rebuilt as a mountain lodge.

The owner and a former local mountain guide, Gerardo Reyes, and his staff were very friendly. He was somewhat skeptical about my idea to traverse Orizaba alone as its south side is basically one big rolling stones scree. I knew it could be dangerous but I also thought it’s probably not worse than on any peak in the Canadian Rocky Mountains.

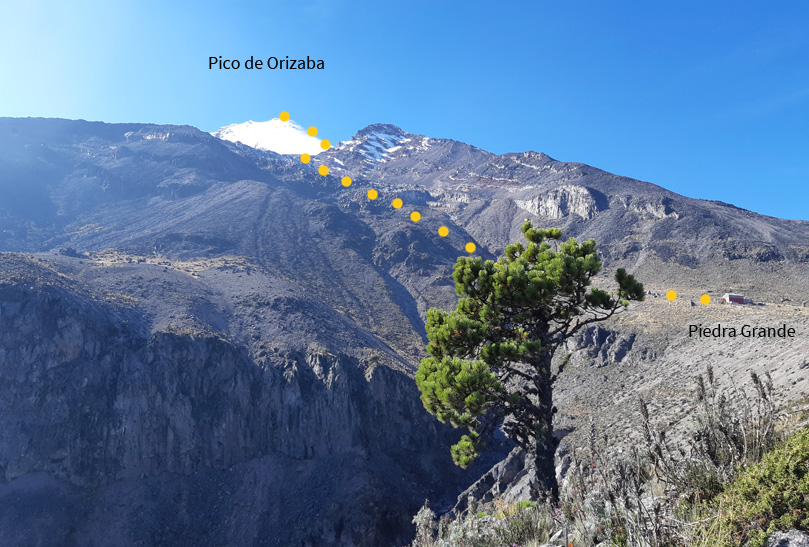
The next day, I caught a ride with Servimont’s driver up to a hut Refugio Piedra Grande that sits at 4200m on the north side of Orizaba. My plan was to hike up to about 4900m for further acclimatization, and drop some gear and food so I wouldn’t have to carry it all when I start the traverse.

My ascent route from Refugio Piedra Grande.

On my way up, I noticed there was a rescue going on as three climbers fell down the Jamapa Glacier. Two were in fairly good condition but the third one suffered a broken femur and pelvis. Shortly after I dropped my things I ran into four people carrying the victim. Naturally, I offered my help. For the next 6h we took turns on loose rocky trails, and well into the dark, carrying the person down to the hut.

The rescue was a good reminder that in Mexico you can’t rely on a swift helicopter rescue, pretty much like in Canada, and so the local mountain guides are usually the ones that end up on these heroic missions, even if it doesn’t involve their own clients. The same day, another climber died on the south side after being hit with a falling rock.

After the rescue, I decided to postpone my attempt by a day as there was no way I would wake up at 3am and go back up again. The food was running short so I thought twice before eating something.

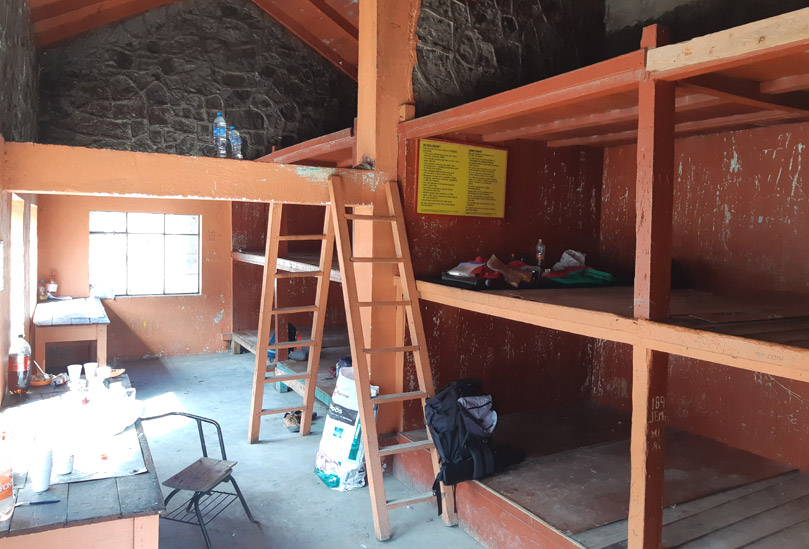
I spent most of my free day outside the hut as it was somewhat dirty and smelly inside the hut.

I departed at 3.30am the next night along with other two people. We made good progress and reached the summit easily by 9am. I was told that most parties usually take about 7-8h.

On the way up, to my surprise, when picking up the food at the base of the glacier, two smiling mice ran out of my food bag! As that was all the food I had I was biting carefully around the mice teeth marks as the sunrise was unraveling.

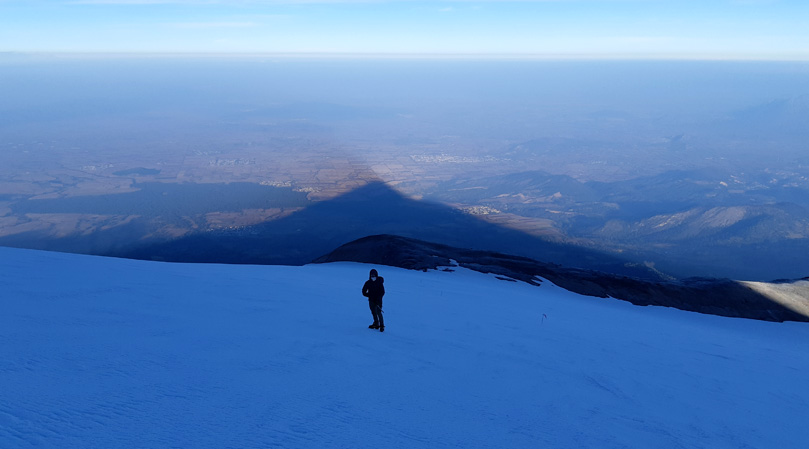
I took this photo around 8am at maybe 5300m. If you manage to be on the summit at the sunrise, perhaps around 6.30am, the shadow might be 3 times longer.

The Jamapa Glacier was very firm so crampons and ice axe came handy. We didn’t rope up between the three of us as we were all planning to climb solo, and obviously no one brought a rope. As for crevasses, I saw one decent size hole about 100m below the summit. If you can see and follow the guides’ path you should be fine, however, you are definitely on a glacier so make your own judgement about not roping up.

Alex on top of the impressive summit crater. We came up together from the north side and he also returned that way.
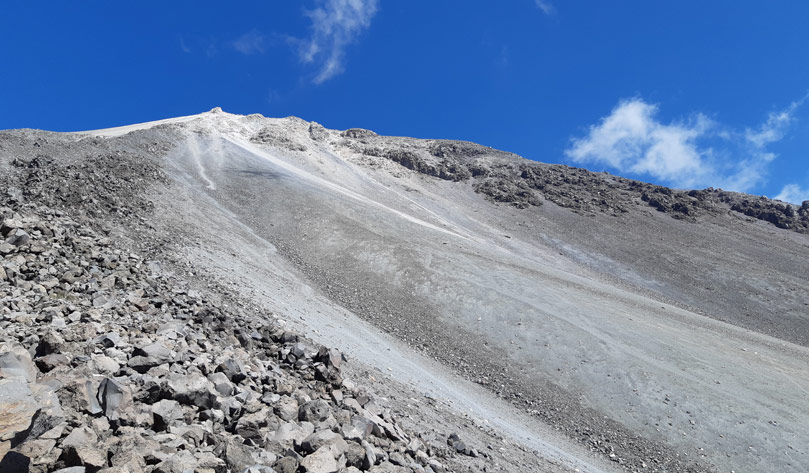
The massive 1000m scree on the south side. I traversed to the left (looking up) below the summit rock and went down that way the first 400m to avoid being under the gun.

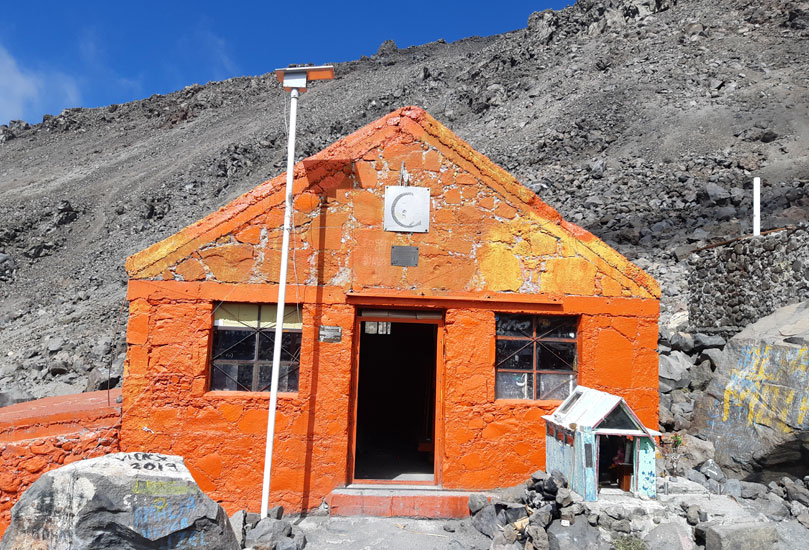
Once rolling down the dry south side scree I made a quick descent to Refugio Fausto Gonzalez at 4600m, reaching it just before noon. My original plan was to spend one night there, however, after seeing and smelling the inside I couldn’t help but run away.

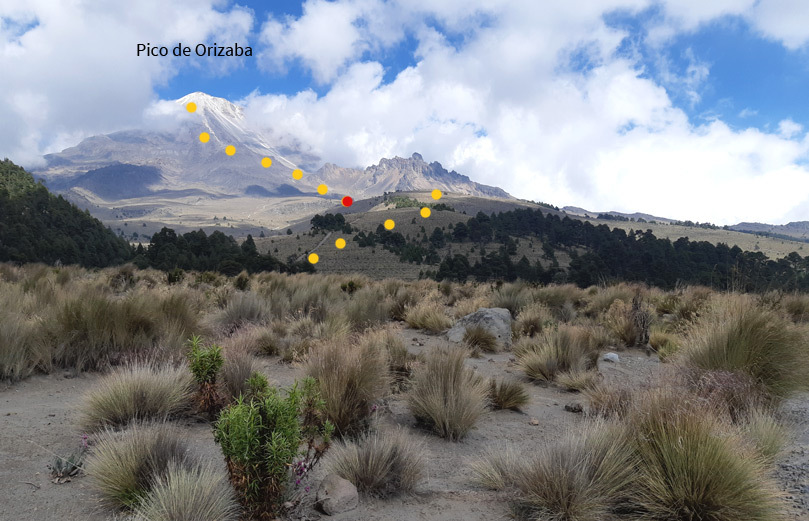
My descent route with Refugio Fausto Gonzales marked with the red dot.
Surprisingly, the south side of the mountain was very quiet and I didn’t meet anyone on my 20km walk until I reached the nearest town of Santa Cruz Texmalaquilla.

In the little town, thanks to my weak Spanish, I befriended a local school janitor who took me under his wing when I pestered him with questions about buses, after I spotted him sweeping the classroom floor through wide open doors. Half hour later, we walked down the village together while he thought me Spanish words for all animals alongside of the road before we caught a taxi…

Visiting Puebla and Mexico City

My next destination was the Puebla city after my new friend put me on small bus called “directivo” on the outskirts of Esperanza. We arrived in about one hour and I was plunged into an evening busyness of civilization.

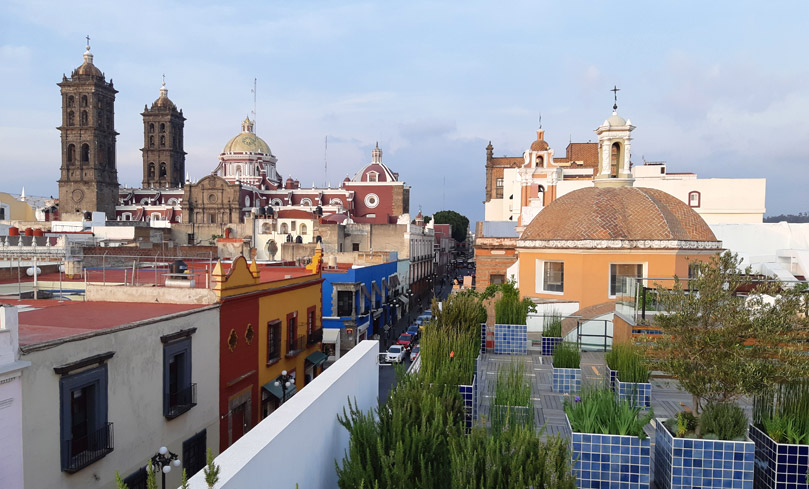
Puebla’s architectural diversity.
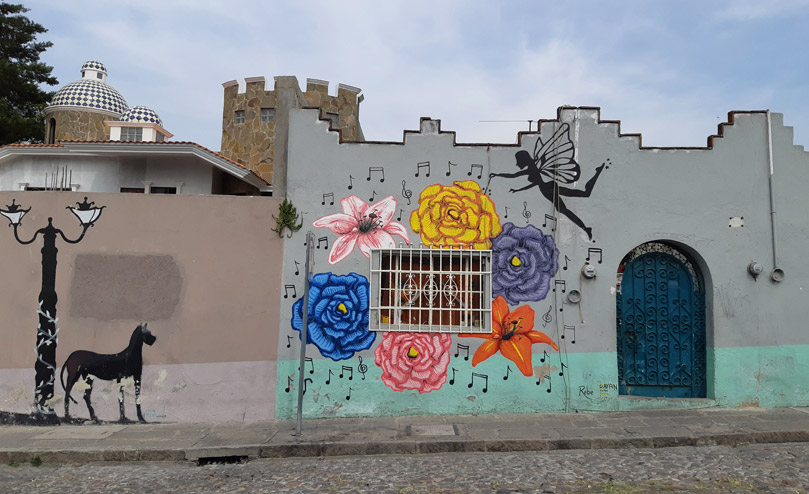
Part of Puebla features murals on every single wall for blocks.

Puebla is incredible and a must visit for anyone attempting Pico de Orizaba. In fact, I happily decided to stay and explore for almost two days as I somehow managed to end up with an extra day in my fast itinerary.

I spent my last day before an early morning flight exploring Mexico City, another worthwhile destination with miles of historical sites and the most museums in the world.

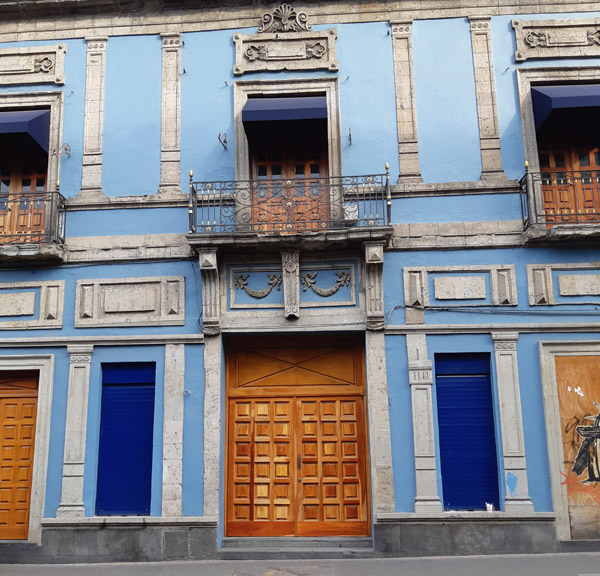
Random house in Mexico City.

Transportation, Accommodation, Food, My Itinerary, Acclimatization…

Here are some useful information to help you with your travels in case you were inspired by my trip.

Transportation:

  • You can travel almost everywhere in Mexico City using the subway system. I always felt safe and it’s very cheap – only 5 pesos, or 30 cents Canadian, per ride to any destination! You can also use it to go to the airport. Occasionally, you might use a taxi which are fairly inexpensive by western world standards.
  • Between cities, it’s best to use buses. TAPO is the main station in Mexico City while in Puebla it is CAPU. Again, the costs are very reasonable for a westerner.
  • You might consider hiring a taxi occasionally once in smaller towns if you want to save time, however, it’s definitely more interesting to use the public transportation as you will experience more of the local life.
  • For getting to Refugio Piedra Grande, it’s worthwhile to contact Servimont. I considered walking there until I realized it’s about 20km and how much water I needed to bring.
  • I used a tour bus for getting around in Puebla one day. I never do this yet it was cheaper than using taxis, and I got to see many interesting parts of the city in a country where language presented some barrier for me.

Accommodation:

  • I didn’t book anything before leaving for the trip, and I didn’t use AirBnB at all.
  • To stay at Servimont in Tlachichuka, it’s best to email them few weeks before as they could be very busy. I was lucky and they had plenty of space when I emailed them only 4 days before I showed up.
  • I stayed in lower budget hotels and hostels in Puebla (Hotel Star Express near bus station) and in Mexico City (Casa San Ildefonso near the historical city centre).
  • There are no fees to stay at Refugio Piedra Grande or Fasto Gonzalez, however, expect only very simple and potentially messy shelters.
  • Bring your own stove, water and food.
  • Usually, there are various options for accommodation in smaller towns but hostels could be very low in standard and cleanliness while hotels will be much better but might start at around $40 per night.

Food:

  • I bought a fuel gas canister for my Jetboil close to the centre in Mexico City, I forgot exactly where.
  • I ate mostly from street vendors or low cost restaurants without any stomach problems. It was always quite delicious and a nice experience as they appreciated my presence and trust.
  • Overall, food is quite cheap and buying groceries is fairly easy even in small villages.
  • For water, to avoid potential health issues, perhaps it’s best to buy bottled water or treat the one from the tap.

My Itinerary by Day:

  1. 5am landing. Morning in Mexico City and riding a bus to Tlaxcala.
  2. Exploring Tlaxcala. Staying at the Malintzi resort overnight.
  3. Climbing La Malinche. Night in Huamantla.
  4. Riding buses from Huamantla to Puebla and then to Tlachichuka. Overnight at Servimont.
  5. Ride up to Refugio Piedra Grande, and acclimatization hike and rescue in the afternoon.
  6. Relaxing around the refugio.
  7. Traverse of Pico de Orizaba – long day:
    3.30am start > 9am summit with 1h there > 11.30am Refugio Fausto Gonzalez > 3.30pm Texmalaquilla village > 7pm in Puebla
  8. Visiting Puebla.
  9. Morning in Puebla and riding a bus to Mexico City in the afternoon.
  10. Visiting Mexico City.
  11. 5am departure from the airport.

Acclimatization:

  • I highly recommend to use proper acclimatization practices for any summit above 4000m if you live below 2000m because 4000m is already high enough to suffer major health issues (even dying) if you push your body too much too soon.
  • For Pico de Orizaba, and other Mexican volcanoes above 4500m, I definitely recommend climbing to around 3600-4200m prior to your summit attempt and having 1-2 days of rest in between. There are plenty of suitable and beautiful volcanoes close to Mexico City or Pueble to do this.
  • My acclimatization went well despite living only at 600m, however, I climbed up to 7500m before and so I know my body well. Also, my ability to adapt is probably better than an average active person thanks to years of training for ski mountaineering races.
  • Great thing about Mexico City, Puebla and the surrounding area is that it all lays above 2000m which forces your body to start adapting as soon as you land.
  • People coming from Colorado, or living above 2500m, might be deal with even 5000m much better but it really depends on their fitness and health.

Mountain Gear:

While I also brought a light harness, few carabiners, slings and some other gear, I am only listing what got used:

  • Ice axe: CAMP Corsa Nanotech
  • Crampons: Petzl Leopard FL
  • Boots: Rebel Lite OD shoe
  • Pack: Gregory 60-65L
  • Stove: old Jetboil
  • Sleeping bag: cheap $50 synthetic sleeping bag for +12
  • Sleeping pad: Thermarest Prolite Plus

Filed Under: Trip Reports & Conditions Tagged With: Pico de Orizaba

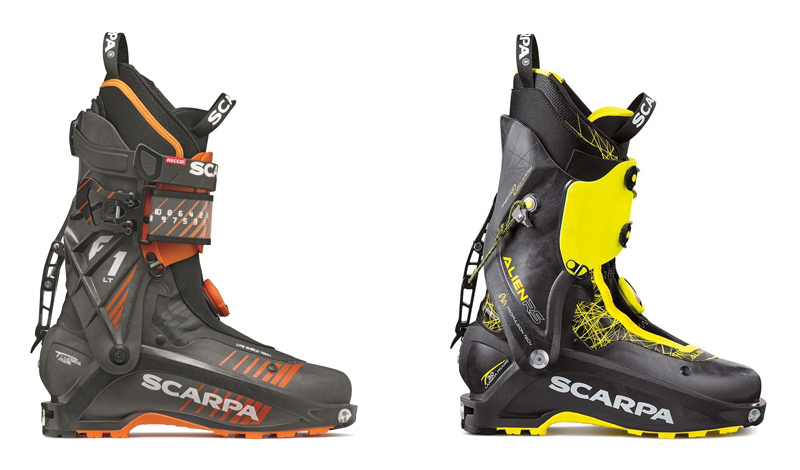
Scarpa F1 LT: New Specialized Ski Mountaineering Boot Replaces Popular Alien RS

February 13, 2020 By Stano Faban 6 Comments

Scarpa made a radical choice going into the winter season 2020/21. It will be replacing the popular Alien RS boot with the new F1 LT.

Basically, the new F1 LT is a blend of features and functionality from the Alien RS and the F1 boots that will further enhance the already great downhill performance of the Alien RS while promising to keep the same comfort for walking and skinning.

However, the discontinuation of the Alien RS is already causing a debate among its fans as it was in many ways a very innovative ski mountaineering boot.

I had an opportunity to talk to Scarpa’s boot designer about the differences and similarities of the F1 LT and Alien RS at the recent 2020 ISPO gear show in Munich. He also hinted, or I understood it that way, the reason behind their intriguing choice to discontinue the Alien RS was a feeling that the new Alien 1.0 revealed last year was perhaps too similar in terms of a customer type (or intended use), and so orienting the F1 LT even more for technical skiing made sense.

In a press release Scarpa described the F1 LT as:

“Your new friend for ambitious traverses and technical ski mountaineering descents. Combining ultra technical elements with a backcountry-oriented design, the all-new F1 LT is our most versatile and lightweight alpine touring boot.”

Comparing Scarpa F1 LT and Scarpa Alien RS

The new F1 LT will be only a little heavier, at 990g in size 27 versus 920g for the Alien RS, and perhaps targeting a slightly different type of skier, but the

The most obvious change comes with the cuff closing mechanism as Scarpa have decided to drop the cord tightening system that was connected to the back locking lever and allowed for one-motion cuff locking and closing as it’s usual on skimo racing boots. Now, these systems will be independent on the F1 LT.

Also, the new cuff features reinforcements in critical areas where the Alien RS had some weaknesses.

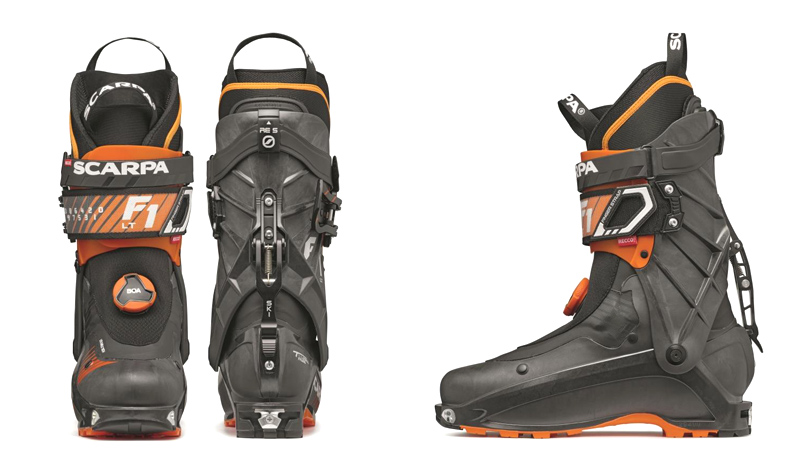
The F1 LT – cuff with reinforcement ribs, 2 power straps, and a new cuff locking lever.

At first glance, the bottom shell and cuff appear the same as the Alien RS but there are some differences. More people should fit into the F1 LT than the Alien RS. The boot will accommodate slightly wider feet as the foot will sit a bit lower in the new shell, offering a 99-100mm last.

The boot sizing will continue as before and so the F1 LT will be available in full sizes only, which might prevent some of us again to enjoy such a fine true ski mountaineering oriented boot. (I couldn’t fit into Aliens RS size 28 and the 29 felt quite big.)

The liner should stay the same, Cross Fit Tour LT made by Intuition and specifically designed for the last and volume of this specialized boot.

Another obvious change comes in the form of two cuff power straps which are staple features on the F1 boots. The top strap is easily removable and I suspect most Alien RS fans will get rid off quickly to safe few grams. The boots overall height, which is quite high for such a light boot, will be the same as on Alien RS and provide plenty of support so that top power strap won’t be needed by many.

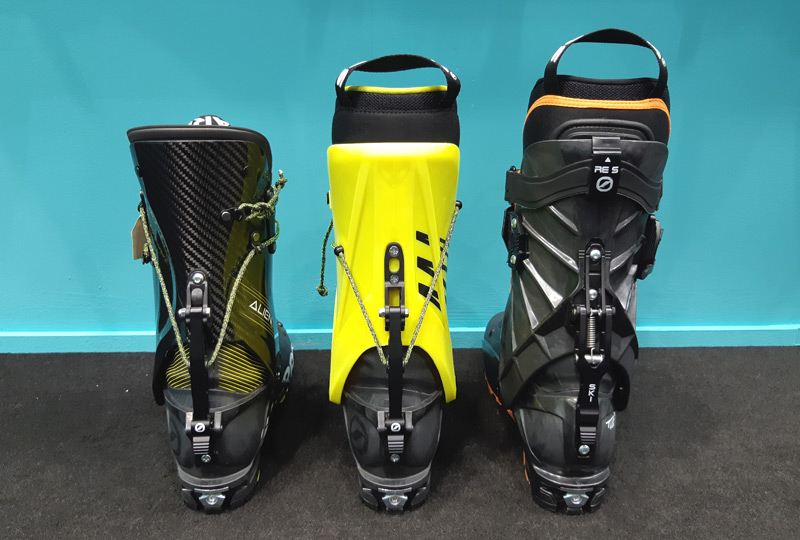
Height comparison of Scarpa’s Alien 3.0, Alien, and the new F1 LT.

Filed Under: Gear, Tech & Food Tagged With: Scarpa, Scarpa Alien RS, Scarpa F1 LT

Review of Julbo Montebianco Sunglasses: Ultimate Eye Protection on Snow

January 2, 2020 By Stano Faban Leave a Comment

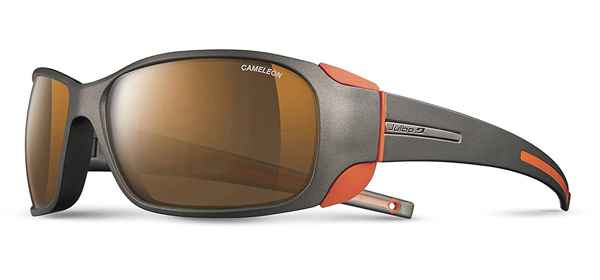
julbo-montebianco-chameleon

Quick Overview:

Usual Retail Price: $100-200 depending on the lens
Weight: 33g
Lens we tested: Cameleon lens – category 2-4 photochromic polarized lens
Pros: the lens versatility, side panels, great contrast, anti-fogging, stylish
Cons: tighter fit for bigger faces

Bottom Line:

Julbo Montbianco sunglasses deliver great eye protection from sun and UV rays on snow and glaciers with the rare category 4 lens. Also, the lens’ ability to transition between category 2 and 4 make them very versatile for various mountain adventures in different weather conditions.

Product Description and How We Tested It:

I have been using the Montebianco sunnies for over a year – about 80 days in total – mainly for skiing, but also for hiking, climbing, mountaineering, and little bit of cycling and running.

Julbo is the “original” mountain sunglasses brand and one of the most recognized names in the outdoor industry. For a couple of decades now, Julbo has been manufacturing eye protection for mountaineering on snow and high altitudes – environments where the sun rays reflection compounds the damaging effects on our eyes.

julbo-montebianco-chameleon-1
Julbo has been specializing in transition lenses for long time and most of their other sunglasses go from category 1 (almost clear) to category 3 (comfortably dark) – these are mostly suitable for off-snow activities such as running, hiking or cycling. In total, there are 5 categories/filters to which sunglasses are categorized into, number five providing the most protection and being very dark.

The Montebianco model has been design for versatility, utility, style and most importantly to protect our eyes. This Julbo model transitions from category 2 (their default state) to category 4 in a matter of seconds when the UV rays are strong enough.

Once the lens is in category 4 mode it is very dark and allows you to comfortably stare into glaring snow whole day. In fact, the lenses has been the darkest I have ever worn.

The lenses also offer a superb contrast vision that is very appreciated during overcast days or in flat light while skiing unknown or through quickly changing terrain.

Some special coating on the insides of my lenses prevents them from fogging up. There were few moments when I needed to remove the glasses and went them out a little, but this happens often with many full-frame sport sunglasses, especially when it’s very hot and humid and you are not moving very fast (breaking trail on skis).

julbo-montebianco-chameleon-2
The “downside” of these category 4 transition lenses is that they don’t clear fast enough when I ski into the forest, or a very shaded area (under a cliff on a north slope for example). On few occasions, I had to remove them for short period, otherwise, everything was too dark.

Another cool feature are the removable side panels that protect eyes from UV rays coming from side angles which happens a lot in the mountains. They are great for winter and spring months. I don’t feel that the panels are needed in the summer unless I spend lots of time on a glacier.

Regarding the fit, like with any sunglasses, this is highly individual. These Montebianco glasses seem to fit well medium male faces. They fit great even when used with a helmet – mountaineering or a climbing one. For me, they feel slightly tight after few hours but I have a larger head.

The Montebianco frames are very durable but you want to be somewhat protective of the lenses to avoid scratches. This is not a sign of “less quality” but a small price to pay if you want to have lenses with so many different coatings that improve and protect your vision.

What We Think Could Be Improved:

There are many features that make the Montebianco model a great choice for your outdoor activities but of course, there are a couple of things that could be improved:

  • Adding some rubberized areas on the legs/stems would help holding the glasses on a ski toque while not in use.
  • It would be great if the transition from category 4 filter back to 3 or 2 if faster, however, I don’t know if this is technologically possible at the moment.

Filed Under: Reviews Tagged With: Julbo, sunglasses

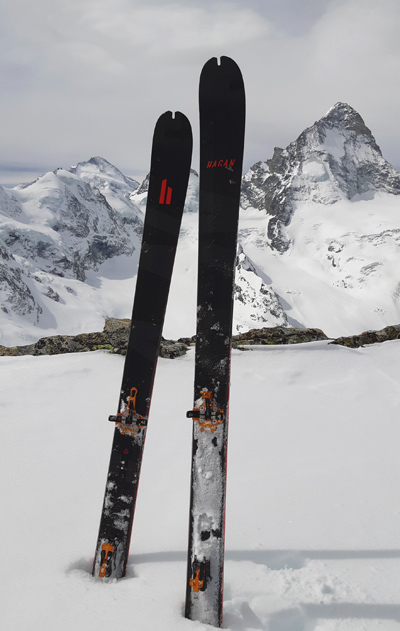
Hagan Ultra 82 Skis Review: For True Ski Mountaineering And Challenging Conditions

December 13, 2019 By Stano Faban Leave a Comment

Overview

Suitability: ski mountaineering, steep skiing, spring ski touring
Usual price: around $750 USD at Hagan US
Weight: 1080g per ski in 164cm (117-82-102)
Tested length: 176cm (19m radius)
Pros: light for its ski performance, stability, edge hold
Cons: too much black colour?

Bottom Line

The Ultra 82 skis are fun to ski and an overall great performer. They are designed for true ski mountaineering with an intermediate to expert skier in mind. While some of its competitors might float better in 30cm+ of dry powder, these skis shine in challenging conditions – on hard packed or wind affected snow, in crust…

Review

We mounted our Hagan Ultra 82 with Plum Oazo bindings.

As the ski season in the Canadian Coast Mountains doesn’t want to take off this winter, I was not able to ski the Hagan Ultras in dry deep snow yet.

On the other hand, I spent enough days on them last spring in a variety of snow conditions. The biggest test was a 4-day Haute Route Imperiale ski traverse in Switzerland with a reasonably heavy pack and travelling through some big terrain.

The Hagan Ultra 82 skis have a 250mm front rocker which definitely helps in deeper snow but that’s not were they excel.

Being fairly stiff torsionally and with a more traditional camber than is perhaps usual for today’s touring skis, the Ultra 82s deliver when conditions are challenging and variable.

They are stable as they absorb most of the vibrations easily. They have a progressive stiff flex and provide really good edge grip. All this makes them nicely predictable.

Because they are on the stiffer side, I think it’s best to pair them with a stronger boot than Dynafit PDG or similar. Of course this also depends on your skill level.

I skied them with Dynafit TLT6 Perfomance boots (with boot tongues in) and it felt just right, but I can imagine skiing these with 3-4 buckle boots to really get the most out of the experience.

They are very responsive and fun to ski if you provide enough power. They handle higher speed, long radius turns very well if you can keep up with them.

The skis also feature a small tail rocker that seems to help with turns on hard packed an spring snow.

The core material is ultra light Paulownia wood with an overall construction consisting of carbon top and bottom layers. Diamond Edge Cap and Micro ABS Sidewalls provide the support for excellent edge hold.

Unless you are always skiing at least boot deep powder then the Ultra 82 skis might be all you need. Also, such width is great for any touring in the early season and spring.

What We Think Could Be Improved

Perhaps keeping the same stiffness but decreasing the camber height could improve the float while not compromising the Ultra 82 skis strengths? It might be a worthwhile experiment.

Filed Under: Reviews Tagged With: Hagan

Best Terrain for Skimo Intensity Interval Training: Groomed Ski Runs or Skin Tracks?

December 11, 2019 By Stano Faban Leave a Comment

Regularly including various technical aspects of skimo racing in your workouts is crucial to your improvement. ISMF photo.

In any competitive sport, once you want to improve your speed beyond a certain plateau, you will have to incorporate regular high intensity sessions into your training (Zone 3 to Zone 5).

Skimo is no different and its various technical aspects introduce even more complexity compared to running or cycling. Skimo race courses travel across a variety of terrain, with most including technical climbing than just going straight up groomed runs.

With that, you might be wondering whether you should do your intensity interval workouts on nicely groomed runs or in a skin track?

Comparing Terrain: Groomed Ski Runs vs Skin Tracks

Comparing the two, by looking only at the terrain, the difference is obvious. Groomed ski runs are easy to climb up even for a skimo novice while skinning in a skin track requires more skill, especially, if your are trying to go fast.

Here are a couple of less obvious points how skinning between these two “terrain types” differs:

  • It’s easy to set into a steady rhythm for long periods of time on a groomed run. Skin tracks with switchbacks break your rhythm often, whether that be your breathing or your stride.
  • Having a consistent skin traction and grip on a groomed run is much easier than in a skin track because keeping good balance is less challenging.
  • Skin tracks usually have switchbacks, thus, your proficiency in kick-turns is crucial to maintaining your speed throughout the climb or high intensity interval.

We can point out more differences but the bottom line is that skin tracks require you to be a much more proficient and technically skilled athlete than groomed ski runs.

Click above to check out our Skimo Manual for proven skimo training tips and advice.

How To Choose The Best Terrain For Your Interval Training?

Now that we are clear on the difference of the terrain types, let’s take a look at how you should decide which workouts to do on groomed ski runs and which ones in skin tracks with kick-turns.

Consider Your Goals and Upcoming Races

The two most important factors when “designing” your intensity workout should be:

  • The goals you have for that workout as part of your overall training goals.
  • What type of terrain you expect in your upcoming important races?

It should be obvious that if you are training for vertical races primarily then performing intervals in skin tracks is not critical to your improvement. In fact, in this case, it might be even be detrimental.

The opposite is true if you are training for technical race or a classic European skimo race like the Pierra Menta. PM’s courses take place almost exclusively in skin tracks and the race includes many technical aspects overall.

Interval Workouts Suitable for Groomed Ski Runs

Early season interval workouts, at least the first few of the season, are best done on less technical terrain, otherwise, you might simply not be able to hold the required intensity for long enough (which is crucial for further progress).

VO2max, or Zone 4 high intensity intervals (5x 5min), are also better performed on ski runs because holding the high intensity for the entire length of the interval is very important in developing your VO2max.

Another example would be maximum speed sprint-style intervals (30x 30sec full-out efforts), it would be counter productive to perform them in a skin track. After all, the goal with these is to generate as much power as possible so it’s best when the snow surface is very supportive and consistent.

Interval Workouts Suitable for Skin Tracks

As already discussed above, depending on your goals and upcoming races, there are times when you can enhance your improvement by performing certain interval intensity sessions inside skin tracks with kick-turns.

If your goal race is a couple of weeks away and you know it will have plenty of skin track skinning, then completing your long intervals (3x 10min of Zone 3) and your high intensity intervals (5x 5min of Zone 4) using the same terrain as the race course, will make you feel strong and confident when the race day comes.

Once you achieve a certain level of technical proficiency, occasionally moving your interval workouts into technical terrain will continue to enhance your skimo progress. As long as you are able to hold the prescribed intensity, in any terrain, you will greatly benefit by matching the race environment as close as possible.

Click above to learn more about our various skimo training resources and training plans. From interval workouts to technique, they provide you with proven tips and advice to help you improve your skimo racing quickly.

Early Season vs Race Season

Early in the season, the priority of your interval workouts should be on building your engine. Work on your technique during the long, easy Zone 1 sessions. Create the best possible conditions (including terrain choice) for a given workout to gain the maximum benefits for the time you spend. Just like you wouldn’t do Zone 4 intervals using your powder ski gear, you don’t want to choose terrain that prevents you from keeping the required intensity or speed.

As your season progresses and your goal races are approaching, design your workouts around the demands of those races. Unless you want to be a pure vertical race specialist, you will need to develop your technical skills while you are breathing heavily and your balance is compromised. Besides, the technical aspects are what makes skimo so appealing and interesting.

Sprint Race Training

Skimo sprints are a special kind of races that require great technique at high speed in quickly changing terrain.

They seem simple at the first glance because they take only 3-5min, however, even without considering the many transitions, a sprint race is arguably the most challenging event to perform successfully on consistent basis.

With that, performing high intensity intervals on sprint-like courses is one of the best ways to improve your skimo skills quickly. Anything done well at high speed will be much easier to repeat when your heart rate is lower. So even if you don’t participate in sprint races, you can greatly benefit by incorporating aspects of sprint races into your training, it is a very efficient use of time.

In few days, we will be releasing a unique sprint and speed development training plan that will give your interval workouts an extra boost and maximize your time. Stay tuned!

Filed Under: Skimo Racing, Training, Tricks & Tips Tagged With: interval training, skimo training

  • « Previous Page
  • Page 1
  • Page 2
  • Page 3
  • Page 4
  • …
  • Page 45
  • Next Page »

Primary Sidebar

  • Facebook
  • Instagram
  • YouTube
Our Facebook Page

skimo-manual-banner-300px
 

Recent Articles

  • Kilian Jornet Interview: About His New Foundation, His Own Environmental Impact, and How He Wants To Help Athletes and The Outdoor Industry To Protect Nature
  • How Fast Are Glaciers Really Melting? How Will This Affect Your Mountain Adventures? Interview with Pascal Egli
  • Book Review – Art of Freedom: The Life and Climbs of Voytek Kurtyka
  • Forest Skis: Innovative, Custom Build, For Backcountry Skiing and Freeride
  • Lighter and Completely Redesigned: New CAMP Ultralight Ski Mountaineering Ice Axes

Categories

  • Contests & Giveaways
  • Crazy Tracks
  • Events & Races
  • Gear, Tech & Food
  • General News & Articles
  • Industry Press Releases
  • Movies & Books
  • News Shorts
  • People (Interviews)
  • Racing 101
  • Reports & Results
  • Reviews
  • Skimo Racing
  • Training, Tricks & Tips
  • Trip Reports & Conditions

Footer

About SkinTrack

Travelling through snowy mountains on skis is like flying… and experiencing life at its core.

Gear reviews, interviews, adventures, contests, skills, skimo training, race reports – we connect you to all things related to self-propelled skiing.

SkinTrack.com, created by Stano Faban, was born out of passion for ski mountaineering and ski touring. Over the years, it has become one of the most popular ski mountaineering blogs in North America.

Recent Articles

  • Kilian Jornet Interview: About His New Foundation, His Own Environmental Impact, and How He Wants To Help Athletes and The Outdoor Industry To Protect Nature
  • How Fast Are Glaciers Really Melting? How Will This Affect Your Mountain Adventures? Interview with Pascal Egli
  • Book Review – Art of Freedom: The Life and Climbs of Voytek Kurtyka
  • Forest Skis: Innovative, Custom Build, For Backcountry Skiing and Freeride
  • Lighter and Completely Redesigned: New CAMP Ultralight Ski Mountaineering Ice Axes

Useful Links

Comparing the lightest: Skis | Boots | Bindings

Skimo Training: Training Plans | Videos

Stay in Touch

  • Facebook
  • Instagram
  • Twitter
  • YouTube

Copyright © 2021 SkinTrack.com. All rights reserved.