• Skip to primary navigation
  • Skip to content
  • Skip to primary sidebar
  • Skip to footer

SkinTrack

  • Lightest Gear
    • Skis
    • Boots
    • Bindings
    • Skins
    • Packs
  • Skimo Training
    • Training Plans + Skimo Manual
    • Transitions Videos
  • Facebook
  • Instagram

Stano Faban

Skin track photo contest: win Ortovox Grizzly snow shovel

December 17, 2009 By Stano Faban Leave a Comment

We all shoot photos while touring but most of the time we just shoot without any real focus, and I don’t mean the focus function on your camera.
To give us all more purpose when snapping pictures here is a little contest that is very fitting for this website:
Submit a photo of a skin track with a little write up and win a brand new Ortovox Grizzly 1 snow shovel from BackcountrySafety.com that is providing the prize.

7 simple contest rules

1. Submit one photo in JPEG (or jpg) format, taken by you, where a skin track plays a major role in the composition of your picture. (Please, submit photos that are at least 600px wide and 400px tall.)
2. Send it to “info(at sign here)skintrack.com” between December 17, 2009 and January 7, 2010 – you have 3 weeks.
3. With the photo, write  (in your email) a short description to answer these:

  • Where and when the photo was taken? (month and a year is sufficient)
  • A short story (2-3 sentences), why did you to take the photo right there and then?

4. The photo can be from within the 3 weeks of the contest or earlier, it is up to you.
5. Please, reveal at least your first name in your email.
6. The winner will win Ortovox Grizzly 1 snow shovel and will be announced on the SkinTrack website as well as contacted via email. Shipping or delivery is free.
7. By submitting your photo you grant me a permission to use your photo in a “skin track contest” gallery that will be published after the contest. That way, we will all see each others photos and can learn from them.

How your photo will be judged and who are the judges?

If you don’t have a professional camera don’t worry. We won’t be judging too much by picture visual quality, however, the photo shouldn’t be blury either. Any point-and-shoot camera with about 4-5 mega pixels can do the trick if you give it a decent try.
And there really is no rule on what the mood of the photo should be. It can be funny or sunset style. Or it can be from the woods or a wind blasted ridge. It can be a fresh skin track or an old one. The mood and feel is up to you and you can be as creative as you want.
There are three judges for this contest:

  • John Baldwin, the legendary mountain explorer on skis and a great photographer himself. You can visit his website – www.johnbaldwin.ca – for some inspiration.
  • James Minifie, a friend and a ski mountaineering, who came up with this contest idea. (I only refined it.) James also shared his story about switching from tele to AT gear for racing purposes here on SkinTrack.com
  • And the last judge is myself. I don’t claim to know much about photography but I find skin tracks quite defining as they can tell a lot about people that set them. Also, to some degree they are a form of art.
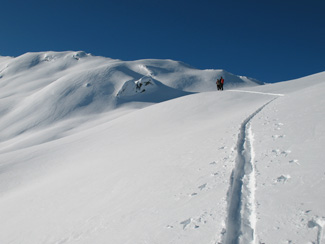
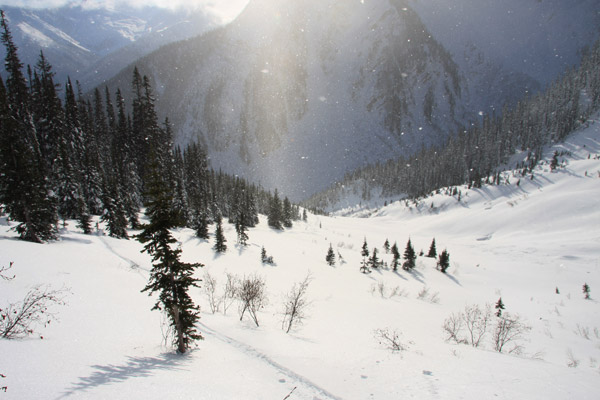
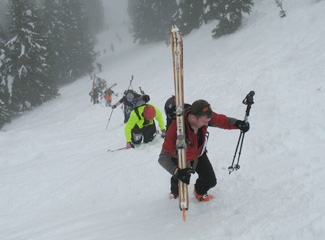
Skinning up inside Cheops restricted area.
Here is an example of what we are looking for (except the size/dimensions of photo):
Author name: Stano
Taken: on Cheops at Rogers Pass on December 2009
Why?: I took the photo because it was most likely the first skin track of the season in that area and because it was my first time there.

Any questions?

If  you have any questions about this contest please ask them via the comments box below as the answers can be useful to others as well.
Thank you for participating and have fun.

Filed Under: Contests & Giveaways

New carbon ski boot: LaSportiva Stratos / Discussion about different carbon boots

December 14, 2009 By Stano Faban 42 Comments

With some plain luck, I found this YouTube video that introduces the new LaSportiva Stratos carbon ski boot.
Before, there were only some images available along with some technical information. Now the picture gets clearer. The ski boot seems quite sophisticated, therefore the expectations will be high.
Take a look at the video and some basic information about the LaSportiva Stratos that were posted on SkinTrack couple of weeks ago.
You are welcome to post your reactions in the comments below. Mine is – WOW.

Filed Under: Gear, Tech & Food

Interestingly strange contest: Win 7-days of heli assisted ski touring with Greg Hill

December 12, 2009 By Stano Faban 17 Comments

Many of you probably know Greg Hill or at least his name. He is often being referred to as “The Million Feet Man” for touring one million feet in one season, all self propelled trips.
And because I have great respect for Greg and for all the projects he has accomplished I can’t help but to find the heli assisted ski touring contest presented by him interestingly strange 🙂

The contest

The contest is offered by Canadian Mountain Holidays, the biggest heli skiing company on the planet, with Arc’Teryx, and Greg, I guess:
“CMH Heli-Skiing & ARC’TERYX want to know What Inspires you to Ski Tour. Make a movie – tell us why you love to Ski Tour. You could win a 7-day Heli-Assisted Ski Touring trip with CMH, ARC’TERYX and Backcountry Legend, Greg Hill. See www.cmhski.com/arcteryx for more details,” according to CMH write up on YouTube. The web page provided doesn’t reveal too much more detail.
You can watch the contest promo video with Greg here:

So what is interestingly strange about it?

To me the contest is interesting because it is strange. There are two things that are quite strange about it:
Firstly, why would you make a movie or write an essay about why you love to ( or what inspires you to) backcountry ski and tour so much, if the prize is something on the opposite end of your spectrum, and maybe values.
GM my as well announce a contest to let them know why you love to drive a Toyota Prius and the top prize will be Cadillac Escalade.
And secondly, strangely enough the contest is presented by Greg Hill, the man that built his name and reputation on hard work in the mountains – by touring NOT flying, way more than almost anyone else.
It is true that I don’t know the 7-day trip’s itinerary, therefore I am not going to make any assumptions, however, I still find the contest interestingly strange 😉
Also, I don’t know whether the contest is presented by Greg Hill the ski guide, or Greg Hill himself, the ski mountaineer. Not sure whether that makes a difference or not but it is a curiosity.
And this may be the idea behind the contest, to make a little controversy. It certainly caught my attention.
I wish luck to anyone that enters the contest and would love to hear how the trip went down. With Greg, it is going to be fun for sure, but I would like to hear how much the helicopter was used.

Filed Under: General News & Articles

Rogers Pass: Significant changes to Winter Permit System

December 11, 2009 By Stano Faban Leave a Comment

Since the end of the last season the System underwent significant changes that were introduced to public at the beginning of this one.
Anyone that skies or skied at Rogers Pass most likely knows about the Winter Permit System that is in place to keep the winter recreating public safe, however, now the rules got a bit more strict and some new restricted areas were created.

What is the Winter Permit System in short?

Skinning up inside Cheops restricted area.
“The Winter Permit System allows backcountry users to enter Winter Restricted Areas that are affected by the highway avalanche program when artillery gunfire is not anticipated,” explains Parks Canada website.
In other words, it is in place to make sure no one will enter areas when they are under gunfire via avalanche control work that is conducted to keep the transportation corridor open.
The Winter Permit System divides the park into three types of areas:

  • Winter Prohibited Areas are closed to visitors all winter.
  • Winter Restricted Areas are where permit holders can only ski here on days when the area is posted as open.
  • Winter Unrestricted Areas of the park are open to visitors all winter. No permit is required.

How does it work and what is new?

From a skier point of view the permit system used to work this way:
Any time you or your group intended to ski in a winter restricted area you had to drive up to Rogers Pass Center, find out what’s open and what is not, and apply for a permit.
Then one of you filled out the permit and off you went to where it was open – meaning the area was not controlled by avalanche professionals for that day.
Since the changes were introduced this process changed a bit. In some ways it means more hassle, more restrictions but in some ways it makes things easier and makes rules more clear.
Now there are two ways how to apply for a permit to a winter restricted areas:
1. The old way with a change:
As before, you drive up to Rogers Pass Center and fill out the permit there. But as of now, everyone in the group needs to fill out a permit and sign a waiver. A bottom portion (stub) of the permit of each one’s permit needs to be placed on the dash of your car. The bigger slip goes with you on the trip.
2. The new way:
You apply for an Annual Winter Permit – for free – at the Rogers Pass Center (RPC) and you will be set for the rest of the winter without needing to drive up to RPC each time you want to ski in a restricted area. To get your Annual Winter Permit you need to sign couple of waivers and sit through one of the orientation sessions that are being held twice a week at RPC.
The Annual Winter Permit consists of two “credit card like” looking cards. One has a photo of you on it and you carry it with you on your trips. The other one needs to be placed on the dash of a car that is used to access the area.
Of course, you can access a restricted area only when it’s open. To find out what is open you can either visit Parks Canada website or call this number: 1-250-837-SKIS (7547).
Benefits
An obvious benefit for those that ski the Pass regularly or couple of times a season is that they don’t have to drive up to the Pass every time they want to ski in a restricted area.
Hassles
For those that ski the Rogers Pass only a few days per season it means driving up to RPC to get a permit any time they want to ski in a restricted area. And each member of the group has to fill out the permit and sign a waiver, each and every time.
New restricted areas
There are three new restricted areas that are very popular locations – McGill, Cheops North, and Grizzly Shoulder. That means that you will have to apply for a permit any time you intended to ski here, unless of course you have the annual permit.

Skiing bottom parts of Grizzly Shoulder and looking towards Cheops North (with Hourglass), both are new restricted areas. Photo by Reiner Thoni.

Why all these changes?

Based on Parks Canada website: “Changes to the Winter Permit System are based on concern for public safety – due to expanding terrain use by backcountry recreationists and the operational need to separate recreation activities from avalanche control actions. Boundaries to Winter Restricted and Prohibited areas have been adjusted in order to firmly apply accepted standards of 1000 metre standoff from artillery targets.”
In other words, until now skiers were exposed to the same danger but now that is no longer acceptable 🙂
Now more seriously – it is a concern now because people are skiing at places they never skied before and the highway avalanche program professionals feel that there would be potential accidents if these changes weren’t made.
Also, a part for initiating these changes was how backcountry users were dealing with railway tracks – crossing them or just walking on them.
By law, crossing Canadian Pacific Railways tracks is trespassing on CP property. Therefore, some crossings and access points have been evaluated and re-established. And make sure to not walk on tracks at all. You can walk parallel to them but at least 16m away from them.

What you should do? What others think?

Parks Canada is making a great effort to make sure that the public has access to as much terrain in Glacier National Park as possible. Therefore, we should all behave in such ways that won’t compromise future use of this great terrain by getting us shut out via some highway corridor safety or CP property issues. The priority is on safe public travel and transportation, so be good guests for the sake of all of us.
Understandably, some local or frequent skiers to Rogers Pass feel that something is being imposed on them that restricts them in a big way. I might agree in some ways, however, I think we should give the new changes a chance and re-evaluate them at the end of this season.

What do you think? Want to learn more?

Changes to the System is a bit of a hot topic among the Rogers Pass winter users these days. Therefore, you are welcome to express your opinion about this topic and discuss it in the comments below. It would be interesting to see what people thing.
To learn more details about the changes in Winter Permit System you can visit Parks Canada website – Winter Permit System.

Filed Under: General News & Articles Tagged With: Rogers Pass

Tiki Torch Dash 2009: fun and chill under the stars

December 8, 2009 By Stano Faban 11 Comments

Melanie Bernier delivered a performance of the night while Montana boys won a relay as the North American skimo racing season went under way.
On Saturday night, Dec 5th, thanks to a determined crew of organizers and volunteers Kicking Horse Mountain Resort near Golden, BC hosted the first race of the season in North America – the Tiki Torch Dash.
Update: This article has been updated with words from Ian Gale – one of Tiki Torch organizers and competitors. See the section “Words from Ian Gale – an organizer and a competitor” 3/4 down this article.
The event consisted of two races and was attended by about 40 competitors:

  • 4-laps teams relay (or solo)
  • hill climb vertical race (only as solo)
  • original facts are here – Tiki Torch Dash 2009
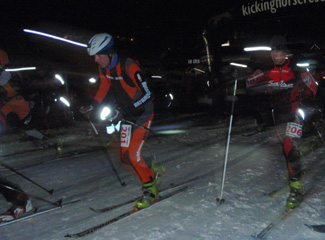
Furious start of the hill climb vertical race.
Furious start of the hill climb vertical race. Photo from Mel Bernier collection.
Special atmosphere, new to Canadian skimo racing, was created by running the race in the night.
The relay race started at 7pm and the hill climb at 9.15pm. Headlamps were mandatory for both races.
The temperature must have been hovering around -15 to -20 C as every deep breath felt very painful.
The main start/finish area was located at the very base of the resort and was fancied up by lit torches, good music and screaming supporters. The race course was marked by small tiki torches, almost a full moon, and hundreds of stars.
» Official results can be found here (PDF format).

Relay race – interesting new format

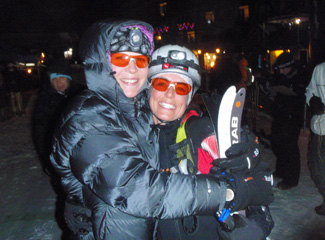
Two fastest girls of Canadian skimo racing: Melanie Bernier and Julie Matteau.
Two fastest girls of Canadian skimo racing: Melanie Bernier and Julie Matteau. Photo from Mel Bernier collection.
The 4-lap relay race was raced by a team of two or solo. The field was strong as almost a complete Canadian National Skimo Team attended and faced a challenge from two very fast Americans.
Each team member completed two laps and they exchanged the relay after each lap (one lap took about 14-20 minutes to complete).
In men’s category, US team “Stars and Stripes” consisting of Brandon French and Ben Parsons took the top prize with a time of 56min 59sec. (Their original time was even faster but they received a 30sec penalty for some rule infractions.)
Second came in the home boys named “Golden Skimo” with Ian Gale and current Canadian skimo champ Reiner Thoni with a time of 57min 6sec.
Third place went to “Andorra Express” team consisting of James Minifie and Stano Faban with a time of 58min 16sec.
Women’s category was won by Revelstoke’s “Les Pitounes” – Julie Matteau and Melanie Bernier – in a time of 1h 12min 56sec.
An award for best costumes was handed to “Shreds from space” team from Golden. The martians were Aaron Enns and Ken McDermic.

Hill climb race – performance of the night

While the first race was taken in a more relaxed manner by all the hill climb was pure business for most. The money of all Canadians was bet on Reiner Thoni and he did deliver.
However, Reiner’s effort wasn’t The Performance of the night. That came from Melanie Bernier in the women’s category. Melanie turned inside out and gave a serious run for money to all the male competitors. She comfortably won her category with a time of 18min 13sec and finished 8th overall.
Q: Melanie, your hill climb effort was amazing. What are your goals for this racing season?
Melanie: “Thank you, I was feeling good that night! My goals for the season are oriented mainly toward the World Championships…With a 30th position at Porte Du Soleil in 2008, I am aiming for a top 20 this year, and if it happens I’ll know that I’ve accomplished a lot. One of my other goals is to keep on developing endurance and fast recovery for multi-day/stage races to make the most of the Pierra Menta without suffering too much along the way! And most importantly, still have fun and enjoy every moment when I’m on my skis,” said Melanie.
Reiner, as our current national champ, took the lead right from the gun and never looked back. Brandon French tried to real him in near the finish but Reiner had one more kick and jumped away. Reiner’s time was 17min 7sec while Brandon’s 17min 14sec. Third place belonged to James Minifie with a time of 17min 56sec.
The rest of the field was coming in as small groups fighting it all the way to the finish while pushing their limits. Whether first or last, all of us suffered with loud coughs picking ourselves from the ground.

Words from Ian Gale – an organizer and a competitor

Q: On behalf of the organizing team, what do you like about hosting skimo events in your resort?
Ian: “What I like most about hosting skimo events at KHMR, is they ‘buy in’ to it 100%. On race day for the Dogtooth Dash, everyone who steps off the gondola is gobsmacked with a Huge Start/Finish area, cowbell galore, screaming spectators, a DJ spinning tunes, Jordon announcing the race and slobbering rando racers running all over the place.  The racers feel welcome and the spectators get a great show.
I also really like showing people a challenging, fun course, where we can try to highlight some of our burlier, rugged terrain and make them feel like they’re actually racing through the mountains.”
Q: You finished 2nd in the relay race and 4th in the hill climb, great performances. Which one was harder and which one did you like more?
Ian: “I really enjoyed both races! The highlight for me was the relay race, it’s fun to work with a partner (especially when he’s super speedy!) and to have more ski mountaineering elements involved ie.: transitions, downhill skiing, strategy etc.
The hill climb was definitely the harder race of the two for me. Lining up for a second race at 9 pm after the relay was tough, especially with the cold temps. A great test though, I do really appreciate the simplicity and honesty of the vertical race.”

How did your race go? Anyone any questions?

You are welcomed to share your Tiki Torch stories here in the comments section, I am sure everyone has something “spicy” to reveal.
Also, anyone that didn’t participate but has questions regarding the event is welcomed to ask.

Filed Under: Reports & Results

Rogers Pass: Canada Skimo Team's second training camp ever

November 30, 2009 By Stano Faban 1 Comment

There is a very committed group of great people that are going to represent Canada at the World Ski Mountaineering Championships in Andorra this winter. And since every team needs a little bonding experience we managed to pull off two training camps in the past two months.
treesThe first official training camp for Team Canada was in Canmore in mid-September, 2009. It was hosted by one of our Canadian skimo speedsters Steve Sellers. The aim was at getting to know each more and spending time training the engines.
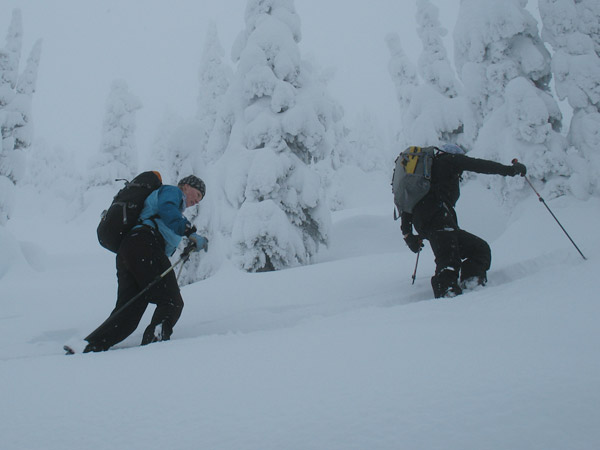
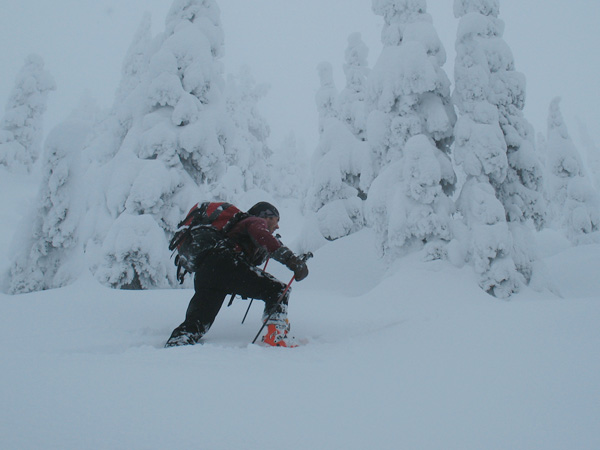
The second camp (and the first official on the snow) was hosted this past weekend (November 27-29, 2009) at the famed Rogers Pass. The emphasis was on long days with face shots. Both worked out perfectly.
Our base was Revelstoke and Golden, and the camp was initiated by Jeff Colvin and Ian Gale, two of the team members.
I didn’t take part in the first two days which are documented on Skitheory and Golden Skimo blogs but I took part in the third day and had lots of fun.
Everyone looks in good shape for the beginning of the season and most importantly everyone is very enthusiastic to represent the best place for backcountry skiing on the planet – Canada.
Here are couple of photos from the final day of the second official Canadian Ski Mountaineering Team training/fun camp. No ski photos though as there was no time to pull out the camera as everyone was charging for their line.

There is never shortage of snow at the Pass.
Our current Canadian Champ, Reiner Thoni, breaks the trail for us.
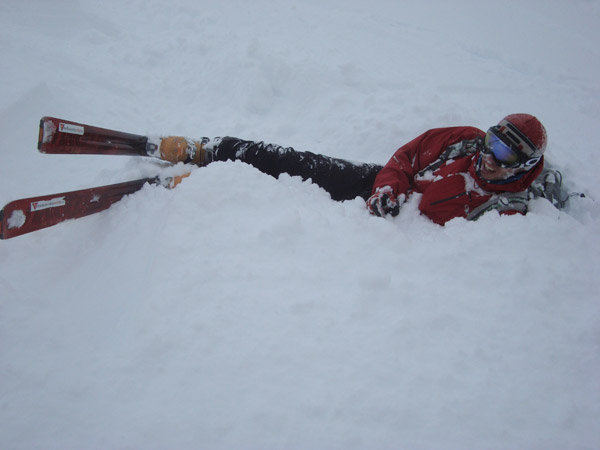
"Digging a snow pit Slovak style." Digger Stano Faban, photo Jeff Colvin.
Trans Canada Highway 1 makes Rogers Pass the best accessible place for backcoountry skiing in Canada.
The snow conditions for this time of the year are very good as the photos suggest. However, lower elevations (below 1500m) still need a bit more to be safe from alder and unexpected “under surface” obstacles.

Filed Under: Skimo Racing, Trip Reports & Conditions

6 tips to get you ready for your first ski mountaineering race

November 23, 2009 By Stano Faban 12 Comments

Backcountry skiing is great fun. It is one of the best ways to spend time with your friends, to relax and to do what makes you happy. But from time to time we all like to try something different, to have a new challenge.
crystal-race-bootpack-2007You can challenge yourself many ways. For me, ski mountaineering racing is one of the ways I like to challenge myself during winter months.
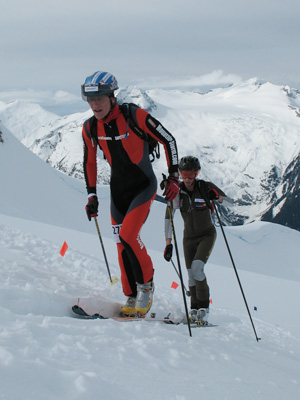
Skimo racing makes my life more interesting in couple of ways:

  • Gives me an athletic goal, which I always like to have.
  • Teaches me efficiency, which helps with equipment skills.
  • Forces me to reach for my limits, which helps in moving them.
  • Makes me participate in a community that by definition is very friendly.
  • Introduces me to one of the nicest people I have ever known.

Whether you feel like trying something new or just wanting to improve in your next race here is a list of tips I consider essential (and in that order) to get the best out of your experience:

  1. Gear – check what you have and act accordingly
  2. Conditioning – your overall fitness
  3. Technique – practice the right moves
  4. Fuel and rest – quality makes or breaks your days
  5. Transitions – gaini time for free
  6. Speed – the icing on the cake

Gear – check what you have and act accordingly

I am starting with gear because without it we cannot backcountry ski. But since it is a whole another topic I am not going into much detail here.
I assume that you have either AT gear, telemark ski gear or a split-board for touring. The level of the gear (high-end, cheap, light, heavy…) doesn’t really matter if there is a will to try new things.
You don’t have to run into the store right away but a fact is that AT gear is the most efficient for skimo racing. You can learn about this from a personal experience of a current Canada Skimo Team member here – From tele to Team Canada: A telemark skier’s switch to AT race gear.
As with anything that involves going uphill lighter is better because it means faster climbing. And skinning up is the majority of the time spent when skimo racing (just like touring).
Besides that you should make sure your skis are in good condition, that your bindings work as they should, or that your ski poles ain’t going to collapse on you.
Simply check all your gear at least couple of days before a race and make necessary repairs or replacements.

Conditioning – your overall fitness

For skimo racing you don’t have to be super fit. Of course, the fitter you are the easier it feels but you don’t have to be able tour 5000 feet days in order to race. There are usually two categories at any event and you can sign up for the one you feel like doing.
The key with conditioning for ski mountaineering racing is to be active. You don’t have to be active racing or speed wise, just be used to spending time outdoors doing things you like – climbing, biking, hiking…
And just because you are getting ready for a race don’t panic about speed or interval training. Speed is only the icing on the cake. To get to a point where you should worry about speed training you need good overall conditioning.
So be consistent with your sport activities for at least couple of weeks before you even think about pushing the pace.
As strange as it sounds, you need to go slow in order to go fast. Everything that is very beneficial for health or racing purposes that happens in your body is a product of low paced activities (or workouts). The amounts of slow paced activities will determine your progress from year to year way more that any interval workouts.

Technique – practice the right moves

Even though good technique is very important for skimo racing, it will not save you if your basic conditioning is poor. Also, your gear will determine your technique efficiency as well.
Climbing
Since the most time during ski mountaineering races is spent skinning up you should focus on developing an efficient stride. Don’t force yourself for the longest stride. Rather try to pick your frequency which some times means shortening your stride if your original one is too long.
Make sure to practice skinning on hard snow, up steep uphills and traversing.
One of the most important climbing skills for skimo racing are making efficient switch backs. There are switch backs sections on many race courses. On those you can loose minutes and lots of energy if you are struggling due to your technique. On the other hand you can effortlessly drop less skilled racers even if you are not as fit as they are.
Downhill
Skiing with seized up legs and burning lungs is hard and some times dangerous but fun. The key for solid downhills is to practice skiing right after you climb a hill and rip your skins off. You need to get used to wobbly legs if you want to ski without stopping in races.
To make the skiing less taxing on your legs practice doing turns with big radius (20+ meters) rather than short and aggressive. Use “traversing sections” between turns to control your speed as oppose to pushing on your edges with your quads. On a 2-3min downhill the difference is only about 10sec but the energy spending is over the roof compared to a more mellow style.

Fuel and rest – quality makes or breaks your days

We all read many times one of these: “you are what you eat” or “your body works only as good as the fuel you put in it”. Of course, there are individuals that defy this. Heck, even I had some great races after downing few beers and eating a big sausage a day before an event 😉
The point is that your eating habits and the quality of food you consume greatly determines your short term as well as your long term body functioning. The same goes for rest. You can find plenty of advice in sport and health nutrition books.
No meat
Based on my experience, for skimo racing, I will recommend not to eat meat starting the day before the race. Few slices of ham on a sandwich are OK but a steak is not very useful.
Dinner
The night before the race have simple dinner – some veggies and lots of pasta or rice. Veggies will give you some variety in taste and pasta or rice will load your body with the desirable carbohydrates.
Race fuel
During the race drink a sports drink rather than just plain water, and you can consume an energy bar or a gel if you feel you are running low on your reserves.
Sleep
If you are not getting enough sleep on regular basis, try to get in at least three 8h nights before your race. No engine is good if your brain is tired.

Transitions – gain time for free

Transitions between uphill and downhill modes (and vice versa) are parts of skimo races where you can gain lots of free time. If you are more efficient with your gear than a guy next to you, you will consistently drop him at every transition and he will be expanding lots of energy trying to catch up to you.
If not sure about your technique ask more experienced/skilled skimo skiers what works for them. Try it out and if it seems alright practice the moves. Once at the race you can observe the fastest racers how they transition in few seconds.
To give you something to shoot for I am going to give you some average times for transitions:

  • Fairly efficient racer with no special AT racing gear needs about 1.5-2 min to go from uphill mode to be skiing ready. And it takes him about 2-3 min to put his skins on, and adjust his boots and bindings before he can march uphill.
  • The fastest racers transition from climbing to skiing in about 20-30 sec, and are ready to hammer up after skiing in about 40-50 sec.

Technique, practice and gear makes the difference in transition areas.

Speed – the icing on the cake

Speed factor is last on this list because I don’t feel it is a necessary element to have a blast at your first race but we can discuss it a bit.

peter-kilian
World class ski mountaineering athletes train smart and a lot, yet even they spend majority of their training at low paced intensities.
Your downhill times are mostly determined by your technique but climbing speed is mostly determined by your conditioning.
Climbing like a mountain goat is desired but not the most important thing at this stage.
However, if you really want to challenge for skimo podiums then you will need to put in some real hurting miles.
You need to teach your brain and body to push more for longer. This is achieved either by simply hammering every hill in your way or by very specific workouts.
Hammering based only on your gut feelings can take you only part of the way. Usually, it has a faster effect than the more “scientific” approach but is short-term lived as it is a very inefficient training method. And if practiced over long time with high frequency you are headed for injuries and illnesses.
For serious speed (fast) training talk to an experienced athlete or a coach and read some books from reputable people. Also, you need to understand that speed training without great overall fitness has very low success rate as you will never reach your full potential.

How are you going to challenge yourself this winter?

So are you going to challenge yourself differently this winter than your usual weekend powder hunting?
I challenge you to make your first race the Tiki Torch Dash in Golden on Dec 6. It is specifically made for those that just want a little taste of skimo racing. Nothing too hard, mostly a fun event where you can learn some tricks and meet new friends.
Ask, share and discuss in the comments below.

Filed Under: Racing 101, Training, Tricks & Tips

West Coast snow report: 2,5m deeeep

November 20, 2009 By Stano Faban 2 Comments

Early season conditions are long time gone.
No one remembers them anymore.
White fluffy stuff keeps fallin’,
So the brave can be rollin’.
This little poem created in less than 60 seconds says it all. Simply, the current West Coast snow conditions are out of this world.

breaking-trail
Yes, there were some poor equipment choices made. But who knew Nov 14th is a mid-winter date. Thin rock skis ain't good for deep and fluffy.
Two weeks ago there was about 20cm of snow on the ground at 1600m up Whistler Mountain or at Mount Baker ski area in US. During the next 3 days over 100cm came from the sky. Since then it didn’t stop.
And it is one thing that an astounding amounts of snow fell in the south-western BC over the past two weeks, but another thing is the quality.
Even though, not as consistent in fluffiness as the slopes of Columbia or Monashee Mountains, there is real Champagne powder to be had on the Coast these days.
Over the past 12 days I toured at 3 different resorts as it is simply too dangerous to go anywhere else: Mt Baker ski area, local resort above Vancouver and on a mountain that will hopefully stay closed for couple of more days.
I haven’t heard any ski reports from other places on the Coast but based on some highway cams it looks pretty damn good for this time of the year. Here’s some more proof.
Except the “Sleeping lifts” photo other pics were taken by some of my touring partners Dusan and Tomas. Thanks a lot.
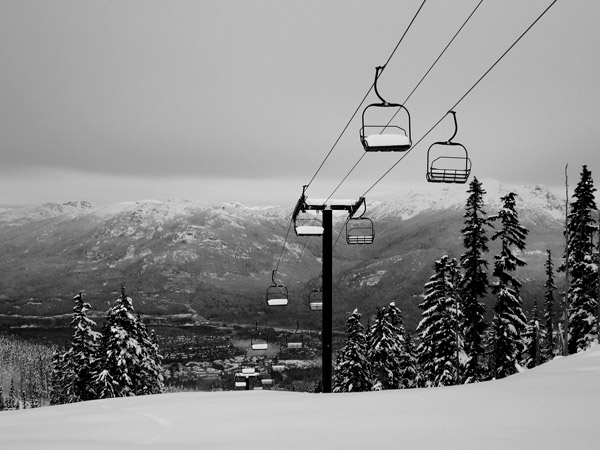
Sleeping lifts on Nov 14th.
Nov 14th.
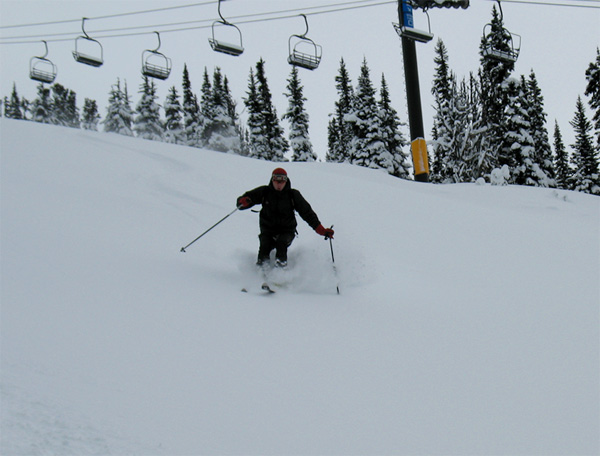
Working slim skis felt like seventies. Nov 14th.
Back for more with fatter sticks. Nov 19th pics from here on.
2
Going down less than 30 degree slope was just...going down.
Going down less than 30 degree slopes was just...going down.
4
No lift, no problem. Just the way it suppose to be.

Filed Under: Trip Reports & Conditions

From tele to Team Canada: A telemark skier's switch to AT race gear

November 17, 2009 By Stano Faban 7 Comments

My first ski mountaineering race was completed on 184cm K2 telemark boards with non-free pivot bindings and Garmont Excursion boots. My skins were G3 Ascensions that required the removal of the ski from my foot in order to get each skin off.
This is a guest post from my friend and fellow skimo racer, James Minifie. James is sharing a great personal experience that is interesting as much for telemark skiers as for alpine gear users.

james-race-gear
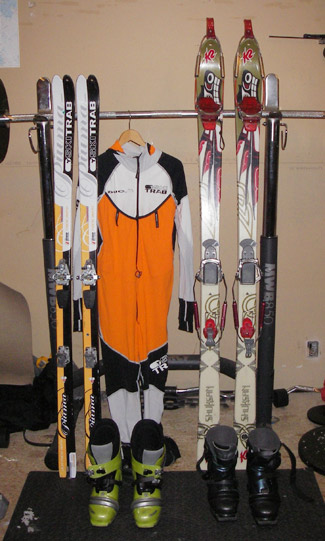
James' gear before (right) and after "The Switch". Now he is on Ski Trab Duo Race Aero World Cup skis, Dynafit bindings and Scarpa F1 boots.
I had never seen light randonnee race gear up until then and looking down at the competitors to my right and left and seeing 160cm skis 60mm at the waist mounted with impossibly small low-tech bindings and skins that could be ripped off in seconds left me awe-struck.
These guys were clad in Lycra suits with special skin pockets. They wore ultra light AT boots that converted from ski mode to tour at the flick of a lever. Their poles were composite Nordic jobs extra long and stiff for ultra efficient climbing.
These guys were F1 racers and I felt like a monster truck ready to lurch my way up a mountain. The good thing was, there were a lot more monster trucks in the field that day 🙂
I was lucky that day. Most of the really fast guys were in Europe competing in World Championships so I was able to Clydesdale my way to a 4th place finish on the tele boards. The other thing that happened that day was a beginning of my obsession with ski mountaineering racing.

The Switch

The winter of 2009 saw my return to skimo racing and this time I came armed with lighter skis and free pivot telemark bindings. I still used the Excursions (little more than a glorified cross-country ski boot) because they were light and nimble.
To paint a better picture, here are my 2009 before “The Switch” results. I always finished as the best telemark skier, yet I wasn’t reaching the top spots in the overall standings:

  • Whitefish Whiteout, MT – came 5th behind 4 AT speedsters
  • Sunshine 5000, AB – finished 9th
  • Nelson ROAM Randonnee rally, BC – finished 8th
  • Mountain Storm in Fernie, BC – finished 9th

See the pattern? It was then that I made my silent apology to the spirits of my telemark brethren and purchased all out AT race gear complete with carbon poles and a tight Spandex race suit.
The transition was surprisingly easy actually. The hardest part was learning to ski in alpine style again. Something I hadn’t done in almost a decade.
The difference in my results was profound. I raced in two final races in 2009 with my new AT set-up and took third in both. The biggest result “The Switch” brought was my second place from Canadian Ski Mountaineering Championships which secured me a spot on a National Team for this season.

Lessons learnt and shared

For those telemark die-hards pondering “The Switch” here is my humble advice:

  1. Just go to AT straight up! I transitioned through lighter telemark gear before I went AT Race. All this did was cost more money and delay the inevitable.
  2. Just give in and get a race suit. Not only does it allow you to show off your um…pecs, it’s an invaluable piece of race gear for comfort and skin storage.
  3. Plan the transition with plenty of time to practice the Alpine turn and get used to having your heel locked down. If you can, take a couple of lessons at a local resort it’ll fast-forward the “re-learning” process.
  4. Keep in mind that you don’t have to transform into Hermann Maier to race on this stuff. Look at the skiers in any rando race. We’re so tired and on such unsupportive gear that we all look like we’re just surviving on the descents anyway.
  5. And finally, if you’re already fast on your telemark rig, get ready for the podium because having AT race gear and learning to use it will put you in that lead pack before you can say “Spandex”!

Have fun shopping for that new gear. It won’t be cheap but neither are cigarettes, junk food, and cable TV!

Want to share or know more?

You are welcome to share your experience in the comments below as well as feel free to ask about any details of this article’s topic. James, I and other fellow readers will answer.

Filed Under: Gear, Tech & Food, Skimo Racing Tagged With: Mountain Storm, Scarpa F1, Ski Trab, Sunshine 5000

Buying altimeter watch that fits your needs and budget

November 13, 2009 By Stano Faban 9 Comments

Choosing which altimeter watch to buy is tough with the variety we are presented today, so let’s make it simpler with some basic advice that will help you decide.
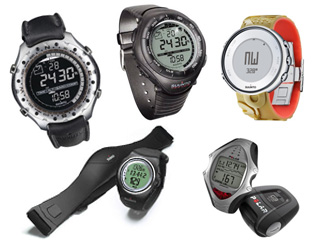
altimeter-watches-mainThis article is an extension of “Altimeter watch: Why it is important and beneficial to know your altitude?“. It is a recommended read for those that are unsure whether they need an altimeter watch or not.
Altimeter watches come in all shapes and sizes, and their features can vary greatly. Some don’t let you record your trips while others combine altimeter functionality with a heart rate monitor.

Making decisions – factors to consider

Two factors you need to really consider are your needs and your budget. The lower your needs and preferences are the less money you will need to spend and vice versa.
To beging the process make a list of your “watch needs”. What you want the watch to use for? What features should it have?
Here are some hints to get your needs list started:

  • need to know only my immediate altitude
  • want to record my trip/hike vertical profiles (logbook)
  • want to know how many laps I skied today
  • need to download data from the watch to computer
  • and so on…

I use and suggest these functions with an altimeter watch:

  • obvious – time, stopwatch, thermometer, alarm, immediate altitude
  • vertical speed – shows your actual vertical speed you are traveling at; once you start following it you will find many uses for it – here is more on vertical climbing speed topic
  • logbook – lets you record your trip/hike/workout including couple of parameters, mainly total vertical meters gained/lost
  • chronograph – almost the same as logbook but more useful for workouts with heart rate monitor

Once you know your needs you can start looking for the solutions – different altimeter watches.
Note: One thing here though is that you may not come up with a certain need in your list because you simply don’t even know a watch can have such features. Therefore, you might adjust (expand on) your needs as you are already browsing different models.

Define your budget – will save you time

Even though it is obvious you know your financial status it is good to predetermine your budget. Come up with a price range, it will help you narrow down your choices and save time comparing different models.
Again like with the needs list, this can be a little tricky if you are new to buying altimeter watch. You may simply not know what altimeter watches are going for.
Altimeter watch prices vary greatly due to different features, their brand name (recognition, prestige) and materials they are made of.
To get an idea, here two examples:

  1. Altimeter watch with titanium housing and leather straps are expensively priced mostly because they are very stylish for everyday wear and they are also very durable.
  2. Watch that has a heart rate monitor and shows only the immediate altitude but has no further altimeter functionality (i.e.: recording accumulated vertical gains) is going to be more affordable than its titanium brother.

Altimeter watches – various brands

As far as your brand preferences go you will have many options these days. But here we will take a look only at those brands that have proven over long time they are worth their price, whether low or high.
Suunto
Based on personal experience, Suunto is my favorite brand if the watch is primarily used as altimeter. Besides me, there are thousands of mountaineers swearing by Suunto.
Polar
Again based on personal experience, Polar is my favorite if heart rate monitor functionality is the most important. And again, millions of athletes swear by this brand too.
Timex
Everyone had a Timex watch at some point in their life. How was it? Mine was great. Unfortunately, I don’t know anyone who has a Timex watch with an altimeter but the brand is definitely strong.
Other popular and casual brands
Then there are other brands that offer altimeter functionality in their watches as well but don’t have as much history with it: Casio, Highgear, Nixon, Freestyle USA and more…

Altimeter watches – introducing 6 models

Now that you have considered your needs and defined your budget let’s look at some actual altimeter watch models:

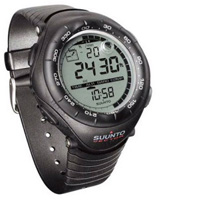
suunto-vector
Suunto Vector
» Essentials
Price: about $200
Various styles: yes
Available at: Backcountry.com, Altrec.com

The name “Suunto Vector” is a legend among altimeters and it was the first altimeter watch I ever saw. I believe, Suunto improved it since then yet they are still keeping it at a very affordable price. This watch has scored many awards and has been used by millions of people that go further than a stroll around a lake. Most recently, Suunto added a new model to the Vector family – Suunto Vector HR – that includes a heart rate monitor.

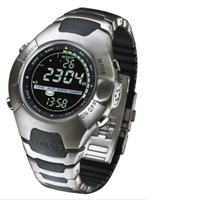
suunto-observer
Suunto Observer
» Skier specific
Price: $300-500
Various styles: yes
Available at: Backcountry.com, Altrec.com

I believe this was one of the first watches that was rated “for skiers” because the logbook was recording your day/trip and at the end you could see how many laps you skied. There are about four different styling options for it, however, not many stores carry more than two. Backcountry.com does.

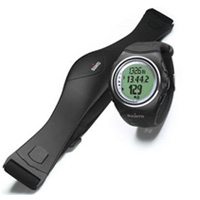
suunto-x6-hr
Suunto X6HR
» With heart rate
Price: about $450
Various styles: yes
Available at: Backcountry.com, Altrec.com

I am using this is a watch past two years. (Before it was Polar.) I like everything about it except that heart rate monitoring is not as flawless as with Polar. Vertical speed, logbook functions and stopwatch recording are great. It connects to PC but the software is not as user friendly as Polar’s.

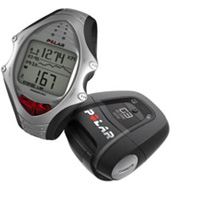
polar-RS800G3
Polar RS800G3
» Heart rate & GPS enabled
Price: about $470
Various styles: no
Available at: Backcountry.com

Polar is mostly know for their high quality heart rate monitors. My personal experiences support that 100%. This watch has basic altimeter functionality but great heart rate monitor features. It also shows your speed and tracks your distance via GPS. Polar comes from Finland, same as Suunto. And it connects to your computer.

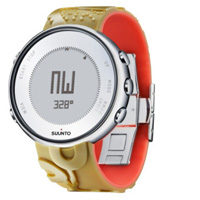
suunto-lumi
Suunto Lumi
» Women’s casual
Price: $300-350
Various styles: yes
Available at: Backcountry.com, REI.com

This is as interesting watch because the styling doesn’t say anything about what’s inside. The Lumi looks to look cool at any situation and it must be. It has an altimeter, barometer and compass. Also, it speaks four languages: English, Spanish, German and French.

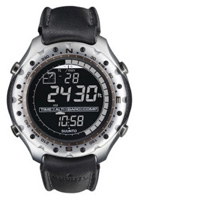
suunto-x-lander
Suunto X-Lander
» Casual & stylish
Price: $300-350
Various styles: yes
Available at: Backcountry.com

Suunto X-Lander is a great watch for anyone who is active outdoors but some times needs to head to a meeting right from the mountains. It has all essential altimeter functionality but with leather straps and aluminum body styling looks very “official”.

At different stores you will find different types/options/colors for different models, therefore you should check out more than one store:

  • At Backcountry.com you have the biggest selection of altimeter watches online (brand, models and options) and you can easily compare 2, 3, even 4 watches side by side.
  • At Altrec.com you will find less selection and different pricing than Backcountry.com.
  • REI.com doesn’t offer too many choices for altimeter watches, but does for other multi-functional watches.
  • MEC.ca offers about 10 different models.

Any questions re: altimeter watches?

If you have any questions or just want to leave a comment about this article or altimeter watches you can do so in the comments below.

Filed Under: Gear, Tech & Food, Training, Tricks & Tips Tagged With: altimeter watch, Polar, Suunto, vertical speed

  • « Previous Page
  • Page 1
  • …
  • Page 40
  • Page 41
  • Page 42
  • Page 43
  • Page 44
  • Page 45
  • Next Page »

Primary Sidebar

  • Facebook
  • Instagram
  • YouTube
Our Facebook Page

skimo-manual-banner-300px
 

Recent Articles

  • Kilian Jornet Interview: About His New Foundation, His Own Environmental Impact, and How He Wants To Help Athletes and The Outdoor Industry To Protect Nature
  • How Fast Are Glaciers Really Melting? How Will This Affect Your Mountain Adventures? Interview with Pascal Egli
  • Book Review – Art of Freedom: The Life and Climbs of Voytek Kurtyka
  • Forest Skis: Innovative, Custom Build, For Backcountry Skiing and Freeride
  • Lighter and Completely Redesigned: New CAMP Ultralight Ski Mountaineering Ice Axes

Categories

  • Contests & Giveaways
  • Crazy Tracks
  • Events & Races
  • Gear, Tech & Food
  • General News & Articles
  • Industry Press Releases
  • Movies & Books
  • News Shorts
  • People (Interviews)
  • Racing 101
  • Reports & Results
  • Reviews
  • Skimo Racing
  • Training, Tricks & Tips
  • Trip Reports & Conditions

Footer

About SkinTrack

Travelling through snowy mountains on skis is like flying… and experiencing life at its core.

Gear reviews, interviews, adventures, contests, skills, skimo training, race reports – we connect you to all things related to self-propelled skiing.

SkinTrack.com, created by Stano Faban, was born out of passion for ski mountaineering and ski touring. Over the years, it has become one of the most popular ski mountaineering blogs in North America.

Recent Articles

  • Kilian Jornet Interview: About His New Foundation, His Own Environmental Impact, and How He Wants To Help Athletes and The Outdoor Industry To Protect Nature
  • How Fast Are Glaciers Really Melting? How Will This Affect Your Mountain Adventures? Interview with Pascal Egli
  • Book Review – Art of Freedom: The Life and Climbs of Voytek Kurtyka
  • Forest Skis: Innovative, Custom Build, For Backcountry Skiing and Freeride
  • Lighter and Completely Redesigned: New CAMP Ultralight Ski Mountaineering Ice Axes

Useful Links

Comparing the lightest: Skis | Boots | Bindings

Skimo Training: Training Plans | Videos

Stay in Touch

  • Facebook
  • Instagram
  • Twitter
  • YouTube

Copyright © 2025 SkinTrack.com. All rights reserved.