• Skip to primary navigation
  • Skip to content
  • Skip to primary sidebar
  • Skip to footer

SkinTrack

  • Lightest Gear
    • Skis
    • Boots
    • Bindings
    • Skins
    • Packs
  • Skimo Training
    • Training Plans + Skimo Manual
    • Transitions Videos
  • Facebook
  • Instagram

Archives for March 2012

Greg Hill talks about his choice of boots, skis and other gear he takes on adventures

March 26, 2012 By Stano Faban Leave a Comment

This article was submitted by Greg Hill through which he responded to my questions and curiosity about what gear (and why) he uses the most these days. Thanks a lot Greg for sharing this info with us. Short paragraphs in italic are comments on my ski touring gear.
Gear constantly evolves and with it so does our ability to progress. I think back ten years to the gear I skied on and its limitations. Now as I skin up mountains and ski down them I can feel the difference.
I have been skiing for 34 years and one would think that I should plateau but I am not. Somehow this year I am skiing harder and better than ever. And a lot of that has to do with the gear I am using.

Touring boots – Dynafit Vulcan

The Dynafit Vulcan boot is the most futuristic boot I have ever skied  (not on the market yet). When in walk mode the boot is free and easy to walk in. My stride is natural and strong. One of the reasons is that the tongue comes out for the ascent.  My hips and knees thank me every time I take the tongue out, the freedom of movement is appreciated by a body that has walked too much.
Once on the top I put the tongue back in and the boot transforms – it changes from an easy walking show to a charging downhill boot. It’s amazing how laterally stiff and aggressive these boots are. I charge harder, and I am more in control than I have been in years.
I am using the Dynafit TLT5 Performance for touring days. They are the best boot to walk in I ever tried (besides some very light, specific skimo race boots) thanks to the range of movement they allow and their weight. The TLT5 also features a removable tongue which adds great stiffness, however, on most soft (or powder) snow days I go even without it. 
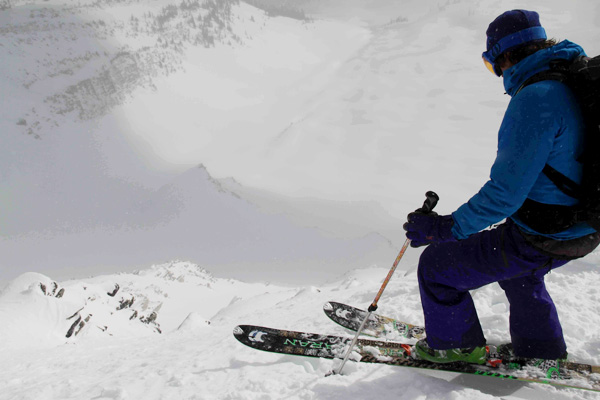
Greg Hill Dynafit Vulcan and Hauscaran
Greg Hill just about to drop off the Peak 8812 in Rogers Pass. This was his first time trying out the Dynafit Vulcan boots and Dynafit Hauscaran skis combo.

Dynafit Huascaran skis

I am also skiing on the Dynafit Huascaran skis a lot (not on the market yet), which is Dynafit’s new big mountain ski. It is 114mm in the waist and has a great early rise tip. The ski is stiff through the middle and tail and skis amazingly well.  I find it super easy to turn and when I am going reckless it is easy to dump speed and regain control.
The combination of the boots and skis connected by the Radical binding is allowing me to evolve into a better skier.
Since I own only one pair of touring skis and skiing very variable conditions during the year I decided to give a try to Dynafit Manaslu skis in 187cm this year. So far I like them. In the past I used to ski much stiffer skis, so I am still getting used to used to them on hard choppy snow. With these I use the Dynafit Speedskins which glide and attach very well, however, might not last as long as my old heavier BD skins.

Greg’s pack – Arcteryx Quintic

The backpack I am using is the Arcteryx Quintic pack (not on the market yet), it is 28 liters and great for backcountry day trips. This bag is super simple on the outside and very complex on the inside.
The outside has straps that are multi use, depending on your style of ski carrying or board carrying this bag transforms to accommodate you.  The inside is very compartmentalized, which means you have to have a system. Once you have a system then everything has its place and is separate from the others.
Now that I am dialed with it I always know where something is and where stuff should go. Although it is a little small for any big days it is a great little pack.
I am using my 9-year old trusted Dynastar touring backpack, so far not seeking an upgrade.

Ski helmet – Smith Vantage and Smith Maze
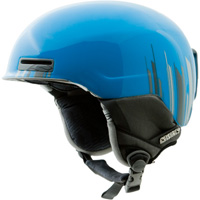
Smith Maze ski helmet.
Lately, I have begun wearing a helmet. This is something I haven’t done since I ski raced at 16 years old. But new helmets are light and comfortable.
I ski the resort with the Smith Vantage helmet and have been trying to tour with the Smith Maze that is lighter.
I think of all the crazy wild lines I have skied without protecting my head, a lot of false confidence that I have luckily gotten away with. But making my kids wear helmets has made me realize the importance of them.
I am not using a helmet for touring days but will consider it. For some steep spring skiing I use Salewa skimo racing helmet.

Greg’s jacket and pants – Arcteryx Sabre combo
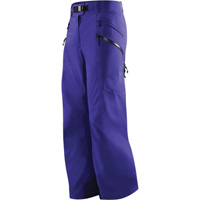
Greg Hill Arcteryx Sabre pants.
Greg's Arcteryx Sabre pants.
As for clothing I like skiing in soft-shell gore-tex products. These are burly but comfortable. They are quiet and supple, and have a cozy fleece inner.
The Arcteryx Sabre pants are long legged, with good side zips for ventilation and not too many pockets. Combined with the Arcteryx Sabre jacket in the same color and voila a ballistic beautiful set up.
I don’t really have a preferred brand or piece of clothing at the moment.

Equipment progress means our own as well

All this equipment is my favorite because it works really well, helps me maximize what I am doing and also looks great. The fact that its evolution progresses our own is as exciting as straight-lining a chute at Mach 5 😉

Buy GoPro HERO Camera at GoPro.com

Filed Under: Gear, Tech & Food Tagged With: Greg Hill

Ken Jones Classic 2012 report & results – Lake Louise skimo challenge

March 26, 2012 By Stano Faban 2 Comments

On Saturday 24, 2012 the Lake Louise Ski Area hosted its second Ken Jones Classic Ski Mountaineering Challenge:

  • Reiner Thoni wins the men’s category on the elite course
  • Melanie Bernier does the same in women’s category
  • 16-year old junior Martin Carnogursky completes the whole elite course
  • Another junior wins overall in women’s category on the shorter Enduro course
  • Joel Bartley wins men’s category over the Enduro course

» Full results: Ken Jones Classic 2012 results (in PDF)

Junior racer conquers the whole Elite course!

“Only through challenging myself can I know how much I can handle, and improve from there.”

The following report was submitted by Martin Canorgursky, a 16-year old junior racer, who went on to complete the full length elite course! I took Martin to his first race in 2011 and he liked it instantly. For the 2011/12 season he prepared with some experience under his belt – mostly by practicing karate 😉 In the coming years living somewhere else than Surrey, BC can surely help.

Lake Louise skimo race 2012
Photos from Martin's head-cam nicely show the racing experience of any skimo racer. (Martin Carnogursky, from Ken Jones Classic at Lake Louise)
The Ken Jones Classic marked the end of the ski-mountaineering racing season for me this year. For those who aren’t familiar with the event, it is held in Lake Louise and this year was the second annual race.
Racers were divided into two categories: “Elite” and “Enduro”. The “Enduro” race featured three climbing segments, three descents, and one bootpacking section, adding up to approximately 1000m of climbing. The “Elite” race had all of the climbs and descents of the “Enduro”, with an additional climb bringing the total vertical gain to around 1700m.
For this race, I decided to challenge myself and undertake the “Elite” course. As a junior racer and the youngest competitor, I usually compete under the “Enduro” category, but after a successful race at Alpental Vert Fest I felt confident I could handle the longer course.
I was a little misinformed about the length of the “Elite” course, thinking it to be 1500m of climbing, only a few more than at Alpental. And with permission from the course marshal, I signed up for the “Elite” race. 🙂
On Saturday, the day of the race, we woke to a clear morning hinting of a bluebird day to come. Panoramic view of the surrounding mountains greeted us at the starting line. It was a crisp -12 degrees, but the sun lessened the cold.
At 8:30, we started off on the first ascent. Halfway up, I paused to take a drink from my hydration pack, only to find a frozen tube! I had made a classic amateur mistake, and unknowingly left my water tube to freeze over. I continued to climb, but the hydration pack was my only water and it was inaccessible.
For the first downhill, we skied one of the backside chutes, where I encountered another setback. For this race, I had a shorter and narrower pair of skis which I had not skied steep runs on before. In the chute, I skied a little too aggressively, trying to link longer turns as I would with my larger skis.
I hit a small burl and started to tumble. I slid down 40 or so metres, until I finally regained control and stopped. Fortunately, my bindings had released, but my skis were a long ways uphill from me. A helpful racer above me passed me my skis, and I was off again. I finished the descent and started on the second climb.
By this time, I was starting to feel the thirst. I had to stop for ten minutes and put my water reservoir along with the tubing inside my jacket, so it would unfreeze. Although this wasted precious time, I couldn’t simply not drink for the next two hours. After that problem was solved the rest of the race went smoothly.
Once the bootpack was over with, the course took me to another section of the Lake Louise ski area. This was the last long climb, in the Larch area. The previous three climbs had worn me out, so I had to slow down the pace. During the last stretch, I was very tired and continued at a snail’s pace, forging on uphill. Finally, I reached the top.
The last descent was a long one, starting on a nice run and finishing with a flat cat-track exit with plenty of skating. After over four hours, I finally finished the race. 🙂
I’m glad that I finished the longer course but it definitely pushed me to the limits. I know for next year that I’ll have to train a lot more to better handle a longer course like this one. Nevertheless, I feel it was necessary for me to do the “Elite” race, because only through challenging myself can I know how much I can handle, and improve from there.

Juniors, parents – don’t hold back

For any juniors or parents thinking about their teenagers participating in skimo racing – don’t hold back, try it. As you see, it doesn’t matter where you live because you never know how the experience will form your future passions and weekend activities.

Filed Under: Reports & Results Tagged With: Lake Louise, Melanie Bernier, Reiner Thoni

Ken Jones Classic Ski Mountaineering Challenge – Lake Louise, Mar 24, 2012

March 14, 2012 By Stano Faban Leave a Comment

Ken Jones ski mountaineering skimo raceLake Louise Ski Area will be hosting the 2nd annual Ken Jones Classic on March 24th, 2012. This ski mountaineering challenge will be the last race on the Canadian skimo calendar this season.
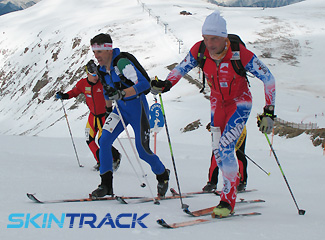
Lake Louise Ski Area partnered with the Alpine Club of Canada to organize this event and they are promising true ski mountaineering courses, great fun, $1000 cash purse and lots of draw prizes.

Ken Jones Classic quick facts

» $70 (youth only $35) will sign you up, pay for your day lift ticket and more!
» race poster for Ken Jones Classic skimo race (in PDF)
Schedule – all is happening on Saturday, Mar 24th:

  • 7.00am – Check-in (bibs pickup, last opportunity to register) in the Great Bear Room in the Lake Louise ski area Base Complex
  • 7.30am – Race briefing (course presentation), should be same place
  • after the briefing a special lift will be running to take all up to the Whitehorn start

Two race courses:

  • The Youth and Enduro courses will climb from Whitehorn Lodge, over the Summit, to Richardson’s Ridge, and back to the Base Area finish by way of Temple Lodge – approximately 620 metres / 2000 feet of climbing and descending.
  • The Race/Elite course will add an ascent through Rock Garden, over Larch, and a descent of Elevator Shaft to make for 5000+ feet of vertical gain.
  • Both routes exit down the ski out for final skate to the finish.

Categories:

  • Men, Women
  • Youth, Elite, Enduro

Registration:

  • Entry fees: $70 adults, $35 for youth 19 and under
  • online registration is available – www.alpineclubofcanada.ca/skimo
  • or call 403-678-3200 (extension 108) to inquire, pay, or enlist directly
  • there will be race day registration at 7.00am sharp

» First timers might want to check out this article: 6 tips to get you ready for your first skimo race
» To train your transitions see videos: ski mountaineering racing transitions with Reiner Thoni

Filed Under: Events & Races Tagged With: Lake Louise

How to choose the right length (and kind) of skimo racing poles for you

March 14, 2012 By Stano Faban 10 Comments

Some time ago someone posted a question on Skintrack about ski poles for skimo/rando racing. It never got fully addressed.
Recently, @peteyknight asked about skimo racing ski poles length during our live Twitter interview with Reiner Thoni. And I bet you are asking the same, so I decided to share some personal experience and discuss the topic more.

ski mountaineering racing world championships
Top 3 from vertical race at 2010 World Champs: in blue Dennis Brunod (he seems about 170-175cm tall), Florent Perrier in red/blue (about 180cm tall), behind Kilian Jornet was about to pass them, more on him below.
Feel free to share your experience and thoughts in the comments below. It will open more opportunities to benefit yourself in finding the most suitable poles for you.

Previous personal experience with racing poles

As anyone I started skimo racing with normal ski poles with full baskets, don’t remember the exact length though. There is nothing wrong with that as during this time you should be evaluating other aspects of your experience more, such as: “Do you like this type of racing? What turns you on to come back?”
After getting inspired by super-fast Euros I decided to put more energy into skimo racing. I noticed that their poles were longer than usual backcountry ski poles and that they were actually cross-country ski poles (smaller baskets too).
To shorten the story, I ended up with 140cm cross-country poles. I am 186cm (6’ 1.2”) tall so it seemed appropriate until I noticed that my shoulders and arms were getting quite tired even mid-way through each race. But still stuck with them.
Few years later a friend from a Spanish skimo team gave me his 130cm Ski Trab poles, he was about 170cm (5’ 7”). Sure, 130cm felt a bit short but was more comfortable on the steeps, in the switchbacks and on the downhills. I stuck with these for few seasons (they were free, eh) until I lost one. Then the dilemma began again. What length?

My racing poles now

In the last three seasons I use 135cm cross-country ski poles and find that length the most suitable overall. As I mentioned above, I am 186cm. My arm span (Wikipedia on arm span) is 186cm too which gives me about an average height to arm span ratio (this ratio is different for women). I am providing this info since I believe it is important to consider also your arm span, not just your height, when choosing your poles.

Some thoughts and examples

Perhaps, a super ideal length for my skimo race poles lies somewhere between 135 and 140cm. However, it is very difficult to objectively select the right one, so by relying on my feelings I am leaning towards 135-138cm, and only maybe 140cm for a flat vertical race.
This leads me to believe that some of the most advanced skimo racers would use, and train to effectively use, two different lengths. In the same time I believe it is very individual.
What length other people use:
Reiner Thoni at cca 188cm (6′ 2″) – 140cm poles (NA and Canada’s skimo champ).  You can read our interview by following Skintrack on Twitter and diggind in our history. The transcript is coming here soon.
Peter Svatojansky at 186cm (6′ 1″) – 138cm poles (podiums at Pierra Menta, World and Euro Champs). Read an older interview with Peter where he provided his ski poles info.
Melanie Bernier at 175cm (5′ 9″) – 130cm poles (3 x Canadian champ and a 5th place from a sprint race at World Champs 2011).
Kilian Jornet at 171cm (5′ 7″) – (best of the best last 3 years) from photos Kilian seems to be using quite long poles for his height, I would guess around 135cm. I also guess that he would be the one to use two different lengths – for individual race and for a vertical.
This video does a good job of showing how long poles the best use (in proportion). Not the best quality but you will get the idea:

How to choose your skimo (randonnee) racing poles?

Since all competitive skimo racers use cross-country (xc) style poles I suggest you consider them as well. Just be careful to pick the ones where hand straps can be easily removed.
Length:
Consider that the poles length should be suitable for all aspects of skimo racing – skinning, bootpack, and downhill.
Since most of xc poles can be cut to adjust length I would  suggest this formula:

  • if you are 190cm+ tall (6’ 3” +) buy 145cm and you can either cut them or keep as is
  • if you are 180-190cm (5’ 11” to 6’ 3”) buy 140cm, cut or keep
  • 170-180cm (5’ 7” to 5’ 11”) buy 135cm, cut or keep
  • 160-170cm (5’ 3” to 5’ 7”) buy 130cm, cut or keep
  • 160cm and less (less than 5’ 3”) probably buy 130cm, then cut or keep

Material and weight:
You have couple of choices:

  • Carbon is very strong and very light but most expensive. Need to be careful not to fall on them because it breaks, does not bend.
  • Aluminum is less expensive, strong but heavier than carbon or composite. Makes for a good beginner or training poles. Usually bends when you fall on it – you can still finish the race. Cheap aluminum poles bend way too much when you put lots of your weight on it, they are too soft.
  • Composite poles are a mix of materials. Price, weight and performance varies quite a bit. Similar qualities as carbon.
  • Fiberglass probably comes only with composites these days. I find it a bit too “bendy” when loaded.

Baskets:
Some xc poles come with very small baskets. You don’t want those. You need something smaller than backcountry skiing pole baskets but still big enough to provide some support when the snow is deep.
Figuring out the length:
See the length formula above before buying. Then it will take some time (maybe even few seasons) to find your ideal.
How about figuring this out with a length-adjustable mountaineering pole?
This only works if you manage to restrict how much of the tip sinks into the snow. Usually, tips on mountaineering telescopic poles can go as deep as 5-6cm. You want to restrict your test poles that only up to 1cm punches in, and then you can use this length as a reference.

What poles do you use? Questions, thoughts?

Share what poles you use and how tall you are. Or if you have any questions use the comments below to ask.

Filed Under: Gear, Tech & Food, Racing 101 Tagged With: Kilian Jornet, Melanie Bernier, Peter Svatojansky, Reiner Thoni, skimo racing poles length, Stano Faban

Skout Trailbars review: We need more quality choices to replace some old fillers

March 8, 2012 By Stano Faban Leave a Comment

Bottom line: Highly recommend to try Skout Trailbars for various activities. Value them for what they really offer and let your priorities decide.
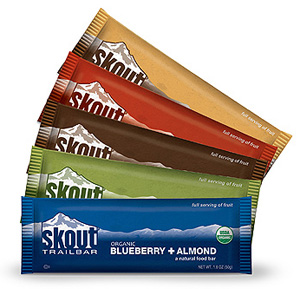
Skout Natural Traibars flavorsThere are plenty of trail, sport, energy and protein bars to choose from these days. In fact, there might be too many.
To me, there is no problem with the amount of choice but with the quality, and so it is nice to see a fresh player bring a natural product to a crowded market.
Surely, to each of us ‘quality’ means different things but to me it represents:

  • ingredient sources – how healthy it is
  • flavors, taste & texture – the variety a brand offers, and whether I like it enough
  • nutritional values – what it gives me (not only energy)
  • price & comparison – how they compare to other ones I like

What do I think about Skout Natural Trailbars

This is a summary from multiple experiences with Skout Natural Trailbars during various sporting and outdoor activities throughout couple of months.
First bars for this review were provided by Jason Pastega of Skout Natural, however, more were purchased on free will. And so you can consider this review as objective or as biased as you like.

Ingredients – nature’s simplicity

What I like about Skout Trailbars is about what they do not contain rather than what they do.
They do not contain any added sugars or fillers such as corn syrup. No artificial flavours or colour.
They are 100% organic, made only from basic natures ingredients. All five flavors of Skout Trailbars contain these two main ingredients – organic dates and whole grain organic oats. Four of them contain the two plus almonds.
Skout bars are made in Portland, Oregon and the ingredients are sourced from the Pacific Northwest region.

Flavors, taste & texture – too much simplicity gets in the way

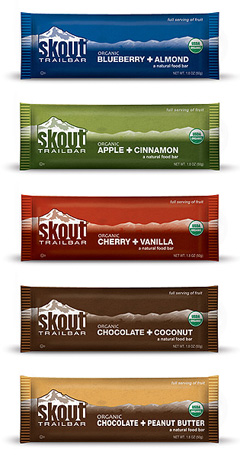
Skout Trailbars come in these different flavors:
All of Skout Natural Trailbars.

  • Blueberry – Almond
  • Apple – Cinnamon
  • Cherry – Vanilla
  • Chocolate – Coconut
  • Chocolate – Peanut Butter (no almonds)

All of the bars taste great (Apple Cinnamon being my favorite), however, to be honest I have to say that they all taste similarly.
It could be my palate but maybe if you have two ingredients creating the bulk of each bar it shouldn’t be a surprise. This doesn’t really bother me since I am sold on the quality of all ingredients.
Texture left a good feeling but was a bit on a drier side, I prefer little juicier. But since most of us drink while/after eating a sports bar anyways this shouldn’t be a problem.

Nutritional values – comparable to other bars but a more natural mix

Again for me, nutritional values come second to the ingredient sources. If those are really natural (doesn’t have to be labeled organic) and chosen wisely then I believe nature does the rest – it provides the right mix of what we need.
Skout Trailbars are totally comparable to other trail bars (or sports, energy bars) in terms of their nutritional values – at 50g provide around 170-200 calories.
The added bonus with Skout is that the nutrients come in more natural combinations than in most other bars. Because once you start pumping a bar with fructose syrup or maltodextrin to raise its energy/carbs values such concentration (or ratios) do not occur naturally.

Skout blueberry bar nutrition facts.
Blueberry - Almond bar nutrition facts.
Skout apple bar nutrition facts.
Apple - Cinnamon bar nutrition facts.
Skout cherry bar nutrition facts.
Cherry - Vanilla bar nutrition facts.
Skout chocolate bar nutrition facts.
Chocolate - Coconut bar nutrition facts.
Skout peanut bar nutrition facts.
Chocolate - Peanut Butter bar nutrition facts.

Price & comparison – quality costs a bit more

Some people like to justify a price of a bar based on grams-to-cents ration. If a sports bar is 60g at $2.10 then you are paying 3.5 cents per gram. Basically, they reason the heavier and cheaper the better.
This thinking forgets to appreciate quality. If something is of higher nutrient quality (not just the amount of calories) it will give your body more than something that is a highly processed 20g heavier “filler”.
Skout Trailbars are more expensive than let’s say Cliff Bars (not 100% organic) but are the same as Hammer Bars and Larabars (both 100% organic) which too use lots of natural, organic and raw ingredients. I would not solely buy Skout bars as it can get pricey but to widen your range of tastes I definitely recommend them.
You can buy your supply online at SkoutNatural.com in boxes of 12 or choose individual bars, or a great sampler box. You can also get them online at REI.com (in person too).

Have you tasted these? Or want to know more?

Feel free to comment below if you had tasted these Skout’s bars. Or if you have more questions about them, ask below.

Filed Under: Gear, Tech & Food Tagged With: Skout Natural

Primary Sidebar

  • Facebook
  • Instagram
  • YouTube
Our Facebook Page

skimo-manual-banner-300px
 

Recent Articles

  • Kilian Jornet Interview: About His New Foundation, His Own Environmental Impact, and How He Wants To Help Athletes and The Outdoor Industry To Protect Nature
  • How Fast Are Glaciers Really Melting? How Will This Affect Your Mountain Adventures? Interview with Pascal Egli
  • Book Review – Art of Freedom: The Life and Climbs of Voytek Kurtyka
  • Forest Skis: Innovative, Custom Build, For Backcountry Skiing and Freeride
  • Lighter and Completely Redesigned: New CAMP Ultralight Ski Mountaineering Ice Axes

Categories

  • Contests & Giveaways
  • Crazy Tracks
  • Events & Races
  • Gear, Tech & Food
  • General News & Articles
  • Industry Press Releases
  • Movies & Books
  • News Shorts
  • People (Interviews)
  • Racing 101
  • Reports & Results
  • Reviews
  • Skimo Racing
  • Training, Tricks & Tips
  • Trip Reports & Conditions

Footer

About SkinTrack

Travelling through snowy mountains on skis is like flying… and experiencing life at its core.

Gear reviews, interviews, adventures, contests, skills, skimo training, race reports – we connect you to all things related to self-propelled skiing.

SkinTrack.com, created by Stano Faban, was born out of passion for ski mountaineering and ski touring. Over the years, it has become one of the most popular ski mountaineering blogs in North America.

Recent Articles

  • Kilian Jornet Interview: About His New Foundation, His Own Environmental Impact, and How He Wants To Help Athletes and The Outdoor Industry To Protect Nature
  • How Fast Are Glaciers Really Melting? How Will This Affect Your Mountain Adventures? Interview with Pascal Egli
  • Book Review – Art of Freedom: The Life and Climbs of Voytek Kurtyka
  • Forest Skis: Innovative, Custom Build, For Backcountry Skiing and Freeride
  • Lighter and Completely Redesigned: New CAMP Ultralight Ski Mountaineering Ice Axes

Useful Links

Comparing the lightest: Skis | Boots | Bindings

Skimo Training: Training Plans | Videos

Stay in Touch

  • Facebook
  • Instagram
  • Twitter
  • YouTube

Copyright © 2025 SkinTrack.com. All rights reserved.