• Skip to primary navigation
  • Skip to content
  • Skip to primary sidebar
  • Skip to footer

SkinTrack

  • Lightest Gear
    • Skis
    • Boots
    • Bindings
    • Skins
    • Packs
  • Skimo Training
    • Training Plans + Skimo Manual
    • Transitions Videos
  • Facebook
  • Instagram

altimeter watch

Suunto Ambit 2 Review: Multi-sport altimeter GPS watch with heart-rate functionality

October 1, 2013 By Stano Faban Leave a Comment

Suunto Ambit 2 quick overview:

suunto-ambit-2-watch

  • Usual full price: $550.00 USD
  • Weight: 82-92 g depending on the model (mine is 89g for the watch + HR belt 60g)
  • Cost per gram: $3.69 / g (watch + belt)
  • Pros: Battery life, data analysis, TrackBack GPS function
  • Cons: Data transfer, size
  • Suitability: Complete sports watch for outdoor/mountain athletes who want the most comprehensive data to monitor their training with the ability to navigate GPS tracks.
  • How we go it: Bought through a pro-deal (disclosure notices)

Bottom line:

Expensive but it does everything. If you want the best of the best this is it.
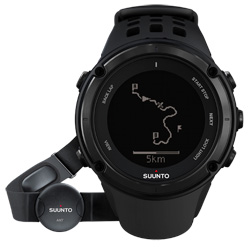
Photos:

Product description and How we tested it:

Four months of summer testing, skiing and running the Sea-to-Sky. It is billed as the wrist-top computer for explorers. The Ambit2 is a fully equipped sport watch with an excellent heart-rate monitor and a GPS device. The Ambit2 has a large battery designed to lengthen its life in GPS mode (compared to a smaller version – the Ambit 2S – geared toward multi-sport athletes).
Suunto has stepped up where Garmin models failed to provide battery life sufficient for ultra-endurance and mountain athletes. The Ambit2 can be used over multiple days and for events lasting longer than 20 hours.
The watch casing itself is similarly sized to other GPS models and though slightly bulky, not overly. Screen size is adequate for reading data and simple navigation. Data fields can be customized to any combination of displays to suit your needs depending on activity. I like to see HR while training but am more concerned with elevation and time during hikes – easy to setup using the online interface.
User designed apps allow custom metrics that can be displayed. While I personally don’t find any of the available apps any better than what is packaged on the watch, this idea has potential for the future as users become better app programmers.
Distances during my runs are generally slightly lower than the devices that running partners use but not significantly. The large face is exposed to scratches, especially while using hands on rock but seems scratch resistant.
Moveslink software is intuitive to use but requires an Internet connection and data is stored online. Every variable can be plotted on graphs versus time and distance.
A track is superimposed over a Google Map. Tracks can be exported and saved within Moveslink to be shared with other users. This allows users to download a track in a new area and use the navigation feature to follow it from start to finish.
GPX files can be exported from Moveslink and uploaded to Strava.com and other training software.
Other features include a compass and accelerometer to enhance distance accuracy.

Pros:

  • Fastest GPS connection I have ever had. Always connects faster than the Garmin.
  • Best battery life (50hrs) of competitive GPS watches.
  • Top quality HR signal.
  • Moveslink software allows useful analysis of data after transfer from device.
  • Recently announced TrackBack feature allows user to retrace their route back to the starting point. Useful “breadcrumb” navigation tool. Could be crucial to ski mountaineers/mountain athletes who find themselves retreating in a snowstorm when navigation is difficult.

Cons / What can be improved about this product:

  • Computer connection uses USB cable (compared to wireless ANT connection).
  • Data transfer requires significant time (sometimes >15min).
  • Data transfers failed frequently using early software versions. This seems to have been fixed, though transfer times are still long.
  • Internet connection required to transfer data and utilize Moveslink.

Product Specs:

  • Weight: 89 grams (my model)
  • Cost per Gram: $3.69 / g (watch + belt)
  • Battery life: up to 50 hrs.
  • Water resistance: 100 m / 328 ft
  • Warranty: 2 years watch, 1 year included accessories
  • Critical accessories:
    • HR Strap (Included in HRM version)
    • Computer with Moveslink installed
  • Optional accessories:
    • Running Cadence Monitor (overrides distance data from GPS)
    • Cycling Speed/Cadence Monitor

Online stores that carry Suunto Ambit 2 watch:

suunto-ambit-2-watch

  • $450-600 at Amazon.com
  • $550 at Backcountry.com
  • $450 at GearX.com (Suunto Ambit2 S)
  • $550 at REI.com
  • $450 at CampSaver.com (Suunto Ambit2 S)
  • $550 at MooseJaw.com

Filed Under: Reviews Tagged With: altimeter watch, GPS, heart-rate monitor, Moveslink, Suunto, Suunto Ambit 2

Buying altimeter watch that fits your needs and budget

November 13, 2009 By Stano Faban 9 Comments

Choosing which altimeter watch to buy is tough with the variety we are presented today, so let’s make it simpler with some basic advice that will help you decide.
altimeter-watches-mainThis article is an extension of “Altimeter watch: Why it is important and beneficial to know your altitude?“. It is a recommended read for those that are unsure whether they need an altimeter watch or not.
Altimeter watches come in all shapes and sizes, and their features can vary greatly. Some don’t let you record your trips while others combine altimeter functionality with a heart rate monitor.

Making decisions – factors to consider

Two factors you need to really consider are your needs and your budget. The lower your needs and preferences are the less money you will need to spend and vice versa.
To beging the process make a list of your “watch needs”. What you want the watch to use for? What features should it have?
Here are some hints to get your needs list started:

  • need to know only my immediate altitude
  • want to record my trip/hike vertical profiles (logbook)
  • want to know how many laps I skied today
  • need to download data from the watch to computer
  • and so on…

I use and suggest these functions with an altimeter watch:

  • obvious – time, stopwatch, thermometer, alarm, immediate altitude
  • vertical speed – shows your actual vertical speed you are traveling at; once you start following it you will find many uses for it – here is more on vertical climbing speed topic
  • logbook – lets you record your trip/hike/workout including couple of parameters, mainly total vertical meters gained/lost
  • chronograph – almost the same as logbook but more useful for workouts with heart rate monitor

Once you know your needs you can start looking for the solutions – different altimeter watches.
Note: One thing here though is that you may not come up with a certain need in your list because you simply don’t even know a watch can have such features. Therefore, you might adjust (expand on) your needs as you are already browsing different models.

Define your budget – will save you time

Even though it is obvious you know your financial status it is good to predetermine your budget. Come up with a price range, it will help you narrow down your choices and save time comparing different models.
Again like with the needs list, this can be a little tricky if you are new to buying altimeter watch. You may simply not know what altimeter watches are going for.
Altimeter watch prices vary greatly due to different features, their brand name (recognition, prestige) and materials they are made of.
To get an idea, here two examples:

  1. Altimeter watch with titanium housing and leather straps are expensively priced mostly because they are very stylish for everyday wear and they are also very durable.
  2. Watch that has a heart rate monitor and shows only the immediate altitude but has no further altimeter functionality (i.e.: recording accumulated vertical gains) is going to be more affordable than its titanium brother.

Altimeter watches – various brands

As far as your brand preferences go you will have many options these days. But here we will take a look only at those brands that have proven over long time they are worth their price, whether low or high.
Suunto
Based on personal experience, Suunto is my favorite brand if the watch is primarily used as altimeter. Besides me, there are thousands of mountaineers swearing by Suunto.
Polar
Again based on personal experience, Polar is my favorite if heart rate monitor functionality is the most important. And again, millions of athletes swear by this brand too.
Timex
Everyone had a Timex watch at some point in their life. How was it? Mine was great. Unfortunately, I don’t know anyone who has a Timex watch with an altimeter but the brand is definitely strong.
Other popular and casual brands
Then there are other brands that offer altimeter functionality in their watches as well but don’t have as much history with it: Casio, Highgear, Nixon, Freestyle USA and more…

Altimeter watches – introducing 6 models

Now that you have considered your needs and defined your budget let’s look at some actual altimeter watch models:

suunto-vector
Suunto Vector
» Essentials
Price: about $200
Various styles: yes
Available at: Backcountry.com, Altrec.com

The name “Suunto Vector” is a legend among altimeters and it was the first altimeter watch I ever saw. I believe, Suunto improved it since then yet they are still keeping it at a very affordable price. This watch has scored many awards and has been used by millions of people that go further than a stroll around a lake. Most recently, Suunto added a new model to the Vector family – Suunto Vector HR – that includes a heart rate monitor.

suunto-observer
Suunto Observer
» Skier specific
Price: $300-500
Various styles: yes
Available at: Backcountry.com, Altrec.com

I believe this was one of the first watches that was rated “for skiers” because the logbook was recording your day/trip and at the end you could see how many laps you skied. There are about four different styling options for it, however, not many stores carry more than two. Backcountry.com does.

suunto-x6-hr
Suunto X6HR
» With heart rate
Price: about $450
Various styles: yes
Available at: Backcountry.com, Altrec.com

I am using this is a watch past two years. (Before it was Polar.) I like everything about it except that heart rate monitoring is not as flawless as with Polar. Vertical speed, logbook functions and stopwatch recording are great. It connects to PC but the software is not as user friendly as Polar’s.

polar-RS800G3
Polar RS800G3
» Heart rate & GPS enabled
Price: about $470
Various styles: no
Available at: Backcountry.com

Polar is mostly know for their high quality heart rate monitors. My personal experiences support that 100%. This watch has basic altimeter functionality but great heart rate monitor features. It also shows your speed and tracks your distance via GPS. Polar comes from Finland, same as Suunto. And it connects to your computer.

suunto-lumi
Suunto Lumi
» Women’s casual
Price: $300-350
Various styles: yes
Available at: Backcountry.com, REI.com

This is as interesting watch because the styling doesn’t say anything about what’s inside. The Lumi looks to look cool at any situation and it must be. It has an altimeter, barometer and compass. Also, it speaks four languages: English, Spanish, German and French.

suunto-x-lander
Suunto X-Lander
» Casual & stylish
Price: $300-350
Various styles: yes
Available at: Backcountry.com

Suunto X-Lander is a great watch for anyone who is active outdoors but some times needs to head to a meeting right from the mountains. It has all essential altimeter functionality but with leather straps and aluminum body styling looks very “official”.

At different stores you will find different types/options/colors for different models, therefore you should check out more than one store:

  • At Backcountry.com you have the biggest selection of altimeter watches online (brand, models and options) and you can easily compare 2, 3, even 4 watches side by side.
  • At Altrec.com you will find less selection and different pricing than Backcountry.com.
  • REI.com doesn’t offer too many choices for altimeter watches, but does for other multi-functional watches.
  • MEC.ca offers about 10 different models.

Any questions re: altimeter watches?

If you have any questions or just want to leave a comment about this article or altimeter watches you can do so in the comments below.

Filed Under: Gear, Tech & Food, Training, Tricks & Tips Tagged With: altimeter watch, Polar, Suunto, vertical speed

Altimeter watch: Why it is important and beneficial to know your altitude?

November 4, 2009 By Stano Faban Leave a Comment

Knowing at what altitude (elevation) you are at any moment while backcountry skiing is very important and can be also very beneficial. Lets take a look why this is the case, and how you may go about choosing an altimeter watch that suits your needs and fits your budget.
map-compass-altimeterThis article is followed by “Buying altimeter watches that fit your needs and budget” guide to make your decision easier if you decide to by an altimeter watch.
For simplicity sake, terms “altitude” and “elevation” will be used interchangeably throught this article. (To see the difference read the first paragraph of Wikipedia article on Elevation.)

Case for knowing your altitude (having altimeter watch)

The single most important argument for knowing your altitude is safety as that can make or break your navigation.
The second argument is your benefit – meaning the luxury of knowing your altitude helps you make better choices towards enjoying your days even more by getting the best out of them.

Safety factor – navigation and general awareness

While backcountry skiing, on a single day trip or a multi-day traverse, we have couple of tools that support our decision making. Altimeter would be one of the tools along snow stability tests, weather observation skills, maps or compass. To use these tools correctly we need also experience which in itself becomes a tool then.
Having an altimeter watch, thus knowing your altitude, significantly helps you make safer choices in navigating through terrain because:

  • If you have a map and compass but you don’t know what altitude you are at you can’t accurately figure out where you are on the map. Therefore it’s tough to make a decision where you should be going, safely.
  • Or, if an avalanche bulletin says that there was a significant accumulation of snow above 2100m it’s good to know where the potential overloading of slopes begins.

The factor of knowing your altitude for navigation purposes is the most important one for your safety. And this becomes increasingly important on longer multi-day trips.
Once out there you are completely relying on a map, compass and altimeter (or GPS with altimeter). These three are like avalanche safety equipment – beacon, shovel and probe really work the best together. Leave one out and you have to deal with additional unnecessary problems.

Benefit factor – better skiing and comfort

On this day the snow above 2000m was fantastic, below 1900m was wet. In between was so-so.
On this day skiing above 2000m was fantastic, below 1900m was crusty. In between was so-so.
Enjoyment and fun is why we ski (some ski for work). Quality of snow makes this experience good or great.
Besides knowing which aspects (slopes face certain direction, e.i.: north, south…) to ski for the best snow at a given time, knowing your altitude can greatly help you with getting the most fun out of your runs.
Scenarios presented here are not always true as the conditions greatly vary from place to place and from time to time, but they demonstrate how altimeter can help you:

  • At higher elevations the temperatures are lower on average. This means that if it rains up to 1900m the better skiing should be above this elevation.
  • Also, precipitation increases the higher the altitude. That means deeper snow pack which usually means higher quality powder skiing. And better chances of face shots.
  • On the other hand, places at higher elevations are often pounded by greater winds which can blow the snow away or form a hard wind-affected top layer that you penetrate through unpredictably while skiing. And that is no fun.

In the three cases above you can clearly see how knowing your altitude can make you help decisions where and when to ski to have the biggest blast.
Among other beneficial factors of knowing your altitude is comfort. Sure, once you are out and the elements are testing you, you enjoy but there is a limit to everything. Here are examples of what I mean by comfort factor, especially on multi-day trips:

  • You need water but want to save gas for your stove (or time melting snow). Creeks with running water are more accessible (convenient to reach) at lower elevations.
  • You may have trouble sleeping comfortably above certain altitude. Altimeter can help you find a spot without loosing significant vertical meters by letting you know where you are exactly while looking for a suitable place.

Altimeter watches

Now that points were made why knowing your altitude is important and beneficial we will take a look at some altimeter watches that will fit your needs and budget in the next article.
“Buying altimeter watches that fit your needs and budget” will provide you with tips on what you need to consider when buying an alti watch as well as it will introduce you to couple of models where each one has a specific use.
If you just want to browse online stores for watches  take a look at Backcountry.com and Altrec.com.

Filed Under: Gear, Tech & Food, Training, Tricks & Tips Tagged With: altimeter watch, navigation

Buying backcountry skiing, alpine touring and avalanche safety gear

October 14, 2009 By Stano Faban 6 Comments

This article is from a series on “How to start backcountry skiing and alpine touring?”. Visit the link to see an outline of all the topics.
Now that you skied off piste in knee deep powder with your friends and learnt some very useful things in the avalanche safety course, you are hooked. If not, then something went wrong while you were reading the two preceding articles from this series, please go back and re-read 🙂
When you are truly aboard you will need some basic gear that will get you further into the backcountry. The choices are immense these days, so your budget will be your biggest definer.
The basic fact with backcountry skiing is that since we need to climb up before we go down, the weight of your gear is very important. Light gear means faster uphills but may not provide the best control for downhill. Heavy gear doesn’t necessarily mean great downhill control but definitely means tougher climbing.
There are three ways to go about this:
•    you take someone’s advice and stick with it
•    you start experimenting on your own
•    or you combine the two
In my opinion, the best thing to listen to some advice but experiment as well. And eventually you should gradually hone your skills and technique that will allow you to eventually tour with lighter gear without compromising anything.
Below is a fairly long yet still quite brief overview of all basic equipment (that you will need) divided into sections: skis, boots, bindings, climbing skins, avalanche safety gear, and backpacks & clothing.

Skis for backcountry and alpine touring

Fat, skinny, light, heavy – the preference should be made on what you plan on skiing the most, whether powder or more of a harder snow.
skis
The best, before you really find your soul, is to go the middle way. Get backcountry skis with around 80-90mm width under the foot. Pick something in the middle of this range and you should be fine for now.
Lengthwise, get a pair that is about the same height as you are, or the skinnier the skis the longer they can be while the opposite is true for fatter skis.
The weight of skis will depend on the length of the ski. At 80-90mm width the weight will generally vary from 1300g to 2200g per ski.
Most popular backcountry ski brands are Atomic, Ski Trab, Dynafit, Black Diamond, K2, G3, Dynastar and Goode.
The usual price range is between $500 to $800. To get a better idea you can check out a wide backcountry skis selection at Backcountry.com.

Alpine touring boots

Backcountry (or alpine touring) ski boots have a lot to do with how well you will be controlling your ride. Again, the obvious properties are light or heavy, however, for good control you need to consider things such as:
boots•    how many buckles a boot has
•    how high the boots are
•    how well do the boots fit
The number of buckles ranges from two to five (to maybe more on some models) and this pretty much defines how well the boots will fit your feet. The better fit, the better control. But again be aware of the weight.
For starters, go with three to five buckles, with a heat moldable liner. The weight of these will be around 1400g to 1900g per boot. Weight significantly depends on the size of the boot.
There are four major alpine touring boots manufacturers: Scarpa, Dynafit, Garmont, Black Diamond. Scarpa and Dynafit will most likely have something for everybody from weight cautions to best downhill performers. Garmont and Black Diamond are focused more towards the downhill performance, so you might not find as light boots in their selection.
The usual price range is between $600 to $800, and again you can check out Backcountry.com to see what’s out there since they seem to have the widest selection in North America. Also, you can check out MEC.ca as they carry lots of models too.

Alpine touring bindings

Fifteen and more years ago the market in Europe was dominated by Silvretta. In North America there were different brands since telemark skiing was much more popular than a fixed heel.
biddingsThen Dynafit came out with a revolutionary Dynafit LowTech binding that changed everything. This was primarily due to the very innovative functionality design which shaved pounds and pounds of weight off the previous touring models.
Over the years Dynafit bindings proved to be at least as durable as anything else on the market. However, your choice should be still made based on some other facts.
If you like to ski the resorts on your backcountry skis or if you ski more in the resorts than in backcountry then you can for Black Diamond’s Diamir bindings since it gives you more clearance above the ground and skiing feels more like on normal bindings. Marker’s Duke bidding belongs in this category too.
Anyone else should pretty much consider only Dynafit. Nowadays, the brand offers various models yet all of them are way lighter than any other brand’s models. And the simplicity of the design means that there is a lot less to break than on any other models.
Dynafit design is specific in a way that not all alpine touring boots can be used with their bindings, however, now all boot manufacturers have at least couple of models that are Dynafit compatible. So no worries.
Also, you may consider “alpine touring adapters” for normal biddings. Those can be easily locked in your downhill bindings and provide a climbing mode for you. You can use these with your downhill ski boots. But beware you will be hauling a lots of weight up the hills with this setup.
Most recommended alpine touring bindings brands are Dynafit, Black Diamond’s Diamir and Silvretta. G3 has recently released an alpine touring bidding too, so if you are like to test new things that might be your choice.
Again, to see what’s out there go to Backcountry.com. Prices will range mostly between $350 to $500.

Telemark skiing gear – skis, boots, bindings

Being not a telemark skier myself (but soon to try) I will give it my best to introduce you to the tools of the trade. (Original photo of the telemark skier is from John Baldwin collection.)
telemark-skiingTelemark skiing (or telemarking) gear consists of the exactly same components as alpine touring – skis, boots and bindings. However, this gear functions differently due to the downhill technique of the marvelous telemark turn.
Telemark skis
Many people are using alpine touring skis (or all mountain skis) for telemarking or even skiers are using tele skis for skiing. Although, that definitely says something about compatibility telemark skis, in general, are somewhat softer and narrower than backcountry skis. However, in recent years they are catching up with the fatness.
When choosing the right ski for you, you need to consider your height, weight and skill just like with normal skis. The best is to ask an experienced tele skier but you should not go wrong with a length that matches your height. And the deeper the snow you plan on riding the fatter the skis need to be.
Usual prices for telemark skis would be about the same as for alpine touring skis, between $500 to $800.
The most popular manufacturers that offer specialized telemark skis are Karhu, Voile, K2, Atomic, Black Diamond, G3, Ski Trab and Rossignol.
Telemark boots
Telemark boots are different from any other ski boots at a first glance. They feature a bellow that allows for a “bending motion” of the boot that is necessary for dropping low when carving the tele turn.
telemark-bootImportant differences among telemark boots, including the weight factor, are:

  • How soft or stiff a boot is?
  • How tall or low a boot is?

To have more control for downhill as well as to have a more precision for aggressive skiing (or jumping) you should be choosing some of the beefier boots that are stiffer and taller. On the other hand, if you want more comfort while climbing then a softer, lower boot will do.
Telemark boots as well have about the same price point as alpine touring boots – $600 to $800.
There is not as many specialized telemark boots manufacturers as for telemark skis, however, there are plenty of boots to chose from. The most popular brands are Scarpa, Black Diamond, Garmont and Crispi.
Telemark bindings
Telemark binding is responsible for making the core differences between telemarking and backcountry skiing downhill techniques. Telemark skis and boots are just follow ups of this tele gear component.
telemark-bindingIn the past, the biggest concern for telemark skiers (and those that wanted to try it) was a lack of releasability of their bindings in a case of a fall. Therefore, facing a potentially nasty “beating” of your head by your attached skis or spraining your knees. This has been dealt with in the recent years by improved binding models.
A cool feature with some of the latest tele bindings is that you can adjust its stiffness. This would affect your downhill control (aggressive vs relaxed). I am not sure how much telemark skiers fiddle with this “setting” while on their skis, however, it is something that alpine touring equipment is missing.
Telemark bindings price range is a bit wider than for backcountry skiing bindings and it’s nice to see the price drop even under $200 on some models. However, you can pay almost as much as $500 for a pair.
These days, telemark binding manufacturers offer a wide choice from different models. The most notable brands are Black Diamond, 7tm, Voile, G3 and Rottefella.
Where to buy telemark skiing gear?
You can buy specialized tele equipment at the same online stores that sell alpine touring gear. So Backcountry.com and MEC.ca will do, with MEC.ca having a better selecion of the bindings and boots.

Climbing skins

Skins are divided usually into three categories – mohair skins, synthetic and mixed. The more mohair, the better glide (less energy, goes faster), but absorbs water in warm conditions quicker. The more synthetic, the less glide but somewhat more durable. The mixed models are a mix of bought.
climbing-skinsMake your first pair of skins synthetic or mixed ones and maybe after a season or two treat yourself with mohair skins for glacier skinning days.
When buying skins you need to consider the length and the width of your skis. Skins are now usually sold in about 2m length, but the widths will differ. It’s always better to buy fatter ones, then trim them to fit your skis as oppose to have skins too narrow.
Popular brands for climbing skins in North America are Black Diamond, G3 and Dynafit; in Europe it would be more Coltex, Pomoca and Ski Trab.
Backcountry.com carries about 15 different types of skins with prices ranging from $120 to $190.

Avalanche safety gear

Avalanche safety gear is a package of three items which function together in a case of an avalanche accident – avalanche beacon (or some times called transceiver), snow shovel and avalanche probe.
The most trickiest to chose is the avalanche beacon, mostly due to the wide range of prices (from $200 to $600).
avy-safety-gearThe shovel and probe are more straight forward with each costing only around $40 to $80. Pick a shovel with an extendable handle and a metal blade as this gives you the best tool to dig with. For the probe, don’t go shorter than 240cm, preferably buy one that is 320cm long.
As for the avalanche beacon, the recommendation is to ask friends that have experience in using one or your instructor at your avalanche course. How to chose an avalanche beacon is a whole new topic, so I won’t discuss it in this article.
A new piece of safety equipment to consider is an avalanche airbag. After pulling a handle a bag full of air infaltes around you or your head. This protects you from trauma injuries as well as helps you to stay above the floating snow.
There are very few manufacturers around the world that focus avalanche safety equipment, and these would be pretty much it: Ortovox, Backcountry Access, Pieps, G3, Mammut/Barryvox, Pulse.
You can find the widest selection of avalanche safety gear at BackcountrySafety.com or at Backcountry.com.

Clothing and backpacks

Most of the clothing you need for backcountry skiing can be the same as you use in a resort. The main difference would be the top layers. Buy a breathable jacket for uphills (soft shell) that has some wind proof properties. The same is true for pants with more emphasis on the breathable part.
ski-clothing-packsFor downhill or more stormy days you should have some heavier duty windproof and waterproof gear. The most recommended are jackets and pants made out of GoreTex fabric.
Then you will need some thin gloves for climbing and a pair of warm ones for skiing, or when the conditions turn bad. The same goes for hats.
All of the extra clothing and avalanche safety gear is best carried in a backpack along with some water and a bit of food. The choices for backpacks are great, but to start buy a pack that is around 25 to 35 liters large and features straps that allow you to attach your skis, this is very useful for boot packing.
This is the category where you will find the biggest selection of all equipment and the most popular brands for clothing and backpacks for backcountry skiing are The North Face, Arc’Teryx, Marmot, Patagonia, Mountain Hardware, Columbia, Mammut…
You can go nuts at these online stores: Altrec.com, Backcountry.com, MEC.ca, REI.com and many more.

Altimeter watch

Altimeter watch doesn’t really fit inside any of the above mentioned categories but it’s an essential piece of backcountry skiing equipment, and the more you learn how to use it the more you will appreciate it.
To learn why altimeter watch is a great tool to have see:
Altimeter watch: Why it is important and beneficial to know your altitude?
To get help with buying an altimeter watch see this article:
Buying altimeter watch that fits your needs and budget

Have questions about gear?

If you have any questions or comments about the gear I just introduced you to feel free to ask or discuss below. I will answer the best I can or even write a post about it. And you are all welcome to answer each other’s questions too.

Buying altimeter watch that fits your needs and budget

Filed Under: Gear, Tech & Food, Training, Tricks & Tips Tagged With: altimeter watch, avalanche safety

Primary Sidebar

  • Facebook
  • Instagram
  • YouTube
Our Facebook Page

skimo-manual-banner-300px
 

Recent Articles

  • Kilian Jornet Interview: About His New Foundation, His Own Environmental Impact, and How He Wants To Help Athletes and The Outdoor Industry To Protect Nature
  • How Fast Are Glaciers Really Melting? How Will This Affect Your Mountain Adventures? Interview with Pascal Egli
  • Book Review – Art of Freedom: The Life and Climbs of Voytek Kurtyka
  • Forest Skis: Innovative, Custom Build, For Backcountry Skiing and Freeride
  • Lighter and Completely Redesigned: New CAMP Ultralight Ski Mountaineering Ice Axes

Categories

  • Contests & Giveaways
  • Crazy Tracks
  • Events & Races
  • Gear, Tech & Food
  • General News & Articles
  • Industry Press Releases
  • Movies & Books
  • News Shorts
  • People (Interviews)
  • Racing 101
  • Reports & Results
  • Reviews
  • Skimo Racing
  • Training, Tricks & Tips
  • Trip Reports & Conditions

Footer

About SkinTrack

Travelling through snowy mountains on skis is like flying… and experiencing life at its core.

Gear reviews, interviews, adventures, contests, skills, skimo training, race reports – we connect you to all things related to self-propelled skiing.

SkinTrack.com, created by Stano Faban, was born out of passion for ski mountaineering and ski touring. Over the years, it has become one of the most popular ski mountaineering blogs in North America.

Recent Articles

  • Kilian Jornet Interview: About His New Foundation, His Own Environmental Impact, and How He Wants To Help Athletes and The Outdoor Industry To Protect Nature
  • How Fast Are Glaciers Really Melting? How Will This Affect Your Mountain Adventures? Interview with Pascal Egli
  • Book Review – Art of Freedom: The Life and Climbs of Voytek Kurtyka
  • Forest Skis: Innovative, Custom Build, For Backcountry Skiing and Freeride
  • Lighter and Completely Redesigned: New CAMP Ultralight Ski Mountaineering Ice Axes

Useful Links

Comparing the lightest: Skis | Boots | Bindings

Skimo Training: Training Plans | Videos

Stay in Touch

  • Facebook
  • Instagram
  • Twitter
  • YouTube

Copyright © 2025 SkinTrack.com. All rights reserved.